Getting Started
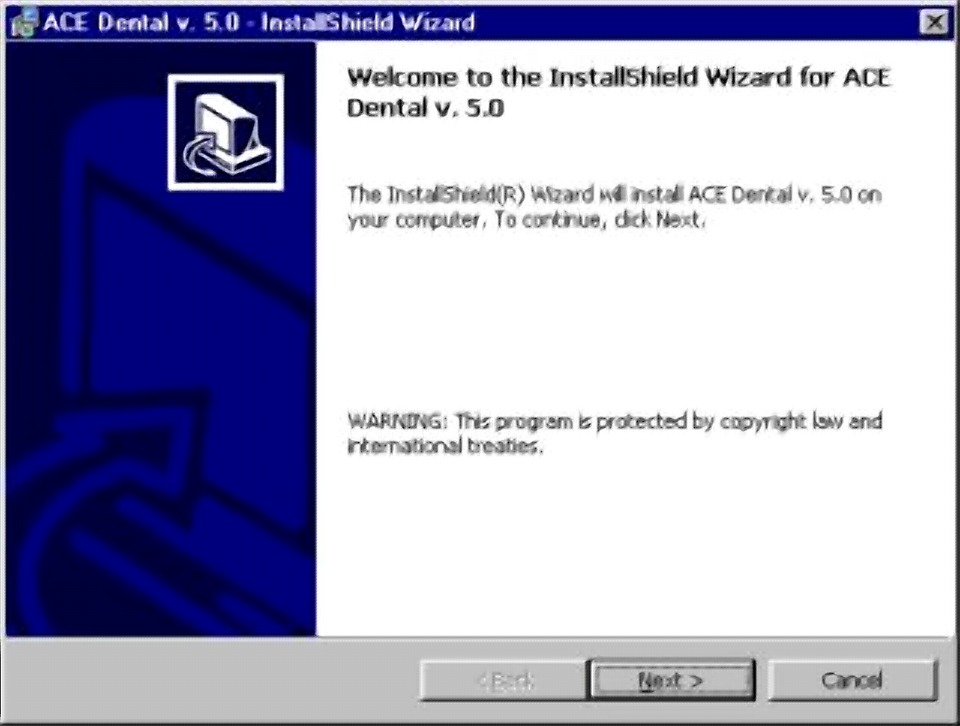
Installation
The installation program makes installation of ACE dental very
easy. During installation, the installation program will create a
subdirectory on the C: drive. This folder will be named ACE. It is inside
the program files folder. This is where the ACE program and supporting files
will reside.
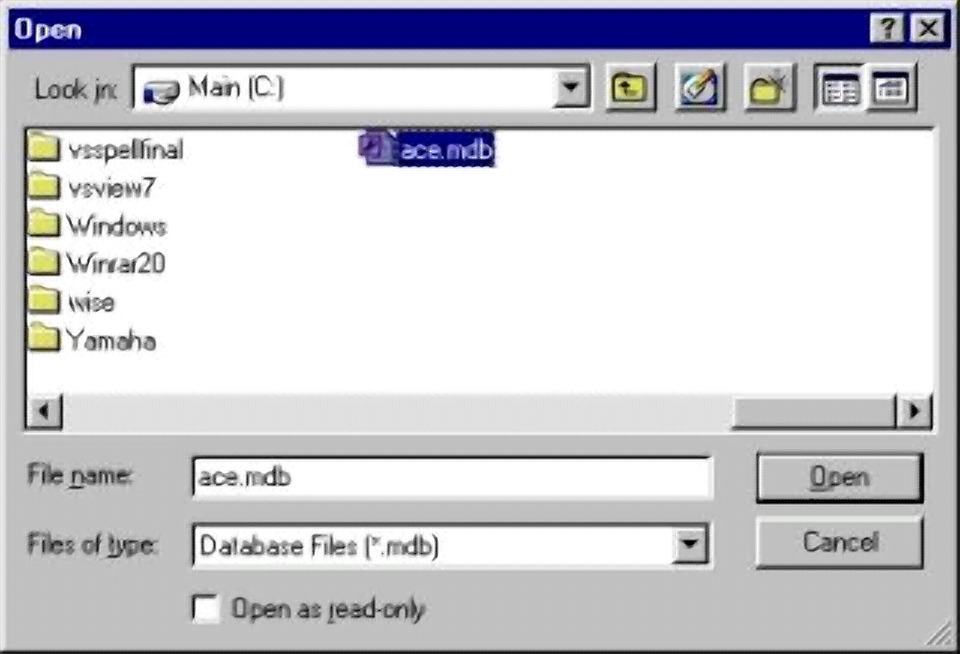
All of your data is in a file called ACE.MDB. It is normally in
the root directory of the c: drive on the server. Each time ACE dental starts,
it automatically looks for this database. If you choose to put your data file
somewhere other than this location, ACE dental will not know where it is. If
this database is not in the C: drive, the first time you use ACE dental it will
open an Open File box. From this box you can navigate to the folder where
you have placed the ACE database. You can highlight the database and press
OK. ACE dental will remember this location each time you open the program
thereafter. You should not have to choose this location again.
If you are using ACE dental on a network, that is with two or
more computers sharing the same data, it is important that you understand where
the data files reside. The computer with the data files is known as the
server. Any other computer accessing these data files is known as the
client. It is VERY IMPORTANT that the client computer does not have a
database called ACE.MDB. Otherwise, ACE dental will open the data on the client
computer instead of sharing the data on the server. When ACE dental does
not locate the database on the client computer, it will open the same Open File
box. The server hard drive should be mapped as a network drive on the
client computer. From the open file box, you can select the appropriate
database on the server drive. Thereafter, ACE dental on the client
computer will always open the appropriate databases.
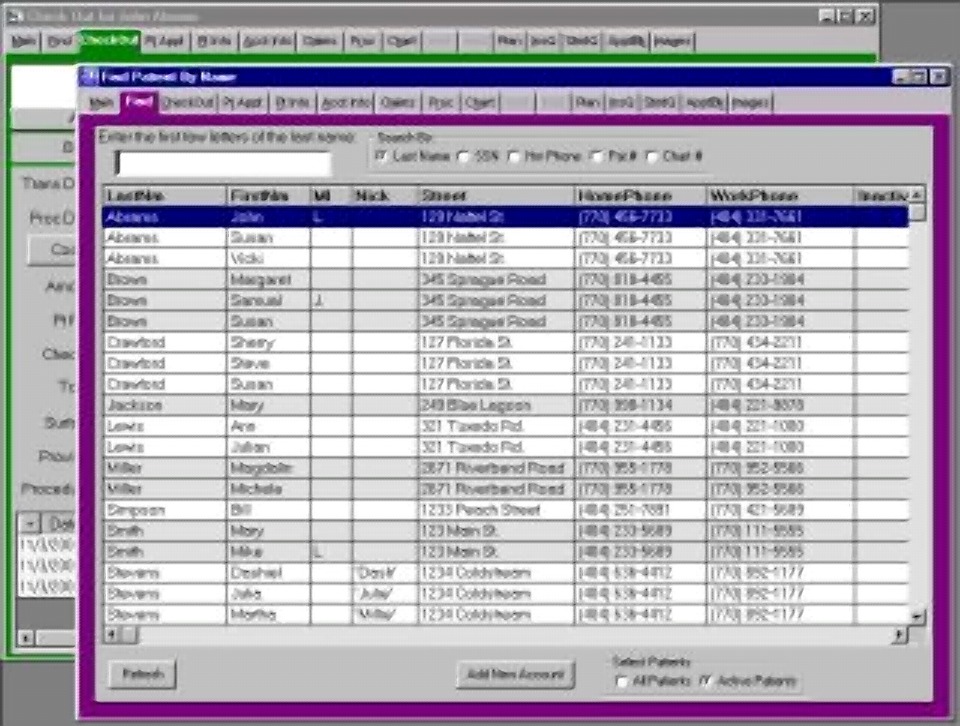
Each time you start the ACE dental program, it will open to the
find patient window. This window will have a list of all patients in the
practice. Each time you add a patient, their name is automatically added
to this list. If a patient is added on another computer, their many may
not appear immediately. To add their name quickly, press the refresh
button.
Procedure Fees
Before we begin adding patients, we should address the procedure
database. This is a database of code's for all procedures, payments, and
adjustments. Virtually all of the ADA codes are already in this
database. One of the first things you may want to do is check the
procedure database to ensure that most of the procedures used in your practice
are in the database. If any commonly used procedures are not present, you
should go to the procedure section and follow the instructions to add new
procedures. If most of the procedures are present, you must enter the fees
for your practice for those procedures.
Click on the PROC tab at the top of the screen. That
should take you to the red procedure database list screen.
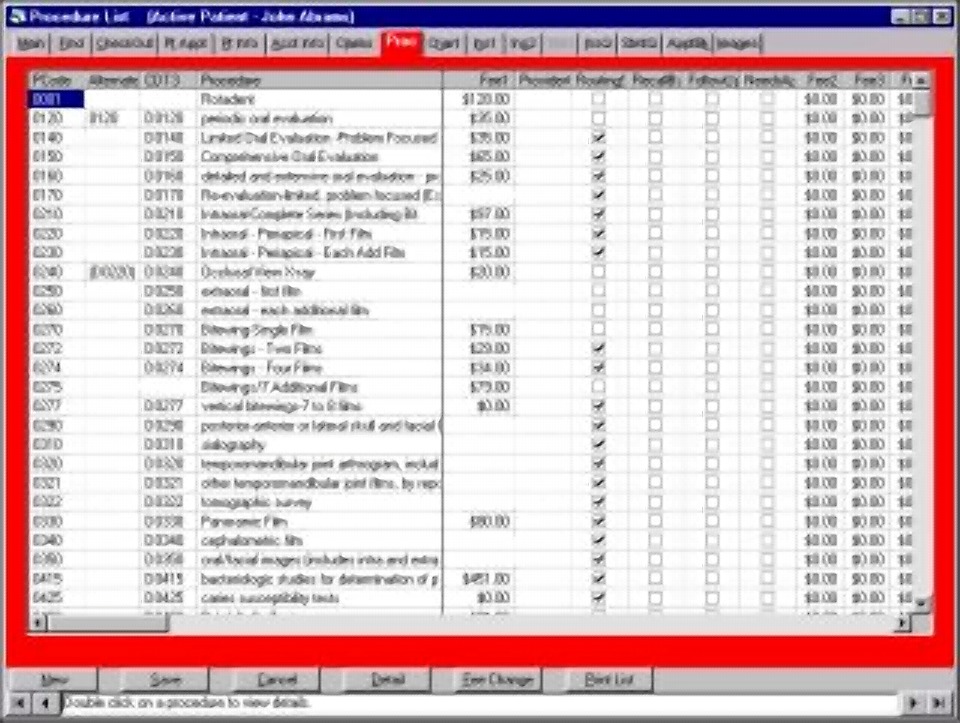
(Click on the image to expand)
To enter or change fees quickly, you can simply click on the fee
box to the right of the procedure description for each fee and enter the
amount. Now, you can click the find tab.
Entering Patients
From this screen, you are now ready to begin entering your
accounts and patients. It is important to understand the concept of
accounts and patients. Every patient must belong to an account.
Every account must have at least one patient. But an account usually
represents a family of one or more patients. The name on the account may
or may not be the name of a patient. The name on the account is the person
to whom the statement is sent. If this person is not a patient, they do
not have to be entered as such. The exception to this is when the person
named as the head of the account is also the policyholder of the insurance for a
patient. This will be covered in more detail on the patient detail
section.
If your practice can provide ACE dental with a list of all of
your patients including name address and phone number, and any other information
like birth date, sex, and Social Security number, ACE may be able to import that
data for your practice. Please call for pricing information. If you
do not have a list of patients, they must be manually entered into the
database.
Some practices want to enter all of the patient data before they
begin using the system. They normally hire a temporary to do this
typing. Most practices elect to enter the patients over a period of
time. They will begin by entering all patient and account information for
those accounts that currently owe the practice money. It is a good idea of
to get a list of accounts receivables before beginning this process. As
each account is entered, a balance forward amount can be entered for each of
these accounts. When this is completed, an accounts receivable report can
be run from ACE Dental to verify the accuracy. After this is complete, patients
can be entered as they are seen. Most of the time they are entered the day
before an appointment.
Backups
The three most important
things to remember in a computerized dental practice management system are backups, backups,
and more backups. ACE dental recommends that you purchase a Zip drive
made by Iomega. They use 100 MB diskettes. The entire ACE database can
be copied from the server hard drive to the ZIP disk. Under
normal circumstances, this should be done every day. In the beginning, however, when he intensive
data entry is being performed, backups should be made throughout the day. Perhaps
two in the morning and two in the afternoon. Before backing up your data,
the sure that the server is the only computer running the ACE
program. All other users must exit program. Pull down the file menu, and
click on the backup option.
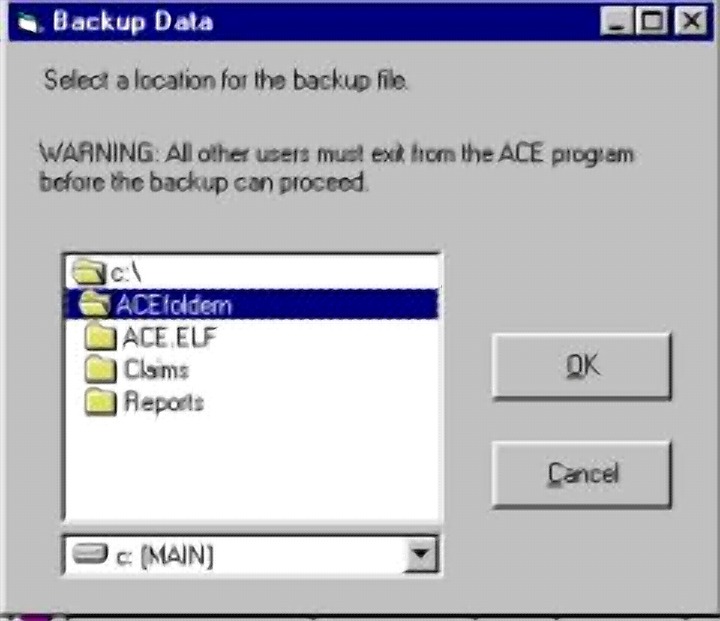
Select the drive letter at the bottom of that window that
corresponds to zip drive and click the OK button. A message will indicate
when the backup is complete.
The next session will cover entering new account
information.
Adding Accounts
As we mentioned earlier, every patient must
belong to account. If we are entering a new patient who does not along to
an existing account, we must first create the new account record, and then the
patient record.
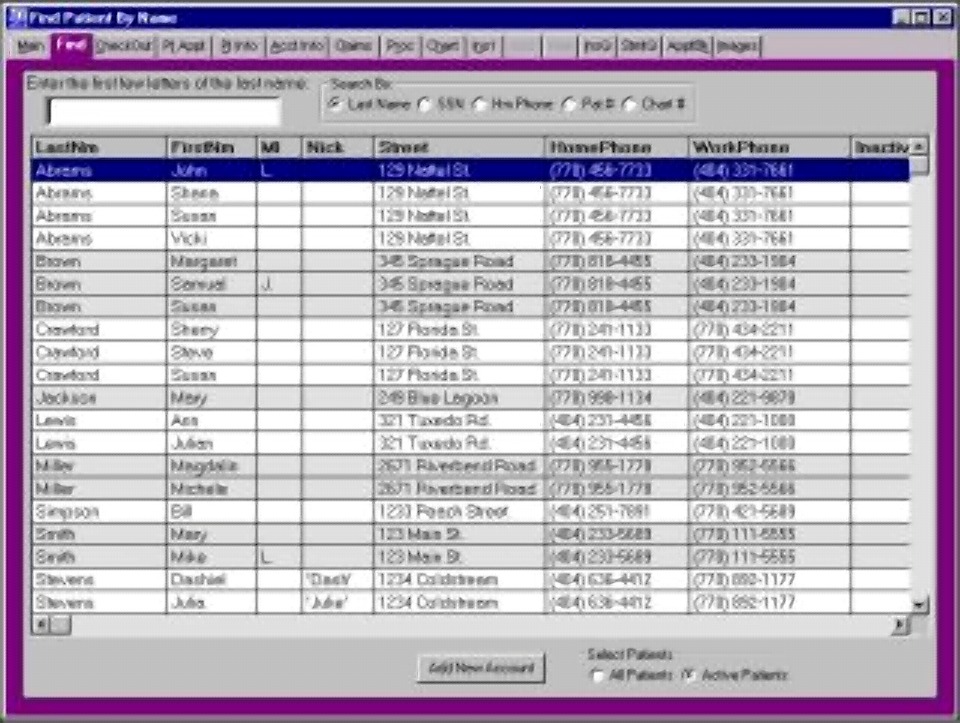
(Click on the image to expand)
To create the new account record, we start
at the find patient screen. We click on the button at the bottom marked
new account. This will open the account information detail screen with all
blank fields. We will now go through an explanation of each
field.
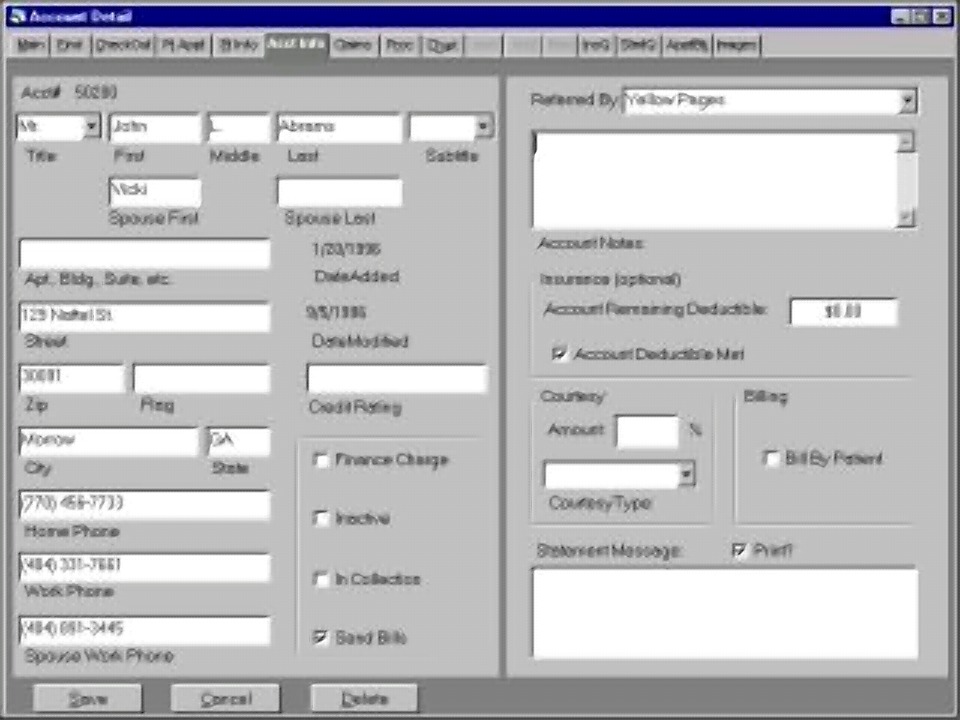
(Click on the image to
expand)
At the top of the screen, the first thing
we see in the upper left is the account number. This number is assigned by
the system. We virtually never need to know anything about this
number. This number will always end in two zeros. We increment this
number by one to create a patient number for each patient in this
account.
The next field is the flag field.
This is a field the practice can use for their own purposes. You can
create your own categories which can be searched later using the report
writer.
The title field is normally used for
doctors but it may also be used for Mr. or Ms. The first name, middle initial,
and last name would be entered next. The subtitle could be for junior. The
spouses first and last name could be entered next. Most practices leave
the spouses last name blank if it's the same as the responsible
party.
Two address lines are available. The
first for apartment or suite number. The second line is for the main
street address. Notice the ZIP field appears before the city and
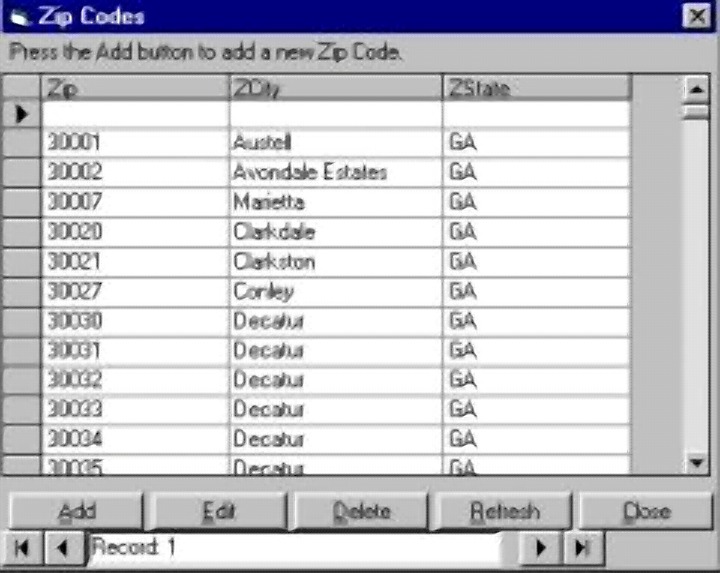
state. ACE dental includes a database of all ZIP codes in United
States. When you enter the ZIP code, the city and state will be entered
automatically. If the ZIP code is not in the database, a window will
appear and allow you to enter that city and state. Thereafter, you'll
never have to type that city and state again.
Phone numbers can be entered next.
When you enter telephone numbers, you do not need to enter the parentheses or
hyphens. These will be entered automatically. If the phone number
includes the area code, do not precede that with the 1. All phone numbers
should either be ten or seven digits long. All of the address and phone
information will be automatically transferred to the patient detail record as
each patient is entered. The notes information will appear under the
account name on the main screen and checkout screen.
Email address can be entered. As this
form of communication becomes more pervasive, we will begin to use this
information for electronic recall notices.
The date added, date modified, account paid
year-to-date, last payment date, and last statement printed date, are all
maintained by the system automatically.
The credit rating field is another
free-form field which you can use in any way you please.
If this account has met their deductible,
for example with another practice, you should check the "account deductible met"
button. If the "send bills" button is not checked, this account will not
receive the statement when they're prepared. If this account has been sent
to a collection agency, the "in collection" button should be checked.
If this account and all patients in this
account are inactive, the "inactive" button should be checked. Be aware
the "inactive" button cannot be checked if this account has a balance. If
the balance is uncollectible, an adjustment must be entered to zero the
balance.
When you run the statements, you'll be
asked if you want to charge a finance charge. This will apply to all
accounts that have a check mark by the "finance charge" button. The
"report" button should be checked if this account is to be included in all
activity reports.
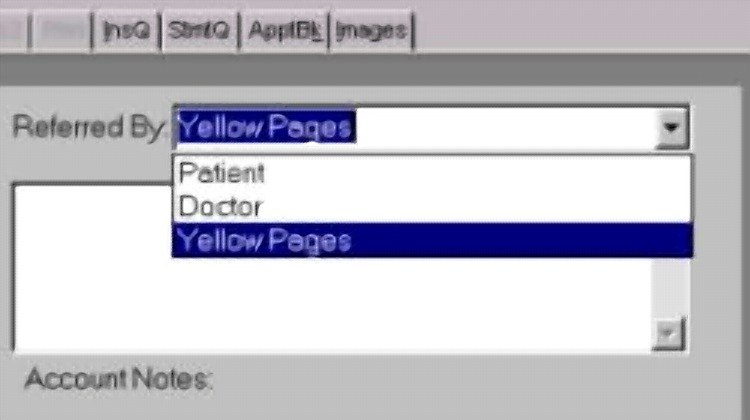
The "referral by" field is a required
field. If you press the save button and nothing has been entered in the
"referral by", a message will appear reminding you to enter this
information. You cannot proceed until this is entered. When you click in
the "referral by" box, a drop-down list will appear. At first this list
may be empty. Simply enter the type of referral in the "referral by"
box. When you leave this field you'll be asked if you want to enter this
entry in the referral by list. If you say yes, you'll be able to select
this entry the next time from the referral by list without re-typing. In
this way you can tailor ACE dental to your own practice. These lists will
appear throughout the program. If you want to remove any entry from the
drop-down list, simply hold down the control key and click on that entry.
You'll be asked if you want to delete the entry from the list.
If this account has partially paid their
deductible at another practice, the account remaining deductible should be
entered. Otherwise it can be left blank. The insurance paid
year-to-date and the last insurance payment date are maintained by the
system.
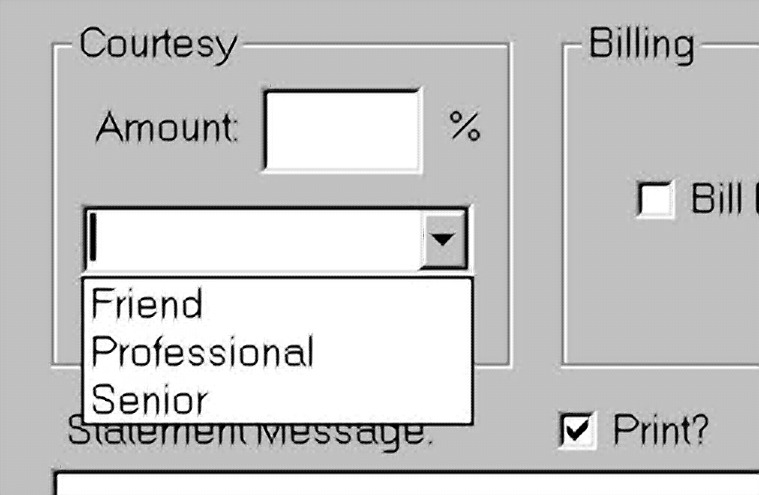
The courtesy is a percentage reduction we
can apply to fees for certain accounts. For example, some practices give
senior citizens a ten percent courtesy. Other practices give a professional
courtesy to other doctors. The percentage can be entered in the courtesy
box. When you enter the courtesy field, another drop-down list will appear as it
did in the referral by box. You can add entries to this list as you did
before.
The statement message box allows you to
create a statement message for this particular account. Default messages
will normally appear on each statement. This statement message box will
override that message if the print button is checked. For example, if an
insurance company for this account gave you some specific information regarding
their payment and you want to relay this message to the patient, you could type
it here and click the print button. After you run statements, the print
button will be automatically cleared. Therefore, you will have a record of
the message printed, but it will not print again unless you click the print
button.
After you have enter all of the information
on this screen, you'll want to click the save button. If you have changed
your mind and do not want to create this new account, you can click the cancel
button and return to the find patient screen.
If you press the save button on a new
account entry, you will automatically be taken to the patient detail
screen. The system knows that if you created a new account you must create
a new patient record.
In the next section we will review how to
enter new patient information.
Adding New Patients
The patient information screen has detailed
information for each patient. Each time a new account is entered and
saved, this screen is automatically presented.
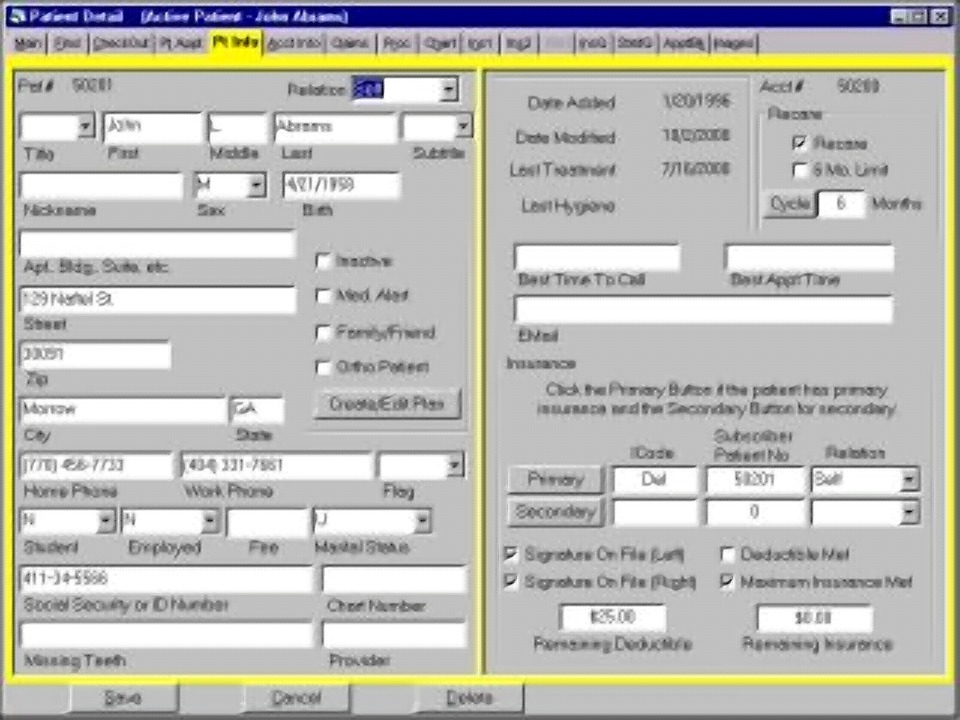
(Click on the image to expand)
The patient number appears in the upper
left corner. Just as the account number always ends in 00, the first
patient number always ends in 01. This number will be incremented by 1 for
each additional patient added to this account.
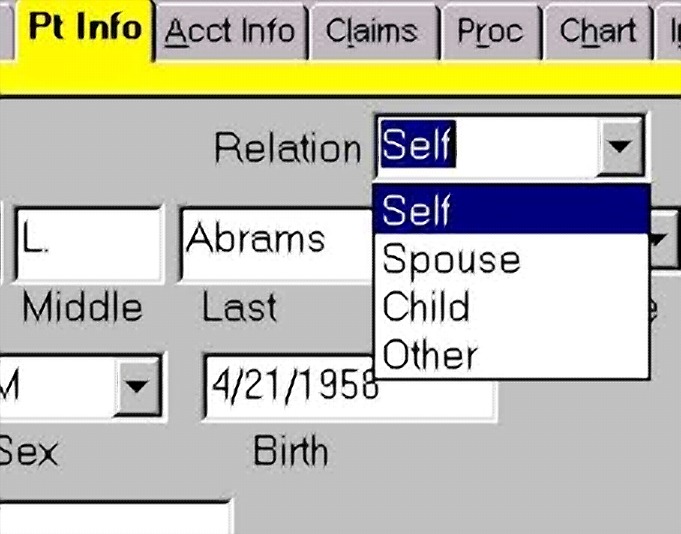
The first relation field we see on this screen refers to the
relationship of this patient to the head of the account. When the first patient
is entered, it is assumed that self is the relationship. This can be changed if
necessary. This field presents another drop-down list.
If this patient has insurance coverage, another
relationship field will be entered later. The first patient entered for
this account will have the first name automatically entered from the new account
information screen. Each subsequent patient added to this account will be
assumed to have the same last name, but the first may must be entered. The
nickname or preferred name can be filled in the nickname field. The sex
box should be checked for male or female. The birthday can be entered
next. It is important to understand how ACE dental handles date
fields. The month, day, and year must be separated. These can be
separated by space, a dash, or any other character other than a number or
letter. This separator or will be replaced by a slash automatically.
If we enter only one number, for example a 5, the program assumes this is the
day of the month. It will assume this month and this year and complete the
date for us automatically. If we entered two numbers, it will assume a we
are entering the month and a day and automatically add this year to the date
field. This convention occurs throughout ACE dental.
All of the address and telephone
information will be automatically entered from the account information
record. This information may be changed. For example, if the patient
is a student and away from home, he may have a different address than his
parents.
The inactive box can be checked if this
patient is not an active patient. For example, if this patient moves away,
we may want to inactivate them. If there's any chance they may return, we
do not want to delete them. If there is no chance they will ever returned,
we can press the delete button below. This record will be placed in a
deleted patient database. Deleted patients can be undeleted at a later
date. Because this can cause problems with transaction information, it is
not recommended that this be done frequently.
If the medical alert box is checked, a
medical alert will be shown on the title bar next to the patient's name.
Also, this will be indicated on any recall list.
The family or friend box is simply there to
indicate to others in the practice that this patient is family or friend of
someone in the practice.
The Ortho patient box should be checked if
this patient is undergoing orthodontic treatment.
A payment plan can be created for any given
patient. This topic will be covered in another section.
The flag field is a free-form field.
It can be used solely for the purposes of this practice. It is especially
helpful for creating reports with the report writer. For example, one
practice with a female dentist treated many patients that were sensitive to some
materials. For those patients, they placed an MA for materials alert in
the flag field. They had some patients who came to the practice because
they specifically wanted a female dentist. For those patients, they placed
in F in the flag field. Some patient received an MA and an F. This enabled
the practice to create reports showing lists of both types of
patients.
When the student field is selected, a small
window will open allowing for selection of full-time, part-time, or not a
student. This may be necessary if this patient has insurance. If
this patient is indicated as a child relationship to the insurance policyholder
and is over 18 years of age, the student status must be selected.
When the employment status field is
selected, a window will open allowing you to select employed full-time, employed
part-time, retired, or not employed.
The fee field allows you to select the fee
schedule for this patient. The procedure database has allocation for six
different fees for each procedure. One through six should be selected for
the fee field.
When the marital status field is selected,
another window will open allowing for selection of the marital status.
This is generally only important if the patient has insurance.
The Social Security number is a required
field if the patient has insurance. Nine digits can be entered without any
dashes. These will be entered automatically.
The best time to call and best appointment
time can be entered next.
The email address for this patient may also
be entered.
When the missing teeth field is selected, a
tooth chart window will open allowing for the selection of missing teeth.
The should be filled in after the examination. This information maybe
required by the insurance company. It will also be useful if the Perio
Charting program is used.
The date added, modified, last treatment,
and last hygiene will all be maintained automatically by the system. The
re-care box should be checked if this patient will be called for future hygiene
visits.
Most insurance companies will pay for two
cleanings per year. Some insurance companies require that these cleanings
be spaced a minimum of six-months apart. If this patient's insurance
company has that requirement, be sure to check the six-month limit box.
When this patient appears on a recall report, they will not be due in less than
six months. If the six-month limit box is not checked, and a patient is on
a six-month recall, they will be specified to appear after the first day of the
sixth month. This gives the practice greater flexibility when scheduling
these patients and maintains the six-month limit only when required.
When patients have a cycle other than six
months, the cycle field can be changed. The blocks required for their
hygiene appointment can be entered in the time required field.
If this patient has insurance, we must
complete the insurance box in the lower right corner accurately.
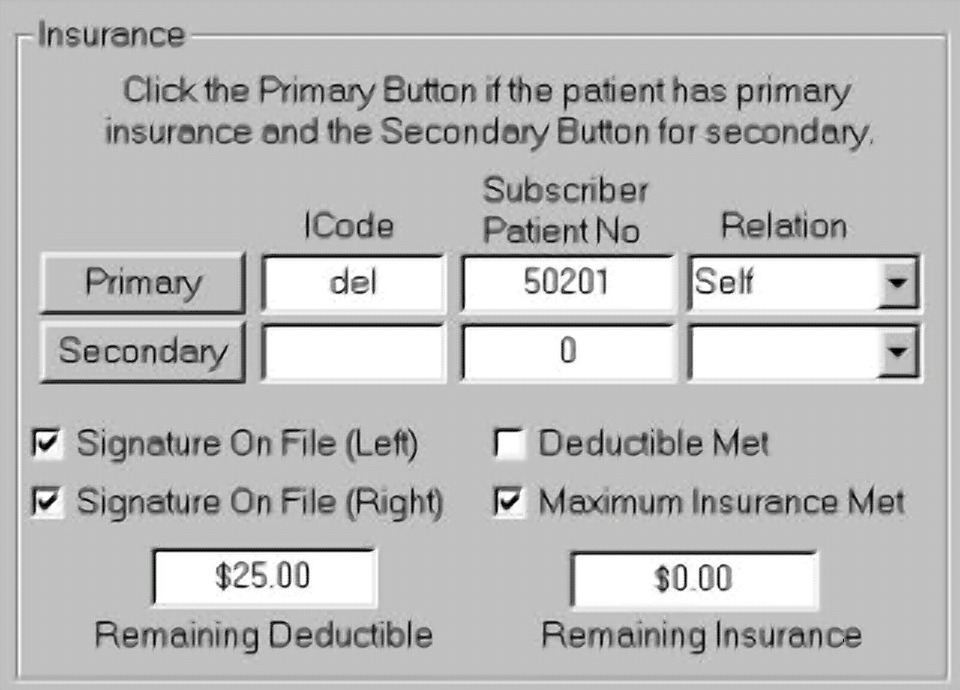
The ICode field refers to a code that
we can assign to a specific insurance plan. If this insurance plan has
already been entered into the system, we can enter the code into the field if we
know that code. If we do not know the code, we can press the Primary
button.
We will be asked if the current patient is the policyholder of this insurance
policy. If we answer yes, the current patient's patient number will be inserted
for the subscriber number and a relationship will be entered as
Self. If we answered no, we are given the list
of all patients.
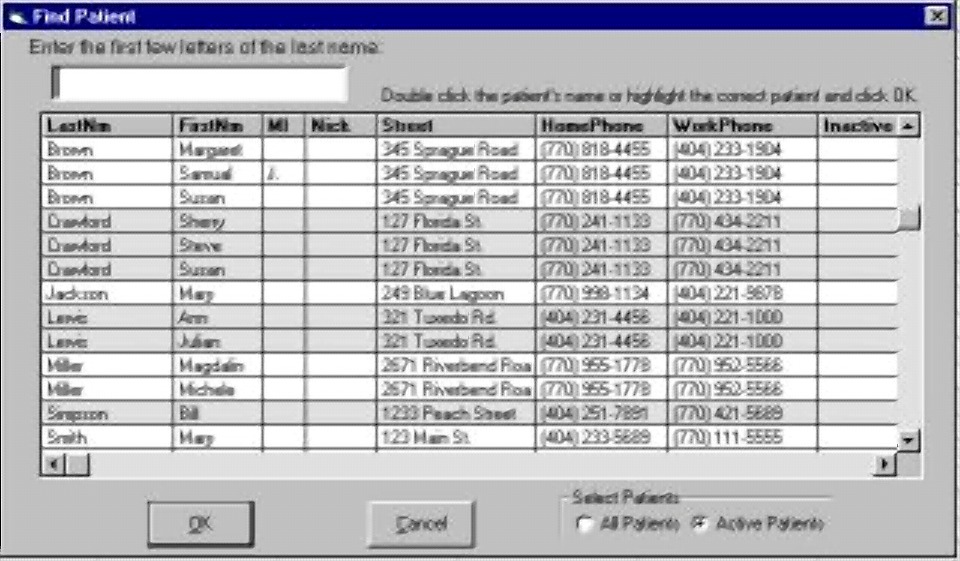
We can select the patient that is the policyholder
for the plan for this patient. The policyholder is not required to be in
the same account as the patient. They can be any patient in the
computer. They may not be an actual patient. If that is the case,
they should be entered as a patient and checked as inactive. Most of the
time, this patient number will be one of the patients within this account.
But we are not limited to that situation. For example, if a husband and
wife are divorced and the wife has custody of the children, the wife and
children may be under one account and the husband could be entered as a
different account and patient. His patient number can still be used if he
is the policyholder of the insurance that covers these children. This
gives ACE dental great flexibility. Policyholders should always be entered
before dependent patients.
If the patient is the policyholder, we will be asked if the
plan is currently in the database. Normally, we will answer no to
this question. This will take us to the insurance detail
screen
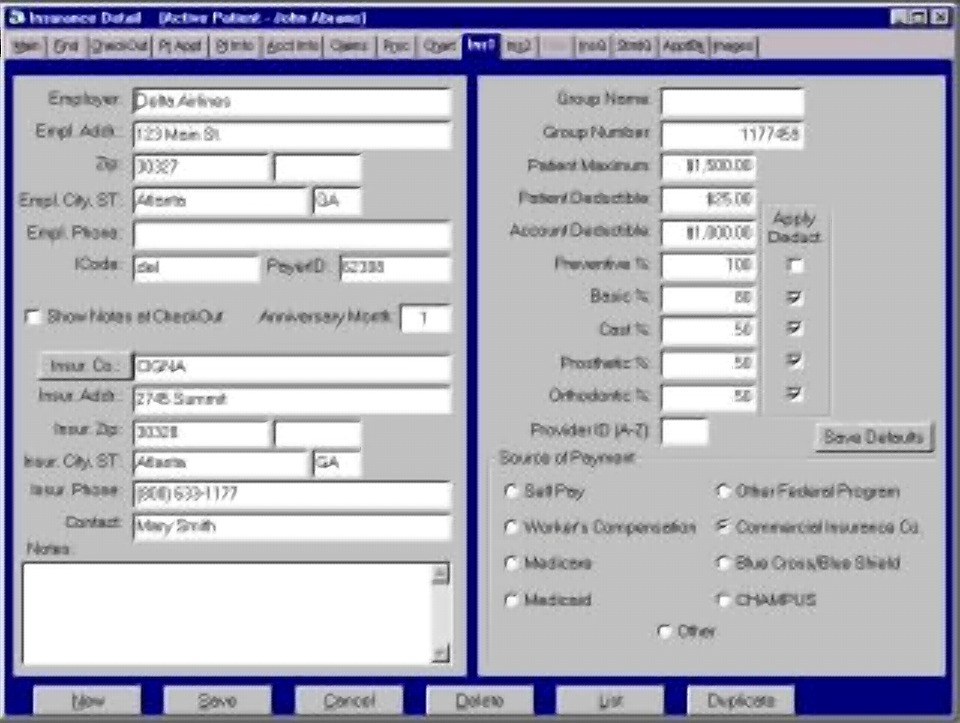
(Click on the image to
expand)
where we can enter a
new plan
in the database. (See the Adding
Insurance section for details). If we are sure we have entered this specific
plan with the identical group number, we can answer yes to the
previous question. This will take us to the insurance list
screen.
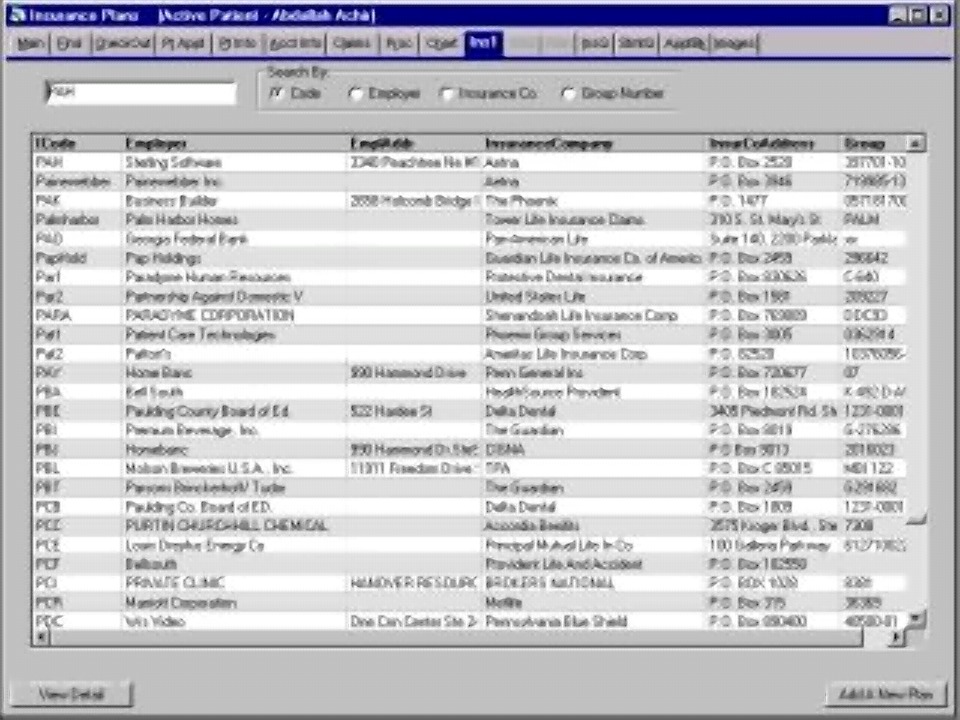
(Click on the image to
expand)
We can select the plan from the list, and double-click it.
This will insert the appropriate Icode on the patient information
screen
The relation field to the right of the
insured patient number means the relationship of this patient to the insured
patient. This may or may not be the same as the relationship at the top of
the screen.
The signature on file buttons indicate
where the signature on file will be shown on the insurance claim. The
signature on file left indicates the patient agrees to allow the information to
be sent. The signature on file right, if checked, will indicate that the
insurance company should pay the dentist and not the patient. If payment
should be made to the patient, signature on file right should be
unchecked.
If the patient has met their deductible,
for example at another practice, the deductible met box should be checked.
Likewise, if this patient has met their maximum insurance, that box should also
be checked. These boxes, as well as the remaining deductible and remaining
insurance, will be automatically updated by the system.
When we have completed all the information
on this screen, we can press the save button. This completes the entry of
information for a new patient for a new account.
To enter a new patient into an existing account, we
simply select any patient that belongs to that account on the find patient
screen. We then select the main screen from the Main tab at the top of
any screen.
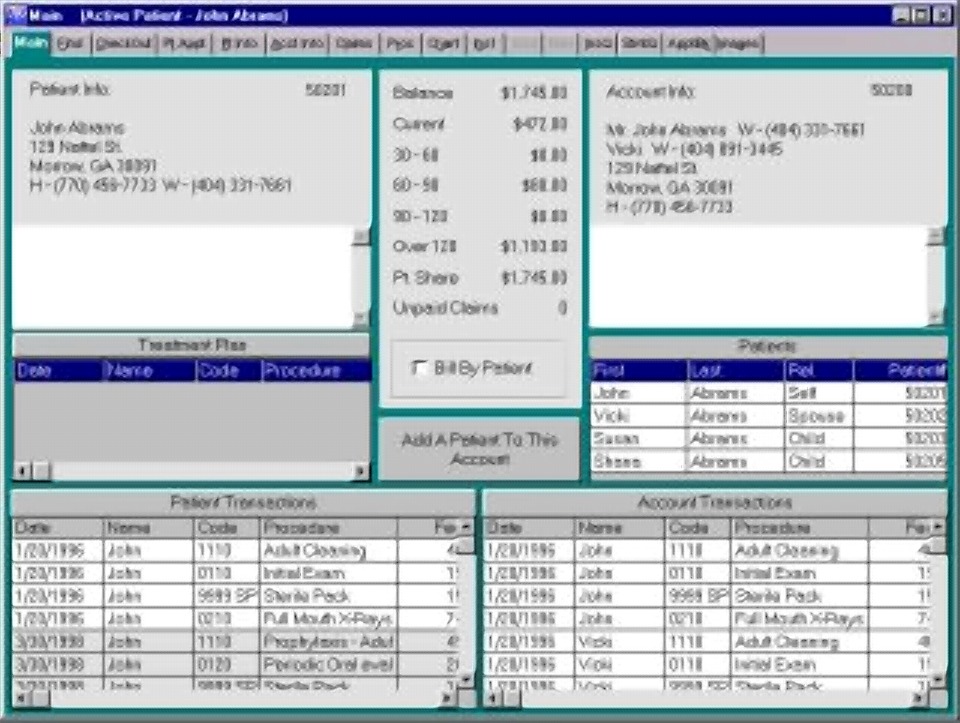
On the main screen we
press the "Add A New Patient To This Account"
button. It should only be pressed when a new patient is to be added to
that account.
Adding Insurance
The insurance detail screen shows a great
deal of information about the employer, insurance company and the coverage for
this particular plan.
The employer's name, address and phone
number should be entered first. Do not enter anything in the payor ID
field.
A very important field is the icode
field. The system will fill this field for you. It will use the
first three letters of the employers name followed by a number. This will
ensure there is no duplication of this field. This code will appear on the
patient information window. It will link the patient to this plan.
When you activate the insurance company field, a window will open with
the list of insurance companies.
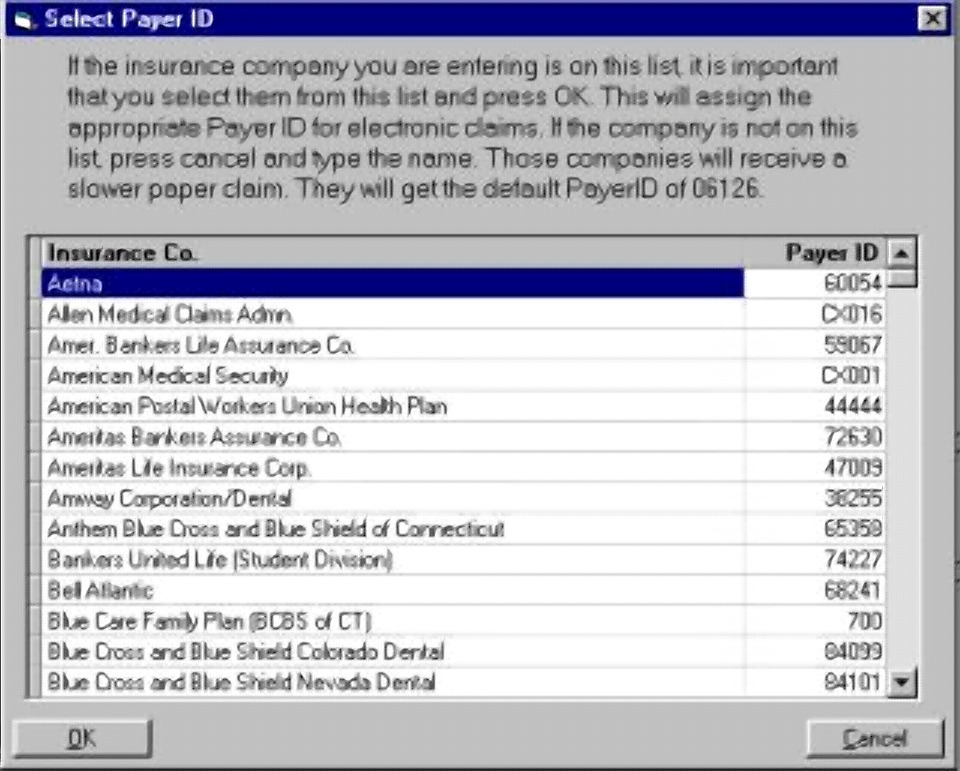
You should
thoroughly scan this list for the name of the company which covers this
plan. If you see the name of the company, highlight the name of the
company and press the OK button. This places the appropriate payor ID in
the payor ID field. This list shows all of the insurance companies that
accept electronic claims and the appropriate payer id is very important.
If the insurance company you're entering is not on this list, press the cancel
button. A payer ID code of 06126 will be entered in the payor ID
field. When you submit electronic claims, you may still submit claims to
this company. Envoy will recognize this ID, print a paper claim and mail
it to this insurance company.
If you selected a company on this list, the
name of a company will appear in the insurance company name field. If you
did not, you should type the name of the company in the insurance company name
field. The address of the insurance company is very important. You
can include the insurance company phone number and contact for your own
convenience.
The group name is not nearly as important as
the group number. The group number is vital for payment. All of the
amounts under the group number are for the convenience of the practice and the
patient. These numbers allow you to estimate at the time of checkout the
amount the patient will pay versus the insurance company.
You should check the box if deductibles
apply to each category. The deductibles normally apply to every category
except preventive, and in some cases they apply there also.
Most of the time the payment source will be
a commercial insurance company. Other options are available.
The notes field allows you to make any notes
for this particular plan. If you checked the box marked alert under the
employer phone number, the notes will appear each time you do a checkout for any
patient with this insurance plan.
The anniversary month is the month of the
year that this plan resets all fields to 0. That is, any deductibles no
longer apply and any maximums met are no longer a limit. The majority of
insurance plans will reset in January. Therefore, the default is
one. Some plans may reset in February, March, or April. Any month
can be specified in this field. When you run statements each month, you'll be
asked if you want to reset the anniversary amounts. They should be done
once per month to insure that deductibles and maximums are clear.
The use button will apply the current code
to the active patient. The new button will blank all of the fields and
allow you to enter a new plan. The list button will open the insurance
list screen. The save button will save any changes made.
The duplicate button allows you to create
new plans with all of the identical information except you may have a different
group number for each plan. You must also creat a new code for each
plan. For example, Medicaid normally applies a different group number to
each patient but all other information is the same. The duplicate button
will expedite that data entry.
If you click the save defaults button, the
items in the deductible and maximum fields will be used as a future default for
new plans.
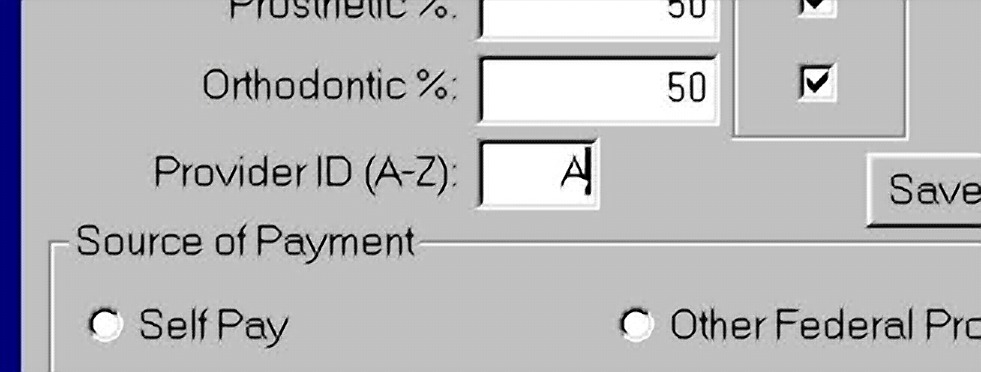
The provider ID should be a letter from
A through Z. This will correspond to the column on the provider information window
accessed under the Windows menu.
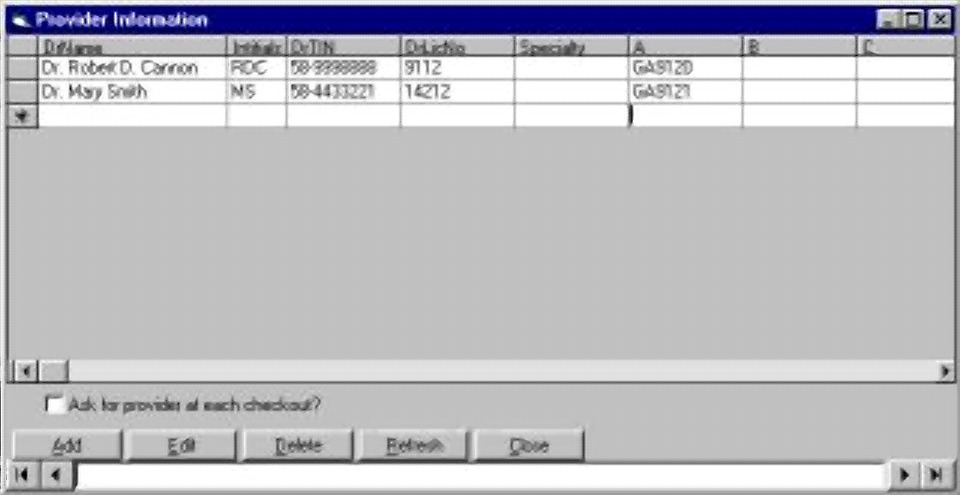
For example, if Blue Cross provided in
an ID for the doctor, you could place it under the A column. Then, on the
this screen for the Blue Cross plan, you would place an A in the provider ID
field. When a claim is created for that plan, the correct provider id the
will appear on the claim.
Checking Out
To checkout a patient, we should first
select the name on the find patient window. After we highlight their name,
we can click the checkout tab at the top of the screen. This will take us
to the checkout screen.
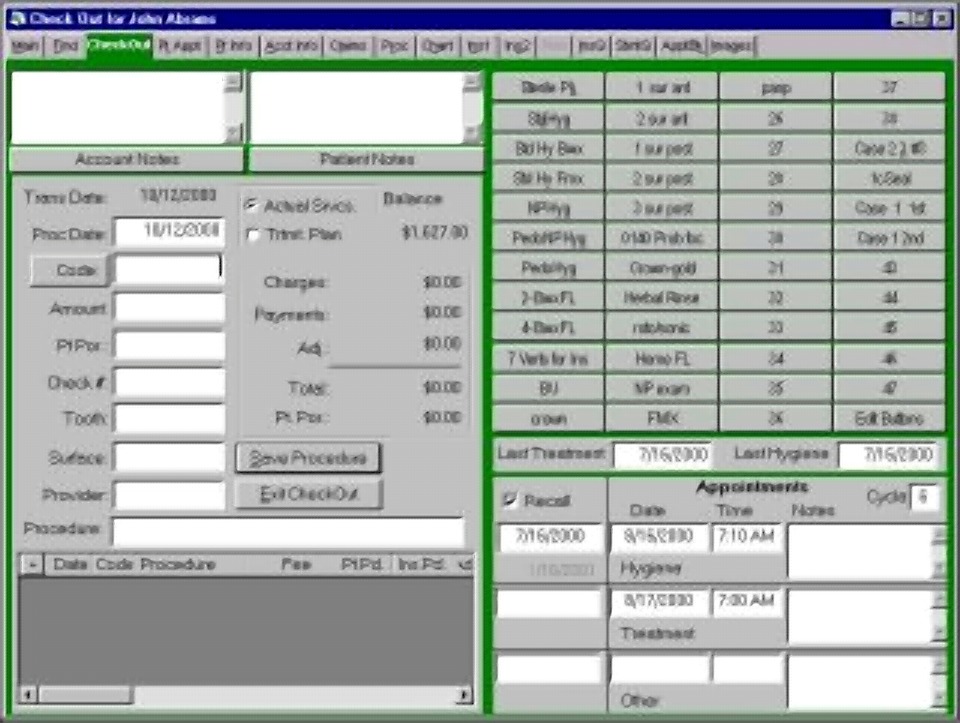
In the upper left corner of the screen is the account notes. We can click on
the A button we will see all of the account notes. If we click on the P
button, we will see all of the patient's notes.
Beneath the notes, are two date fields.
The transaction date is assigned by the system. This is the date this
transaction was entered. This date cannot be changed by the user.
The second date is the procedure date. The procedure date is the date this
procedure was performed. If we are entering procedures from a previous
date, the user can change this date.
We can enter procedure codes on the screen in one of
two ways. If we know the code we want to enter, we can enter it in the field
to the right of the word code. The word code is actually a button. If we
do not know the appropriate code we can press this button. See Code
LookUp.
After we place the appropriate code in the
code field, when we press the tab key, the amount and procedure will be
automatically filled in from the procedure database. If the code is not
recognized, we will be warned.
The amount of fee for this procedure can be
changed at this time. If this patient has insurance, and the deductibles
have been met, and the maximums have not been met, a patient portion will be
calculated instantly.
Another way of entering code's is with the
explosion buttons shown in the upper right portion of the screen.
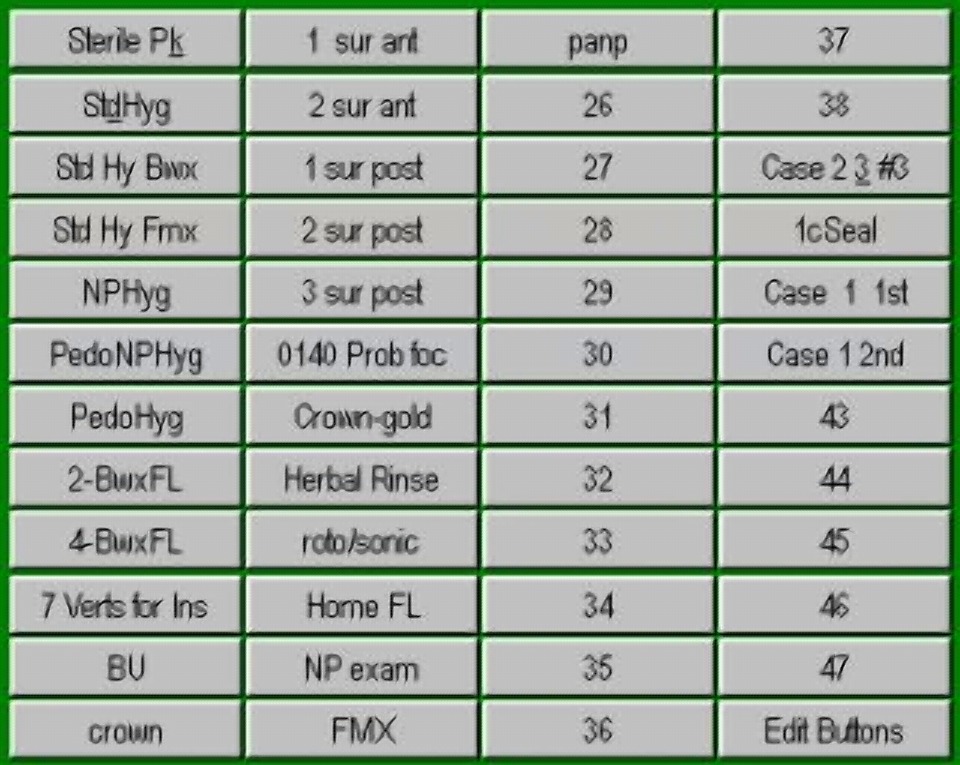
See CheckOut, Buttons
If any procedure
requires a tooth and/or surface, we should enter that in the tooth and surface
fields. When all of the entry is correct, we press the save button.
This places this procedure in the list at the bottom left. If a tooth
number was required for this procedure but not entered, a window with a tooth
chart will appear reminding us to select the tooth number.
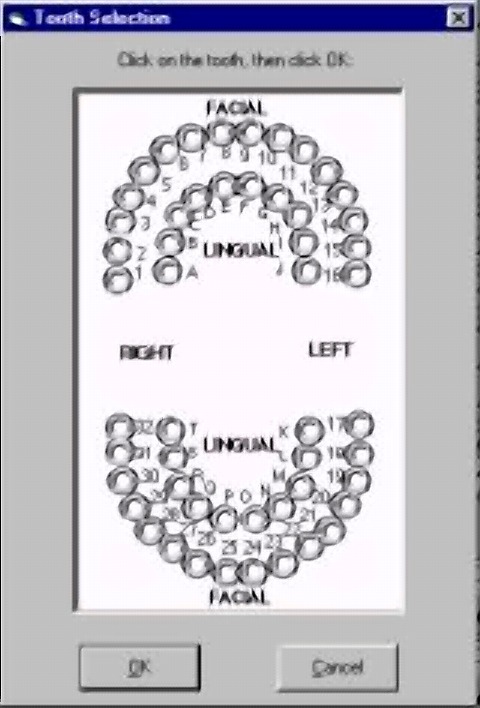
If a surface was required but not entered,
a window will appear with a list of surfaces.
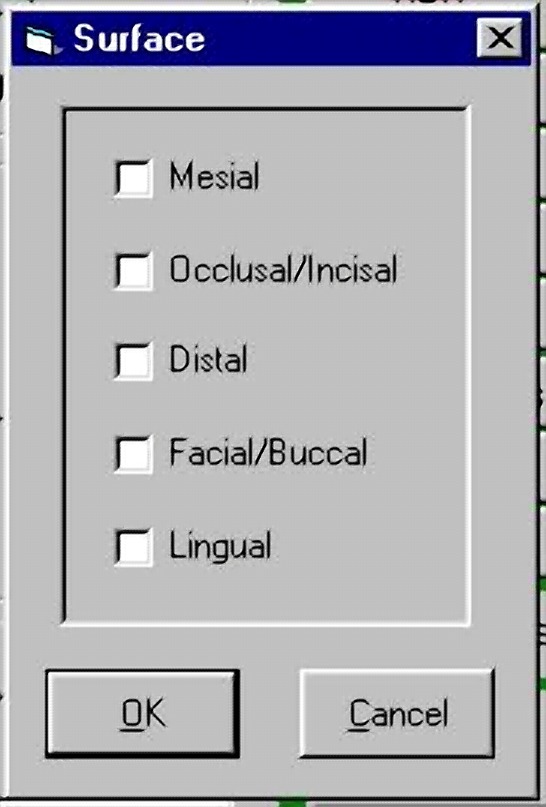
All transactions are entered into ACE
Dental in this same manner. If we had selected the treatment plan button
instead of the actual services button, we can enter a treatment plan for this
patient using the same methods. It is through the treatment plan entry
that we can create an insurance claim for a pre-treatment estimation.
In addition, payments are also entered in
the same way. We can assign procedure codes for patient or insurance
payments.
If the code we entered represents a patient
or insurance payment, we should enter the check number in the check number
field. If the payment is a credit card or cash, we can place a V for Visa,
an M for MasterCard, an A for American Express, a D for Discover, or a C for
cash in the check number field. If we enter nothing in the check number
field and the code represents a payment, a small window will appear asking us to
select the type of payment. The type of payment is important for
segregating the payments on the collection report.
After we press the save button, the
procedure or payment is shown in the list at the lower left. This is a
temporary holding list. These procedures have not yet been posted to this
account. If we want to delete one or more of these procedures from this
list, we simply double-click it. If we want to delete more than one
procedure, we can hold down the control key and click all multiple procedures,
then double-click. We will always be asked if we're sure we want to delete
these procedures.
Under the explosion buttons are shown the
last treatment date and last hygiene date. These are maintained by the
system.
In the lower right
corner is the appointment information for this patient.
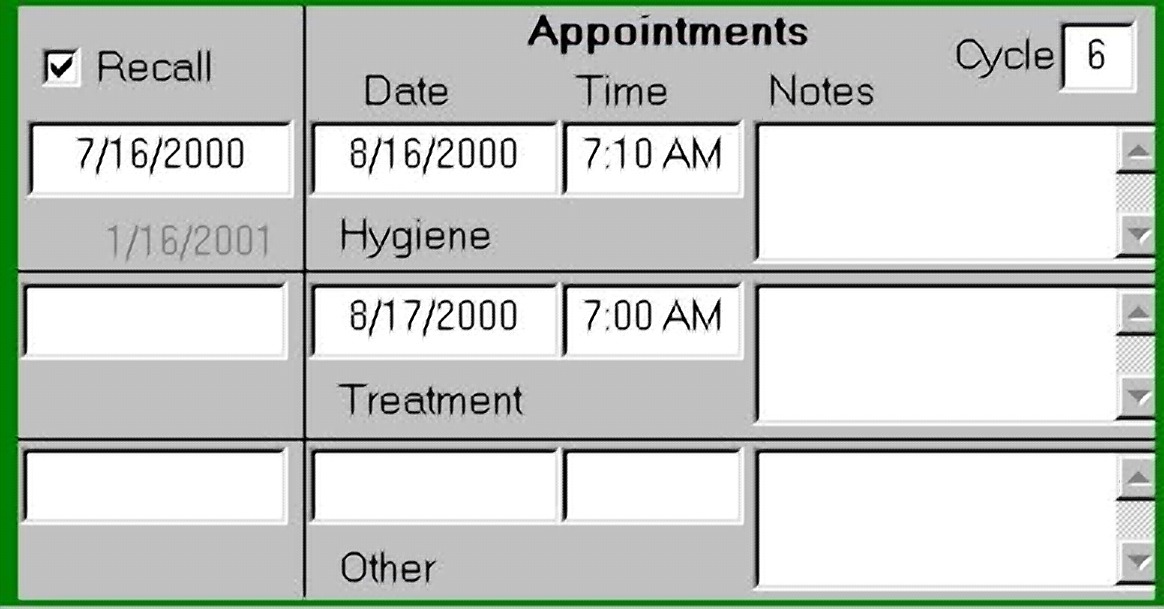
If we're using the electronic
scheduling system, all of the data in the appointment field is automatically
updated. If we're not using the electronic scheduling, we can enter or
update the appointment information at this time. The dates under the
recall box indicate the date this patient should be called. The
information under the date, time, and notes fields indicate actual appointments
for hygiene, treatment, and other appointments. This information can also
be seen on the patient appointment screen.
We can click on any
other tab at the top of screen during a checkout. However, if we have
procedures in the list that had not been posted we will be required to return to
the screen to complete the posting. In other words, we must press the exit
button before we can select another patient.
Code LookUp
If we click on the Code button to the left
of the Code field on the CheckOut window,
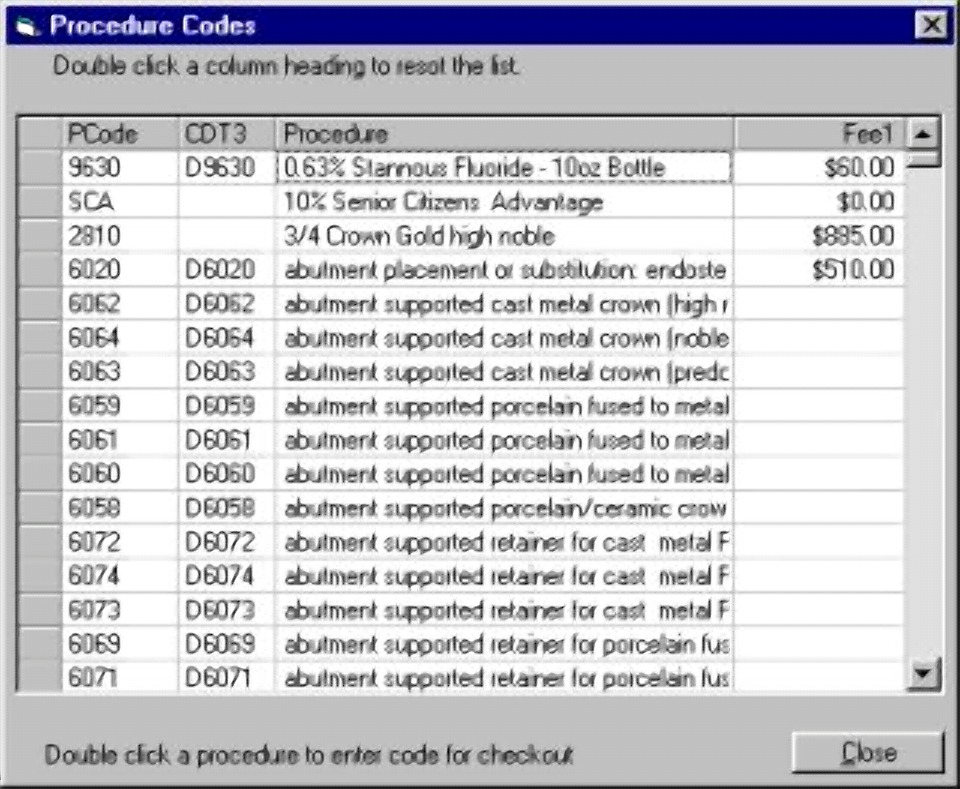
a small window will appear that allows us to
search for the appropriate code. If we type a few letters and press the
find button, a list of codes that contain those letters will appear. We
can then select the appropriate procedure and press the use button.
All of the procedure
codes initially appear in this window. They are sorted the by the
procedure. If we double click a column, they will be resorted by that
column. If we double click a code, it will be entered on the CheckOut
window Code field.
Explosion Buttons
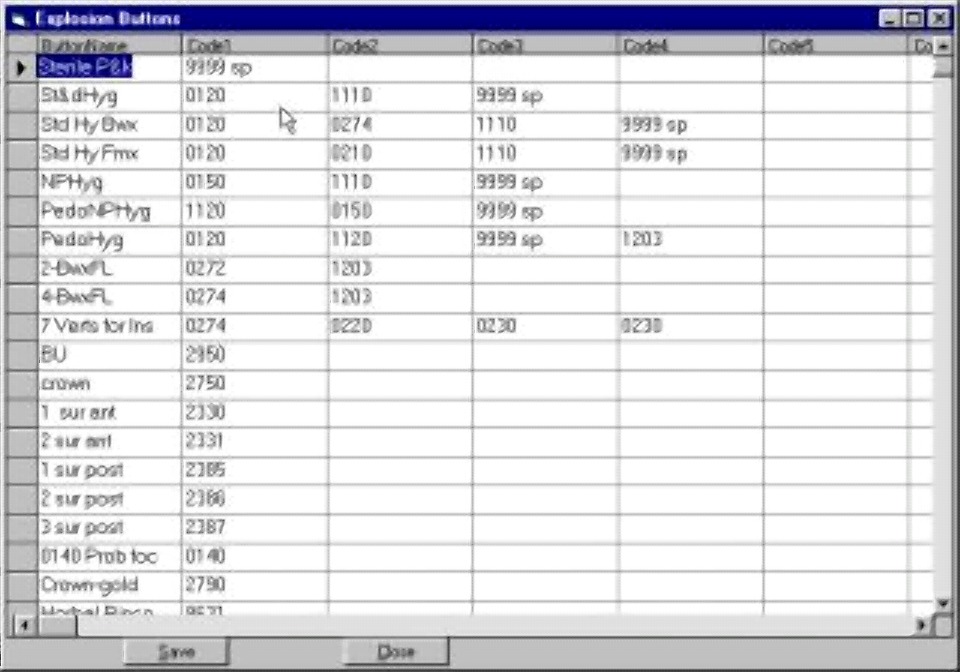
47 buttons can be programmed to represent
one or more codes each. To demonstrate this, we will press the "edit
buttons" button in the lower right corner.
By clicking on any line in this list, we
can change the button name and enter from 1 to 20 codes for that button.
We simply press the tab key to enter additional codes. When we have
finished, we press the save button. We can see the name on the button has
now been changed. When we press that button, it is as though we
entered all of the code's assigned to that button.
Treatment Plan
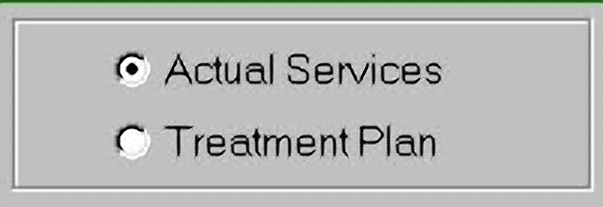
If we had selected the treatment plan
button instead of the actual services button, we can enter a treatment plan for
this patient using the same methods.
It is through the treatment plan entry that
we can create an insurance claim for a pre-treatment estimation.
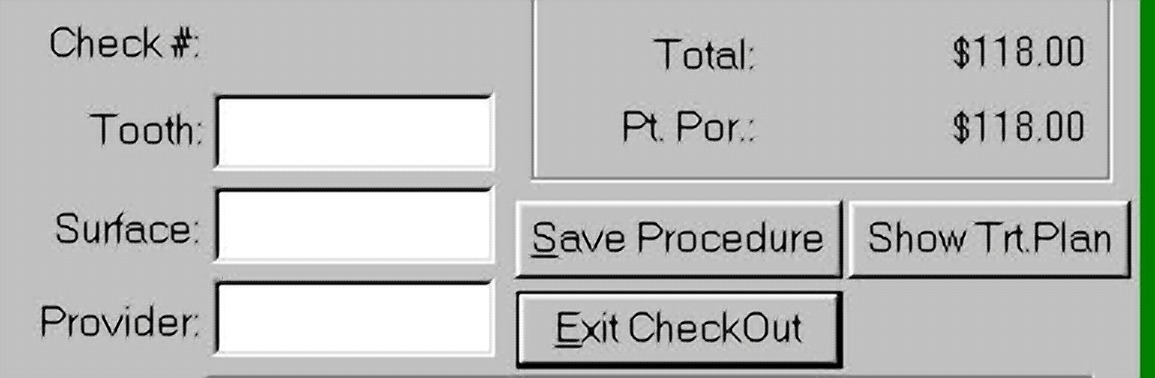
If a patient has an existing treatment
plan, a treatment plan button will be shown when the checkout screen is first
entered. If we're performing procedures that are on this treatment plan,
we can select those procedures from the plan and they will be entered into the
procedure list on the lower left and removed from the treatment plan.
Exiting CheckOut
When we press the exit button, we are given
three options.
We can exit, exit and print a walkout statement, or hold
these procedures for later use.
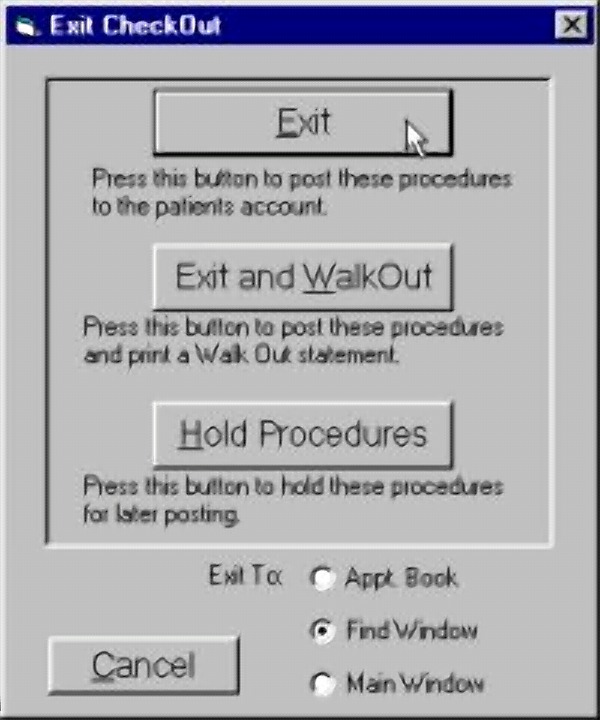
The hold procedures can
be useful when the procedures are entered in the treatment room, for
example. When this patient arrives at the front desk and their checkout
screen is selected, all of the procedures will be presented as though just
entered. At that time, any changes or payments can be entered and the
normal exit will take place.
When we do an exit or exit and print a walk out
statement and the patient has insurance, we are asked if we want to
create a claim for tracking.
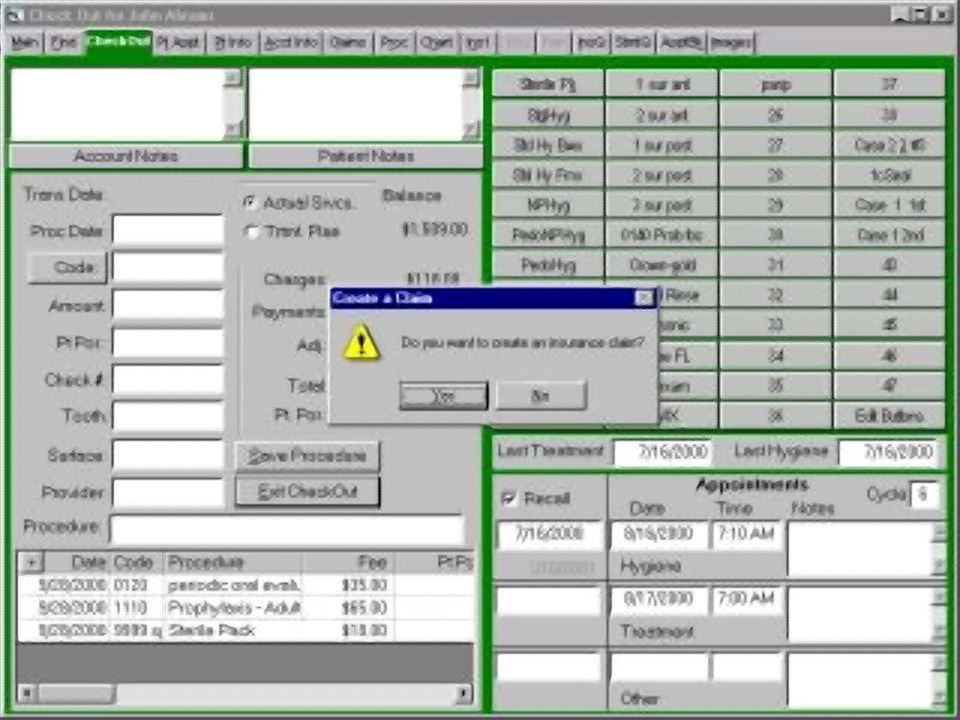
If we want to create an insurance claim for this
patient we should answer yes.
Creating A Claim At CheckOut
When we do an
"exit" or "exit and print a walk out statement"
and the patient has insurance, we are asked
if we want to create a claim for tracking.
If we want to create
an insurance claim for this patient we should answer yes.
The insurance summittal screen will then open.
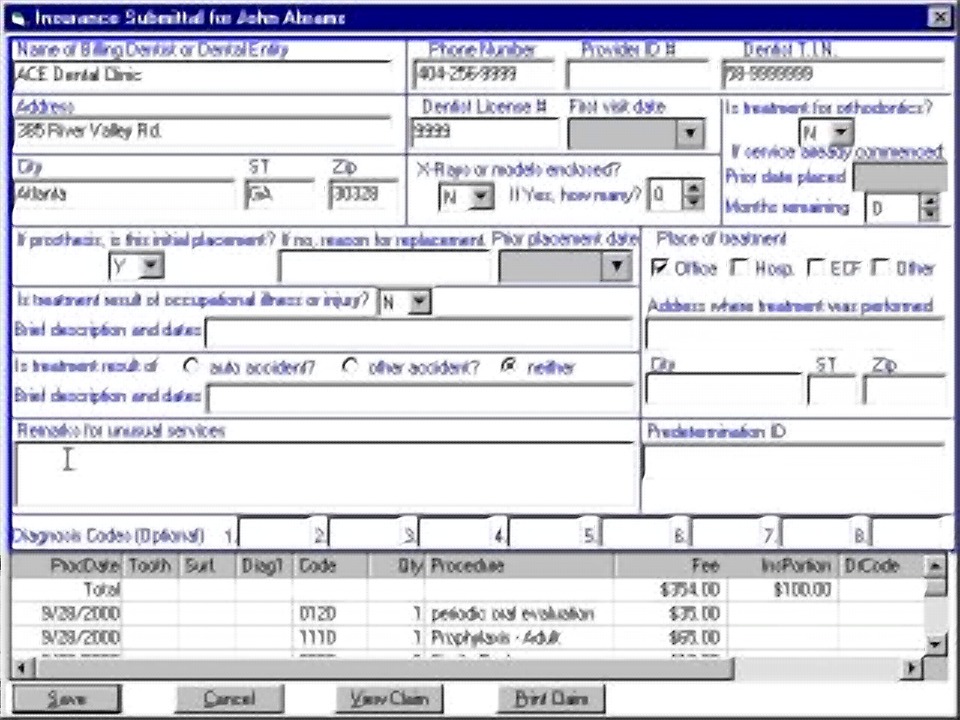
This screen is the middle portion of the ADA insurance
form. All of the information on the upper portion of the form is taken
from the account and insurance database. All of the information for the
lower portion of the form is taken from the checkout information. We can
now make any changes necessary to the middle portion of this form. For
example, if we want to include any x-rays, we can say yes and indicate the
number. If we have any remarks we can enter those on the
screen.
If, for example, the patient wants to take a copy of the
claim with them, we can press the print now button. If we do not want
create this claim, we can press to cancel button. If we are unsure about
information on the claim, we can press the view claim button. We will normally
now press the save button to save this claim.
Creating A Claim
We normally create a claim following
CheckOut. (See CheckOut - Creating A Claim At CheckOut).
If we want to create a claim for procedures
previously entered, this is easy to do. We select the patient on the find
patient screen, and go to their main screen. We then pull down the reports
menu from the top of the screen. We move our cursor down to create a
claim.
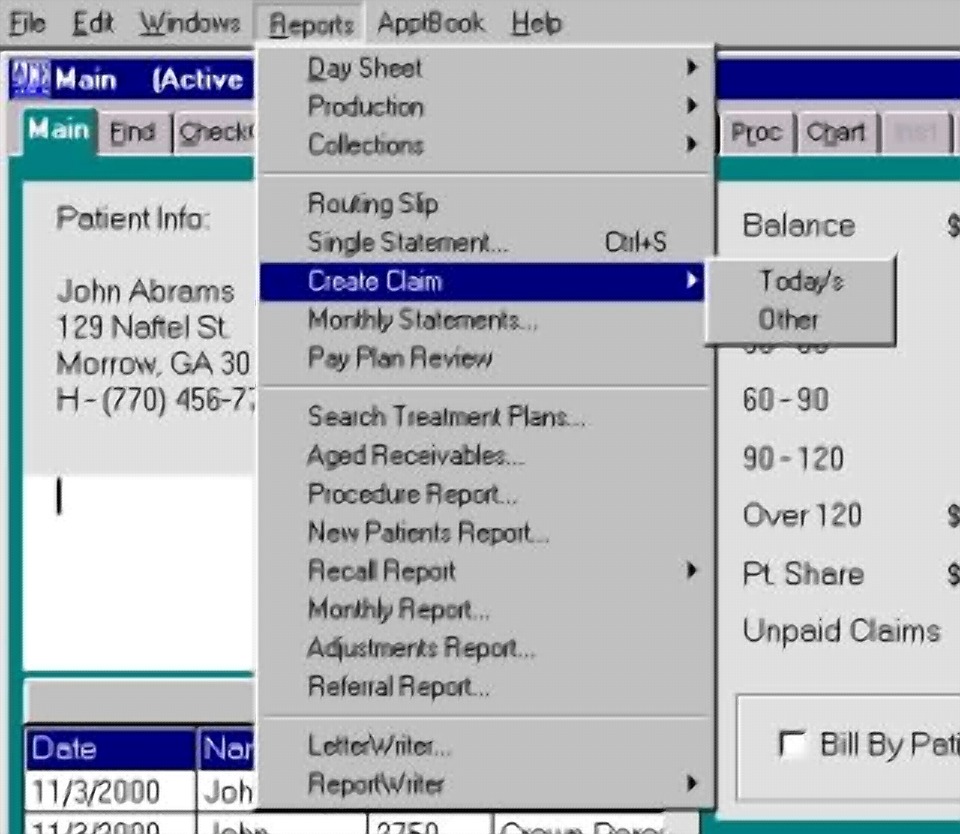
Here, we can
select a claim for today's date or any other date. If we select other date we
can create a primary or secondary claim. We then fill in the beginning
and ending date for the claim requested and the insurance summittal
screen will appear.
We then
save the claim.
We will review sending claims in another
section. If we want to see a claim previously created for a given patient,
we can select that patient's named on the find patient screen and press the
claims tab at the top of the screen. We will see a list of all claims
created for that account. We can highlight any claim and press the edit
button to view the claim. If we choose, we can change or delete this claim
at this time. If we want to create a secondary claim for the same date of
service, we can highlight the claim on the claims screen and press the secondary
claim button. The identical claim will be created with the secondary
insurance company.
Filing Electronic Claims
Filing your insurance claims electronically
is very simple process. Before we began, we should make sure that the
information on the electronic claims set up window is correct. Under the
Windows menu click on the ECS set up item.
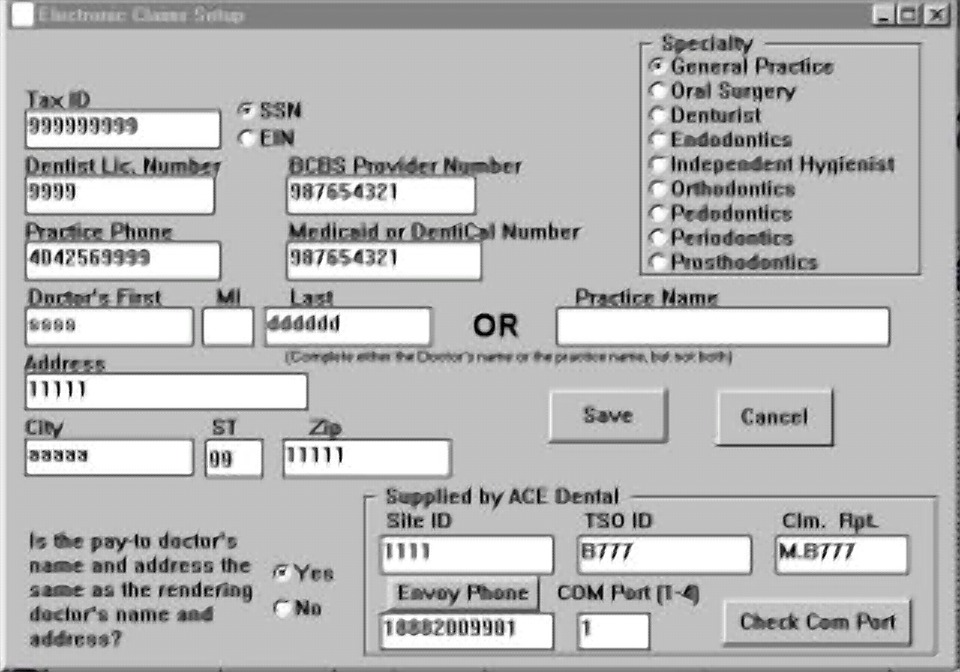
If anything on this screen is incorrect or if
any information is missing, please call ACE Dental for assistance.
As we have seen, claims are created after the
checkout process or manually from the reports menu. After the claims are
created, they are held in the claims database. We can search this database
by opening the InsQ window. Press the InsQ tab at the top of any
window.
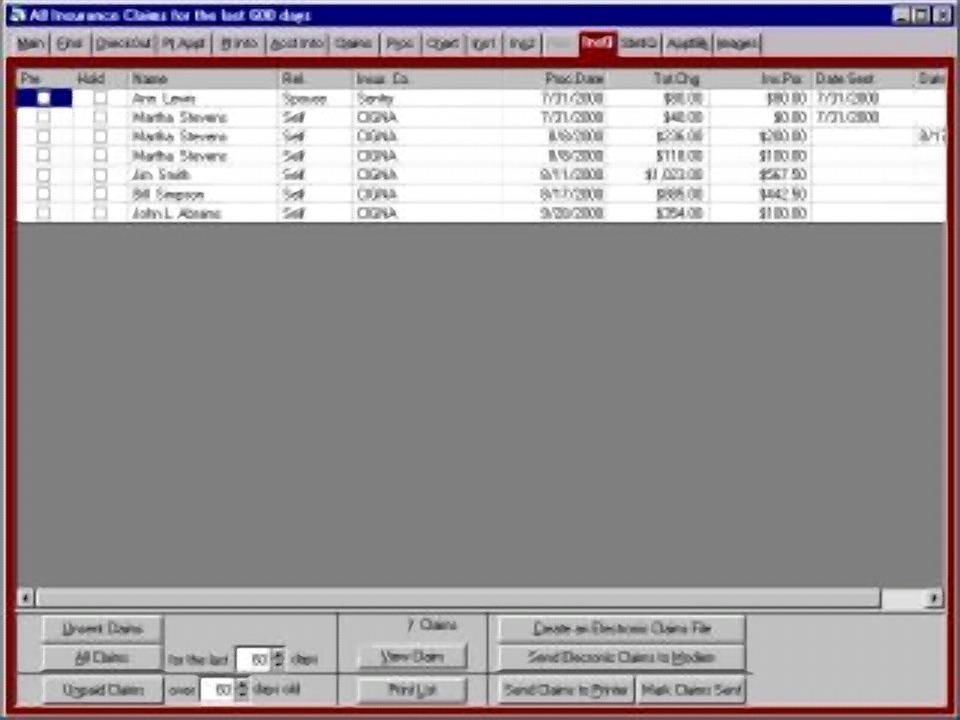
The insurance queue
is a list of claims that we create from the claims database. If we
click on the all claims button, we can retrieve all of the claims in the
database for the specified number of days. Most of the time we want to
send any unsent claims. To do this, we can press the unsent button. This
will retrieve all of the claims from the claims database that have not
yet been sent.
Before we send any claims, we should look at
the hold column on the list. If nothing appears in this column, all claims
will be sent. If we place a check mark in the hold column, the claim will
not be included in the claims filed. These claims will reappear the next
time we press the unsent claims button. If we never want to send a
specific claim, we have two options. We can delete the claim from the
patient's Claims tab window. Or, we can place an x or any other character
in the date sent column.
To send these
claims, we merely press the Create Electronic Claims File button. We
then press the Send Electronic Claims to Modem button.
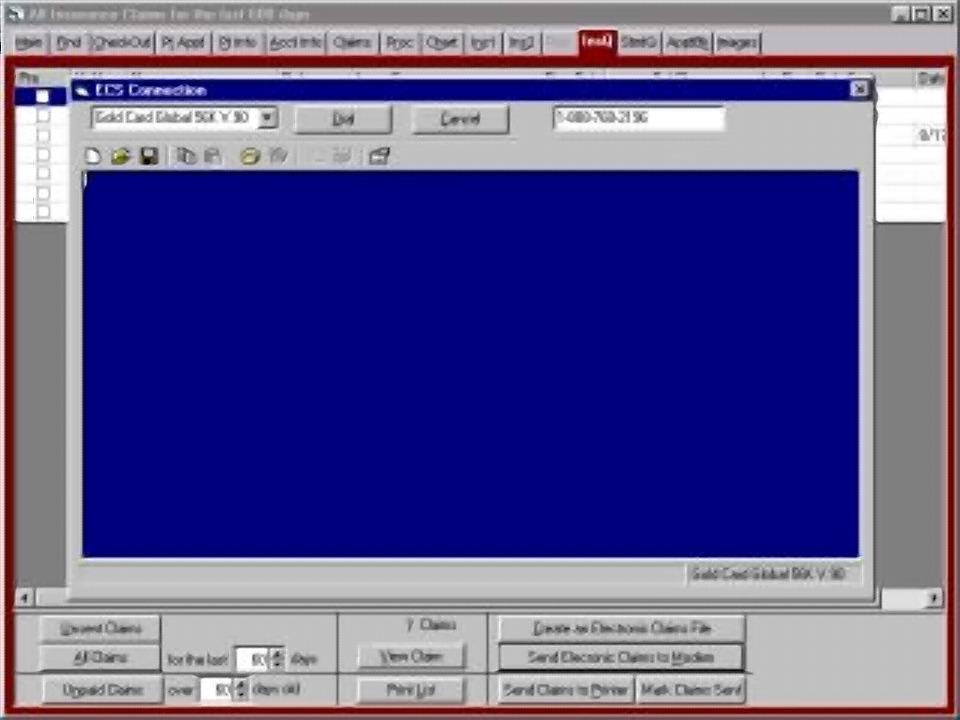
A blue screen will appear. We click on the dial button.
The software will automatically dial a local or toll-free telephone
number. Through the modem, we will send the file to Envoy. In
addition, we will download a file that gives us the status of the previous days
submission. After the modem disconnects, we click on the cancel
button. We are asked if we want to view the report. It is
recommended that you always say yes. The report can be sent to your
printer. This report is very important because it will tell you if any
claims were rejected from the previous submission. If any claims are
listed as rejected, they must be corrected and resent.
You are then asked if you want to mark claims
as sent. If you answer yes, today's date will appear in the date sent
column for all claims listed. This will prevent these claims from
appearing on the next batch of unsent claims.
As we saw on the checkout screen, when a
claim is paid, it is designated paid. Therefore, we can create a list of
unpaid claims by pressing the unpaid claims button. These claims can be
resent if necessary.
Main Window
The main screen gives us an overview of the
account and all the patients in the account.
The right half of the screen has account
information. The top right portion of the screen shows the account name,
address and phone number. Under that are the account notes. These
notes should indicate the factors that affect the account. For example,
any agreement regarding payments or any information about late payments or
bounced checks.
The list under account notes is a list of
all patients belonging to this account. The button that appears above this
list labeled patients can be pressed to refresh the list beneath it. That
should seldom be necessary.
Under the list of patients appears a small
list of the account transactions. This is effectively the ledger card for
this account. We can expand the small list into a large window showing all
of the history for this account by pressing the history button to the right of
the account transaction button. The account transactions button allows us
to refresh the account transactions list and also ages the account as of
today.
The aging appears in the upper middle
portion of this window. We see the balance and the age of the balance in
terms of the 30, 60, 90 and 120 day amounts. Beneath the amount for
anything due over 121 days is the patient portion due. Beneath that number
is the claims number. The claims number shows that number of unpaid claims
for this account. The date at the top of the list is the date the amounts
were last aged. Any amount over 60 days old is automatically applied as a
patient portion.
The left half of this window represents
information regarding a specific patient. At the top left we see the
patient name address and phone number. Beneath add our any notes that
applied toward this patient. These notes may indicate pre-medication,
special fears, special appointment times, etc.
Beneath the patient notes we see the treatment plans
for this patient. The treatment plan is created on the checkout screen.
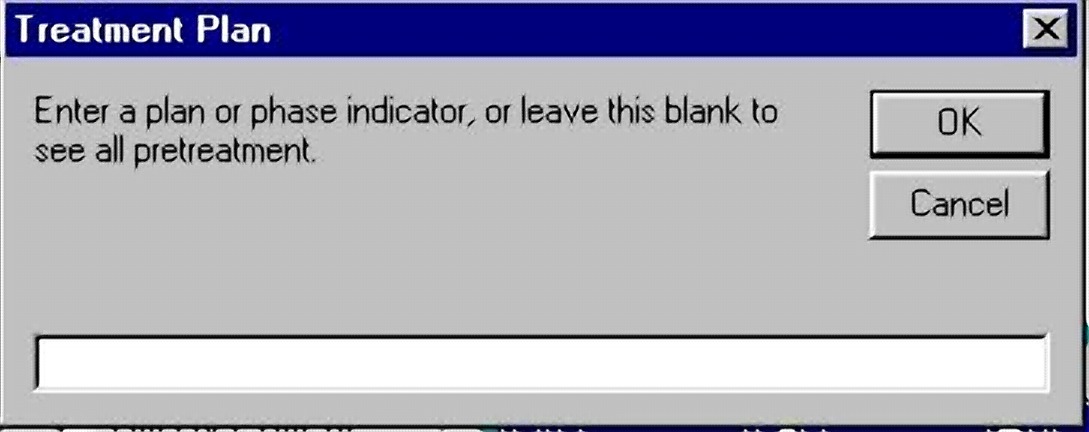
We can create multiple treatment
plans or multiple phases within a treatment plan. When we click on the treatment
plan button we are asked to specify which phase, or we can leave
that blank to see the entire list within the treatment plan database.
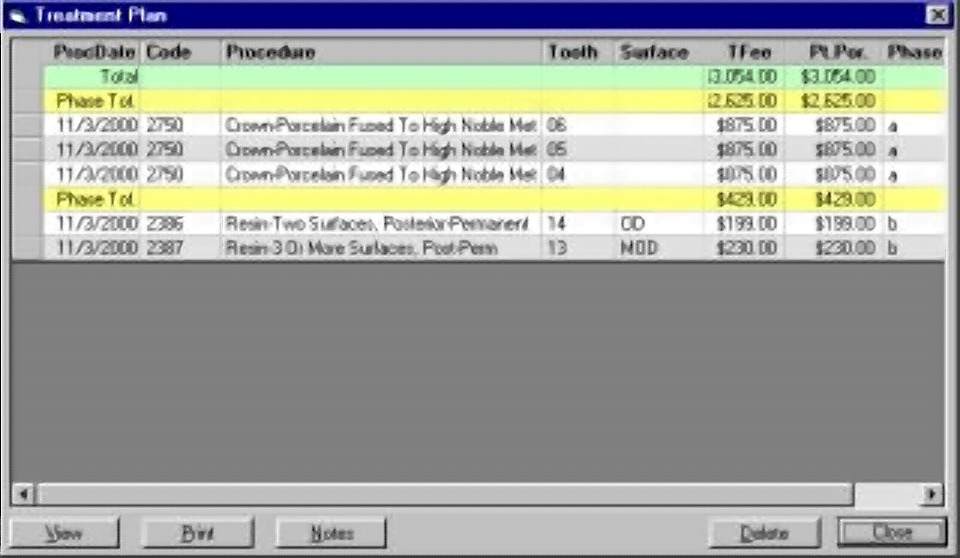
On this list, we can make changes
to any item or make deletions. We can then view and print the
treatment plan. There are notes at the bottom of the treatment plan.
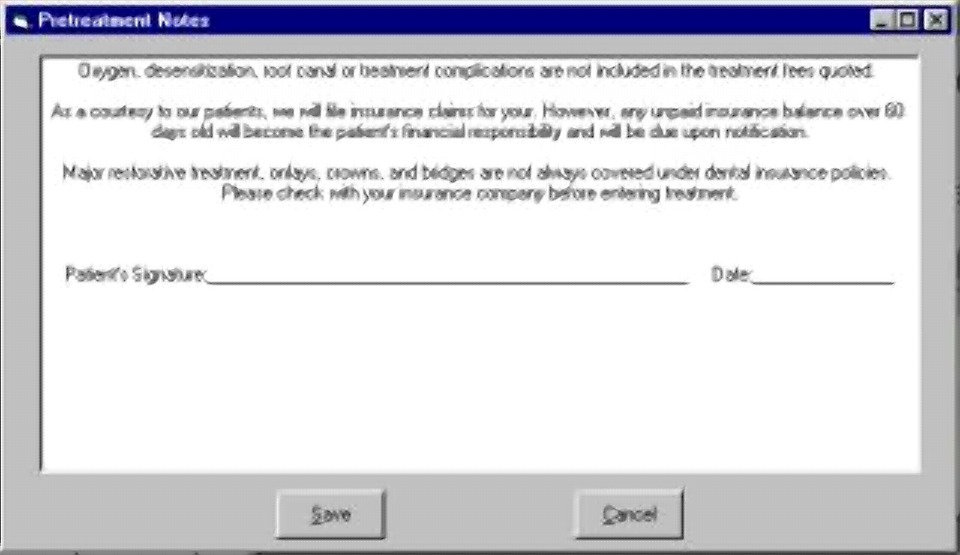
The notes button
allows us to
make changes to
these notes at the bottom of the plan to suit any practice.
Beneath the treatment
plan we see a short list of patient transactions. These are procedures performed
only on this patient. If we want to see an expanded
list of these procedures and larger window we can press the history button
to the left of the patient transactions button. The patient transactions button
allows us to verify that all the transactions in this window are correct. It
effectively re-reads the database for all transactions for this patient. It
is through this list of transactions that we can edit or delete specific
transactions. If we double-click on a single transaction in this
list,
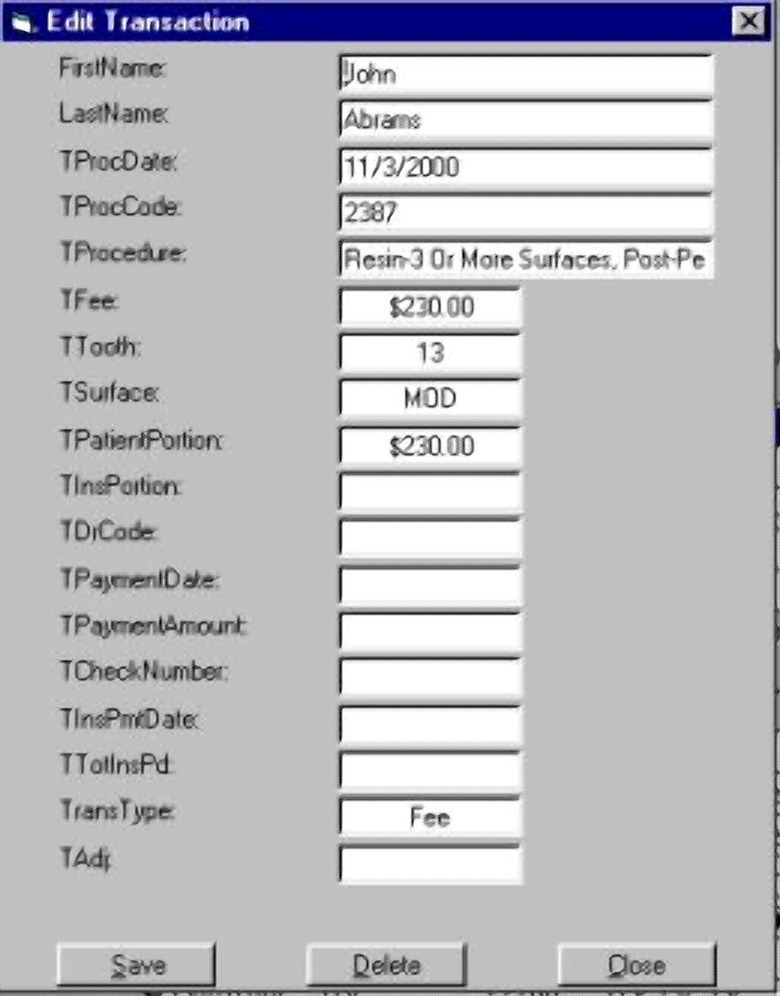
a window will open that
allows us to edit or delete this one transaction. If we highlight more
than one transaction, then double-click on the highlighted transactions, we can
delete multiple transactions. If we choose to do this, we are first asked
if we're sure are we want to delete these transactions. We're then
instructed to type the word delete. This is a double check to insure that
someone does not inadvertently delete a large number of transactions. To
highlight more than one transaction, we must hold down the shift key to
highlight contiguous transactions, or the control key to highlight specific
transactions.
By clicking on any
patient named under the account notes, we can change the active patient shown on
the left half of the main window.
Patient Appointment Window
The patient
appointment window will give us an overview of any appointments made for a
particular patient. If we are not using the Electronic Appointment Book,
we can enter appointments here. If we are using the Appointment Book, any
appointments entered there will appear here. However, any appointments
entered or changed here will not be reflected in the Appointment Book
. In other words, appointments should only be made and changed
in the Appointment Book if we are using it.
We simply
go to the find patient screen, highlight the patients name, and click the
patient appointments tab at the top of the screen.
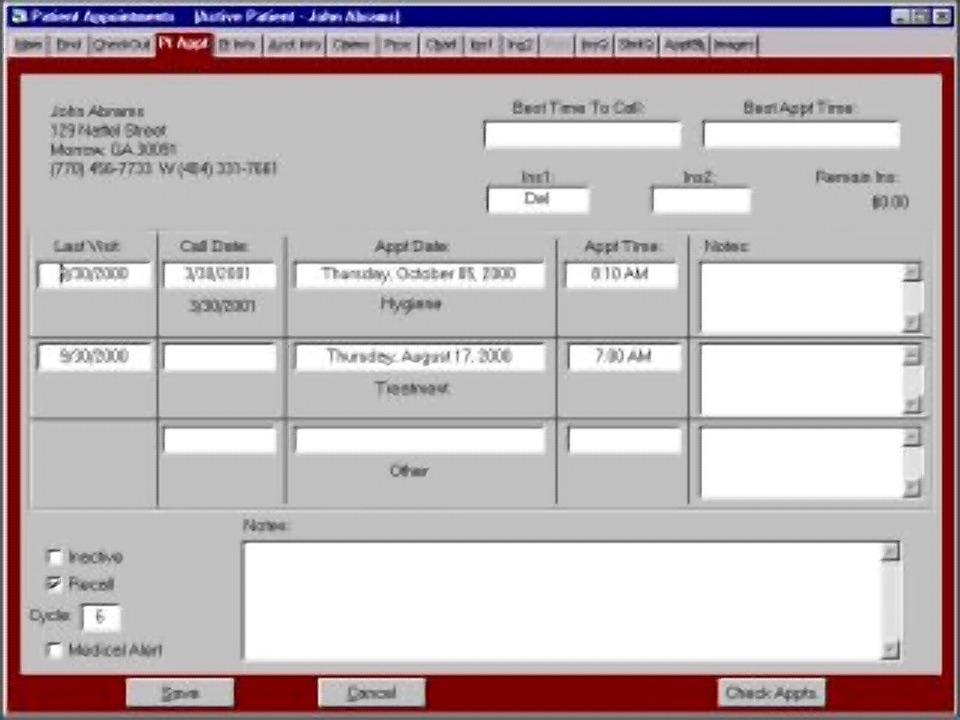
The fields will show the date of the last
visit for hygiene or treatment, the date this patient should be called, any
appointment date, time, and notes.
If this patient has
other future appointments,
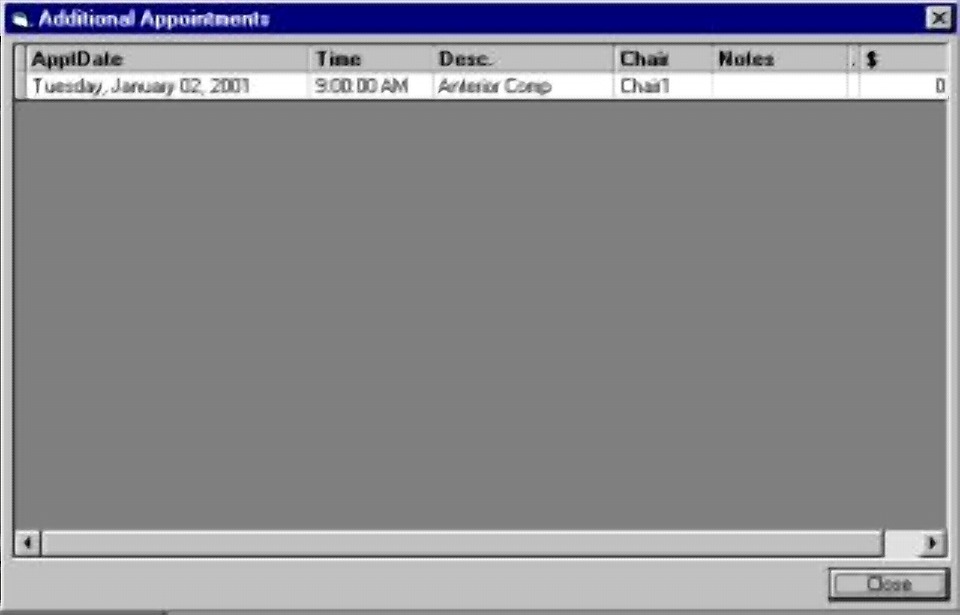
a small window will appear listing those appointment dates and
times, as well.
The route slip button on this screen allows
us to create a single route slip for this particular patient.
The due date shows us when this patient is
actually due for their next hygiene appointment. From time to time, a
patient may request that we call them at a later date. We can change their
call date but their due date will remain the same. This way, we will not
lose track of the actual date they are due.
Claims Window
We can view a list of claims for any family
by clicking on the Claims tab at the top of any window.
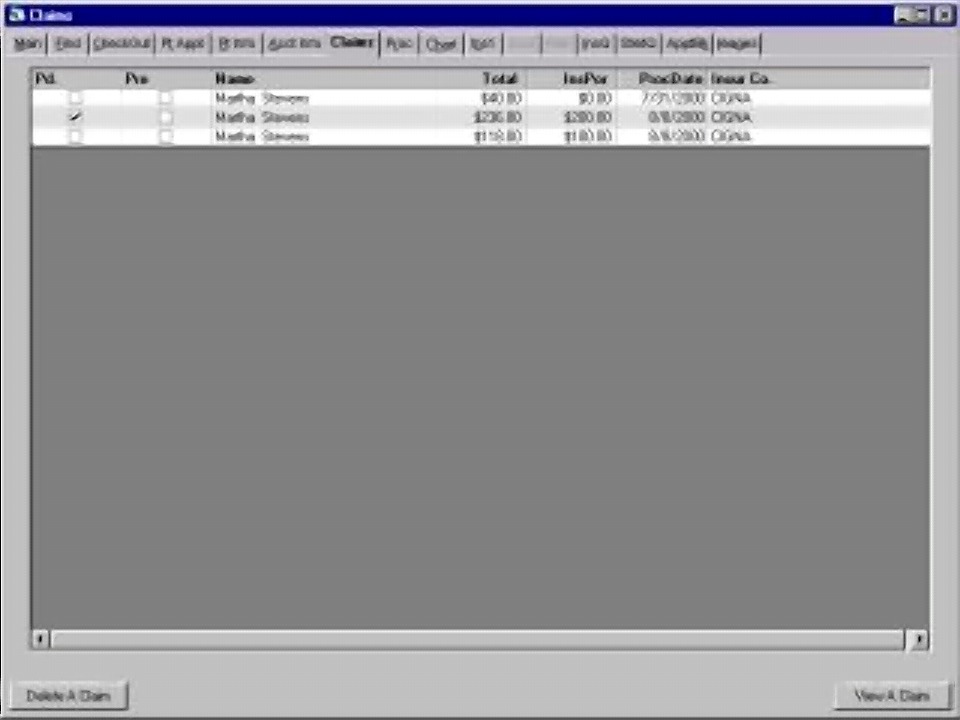
This will show all of the claims for the
account of the currently active patient.
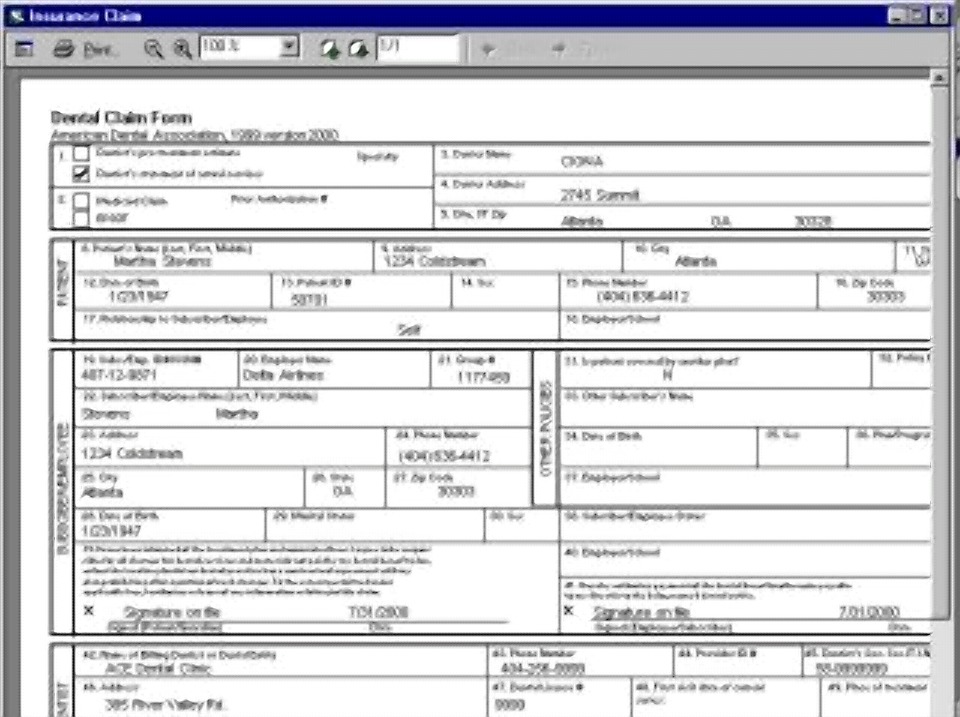
If we highlight a claim, and click on the
View button we can see and printthe contents of the
claim.
Procedure Codes
Procedures stored in the procedure database
can be accessed by pressing the proc tab at the top of any screen. On the
screen we will see a list of procedures in the procedure database.
We can delete any procedure from the
procedure database by highlighting that line and pressing the delete key.
We can also print a list of all procedures by pressing the print list button.
One handy feature of this list is that we can change fees for many procedures
from this screen. We simply click on the fee box to the right of the
procedure name an enter the appropriate fee.
To see the
detail for any specific procedure, simply double-click that line.
The detail screen will be shown.
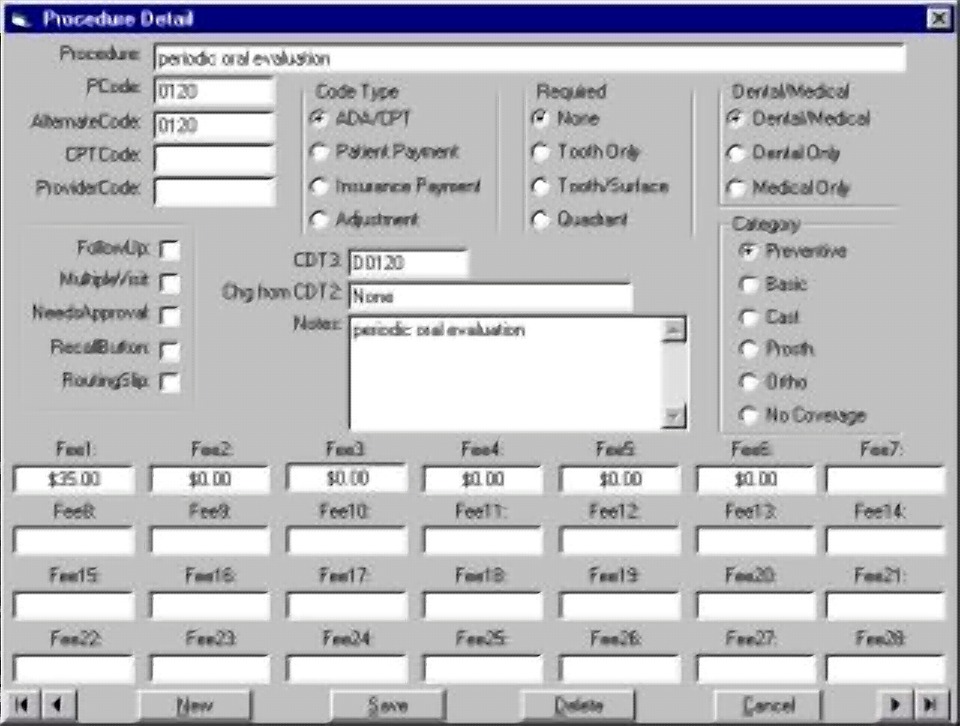
The description of the procedures is shown first. The code is the next
field. This is normally the ADA code for a given procedure. However,
we also use this field to enter codes for things like payments and
adjustments. The alternate code field can contain any abbreviation of any
procedure. The CPT code can store the medical codes for a procedure.
The provider field can indicate when a given provider is normally responsible
for a specific procedure. For example, a hygenist normally performs all
cleanings. The hygenist abbreviation should appear in the provider field
for all cleanings. In a multi-doctor practice, one doctor may always
provide certain procedures. That doctor's abbreviation should appear in
the provider field for those procedures.
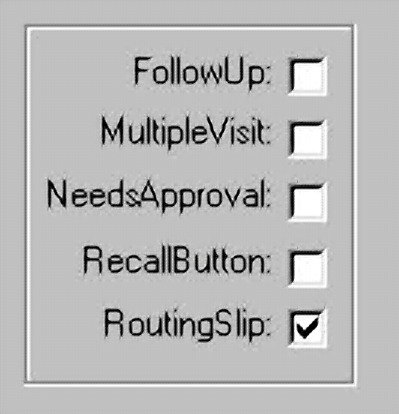
Some procedures require multiple
visits. For example, a crown preparation is almost always followed by a
crown seat. These procedures should be checked for multiple visit
box. The recall box should be checked if this procedure should advance the
recall date for any patient. The follow-up box can be checked if we want
to print a follow-up report for the doctor to call those patients at the end of
each day. If the needs approval box is checked, a message will be flashed
whenever this procedure is selected that the insurance company requires special
approval. If the routing slip box is checked, this procedure will appear
on the list of procedures on the routing slips printed for patients each
day. Up to 50 procedures can appear on the routing slip.
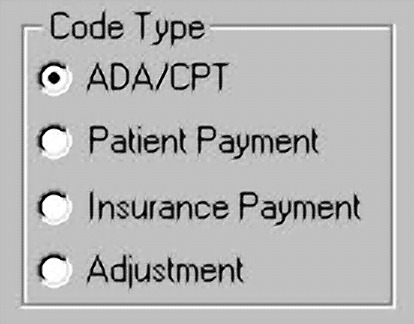
If the procedure is a ADA
or CPT code, that button should be pressed. If the code
represents a patient payment that button can be selected. Likewise if the
code represents an insurance payment or adjustment that button should be pressed.
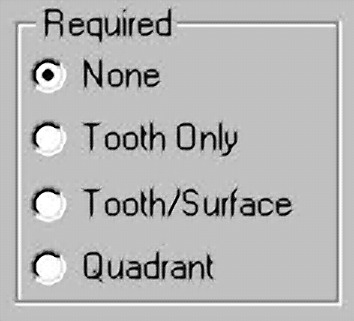
Some procedures require a tooth number,
some a tooth and surface, and some a quadrant. Those buttons of should be
checked accordingly.
Some procedures may apply to dental and
medical, some are dental only, and summer medical only. Those button
should also be selected.
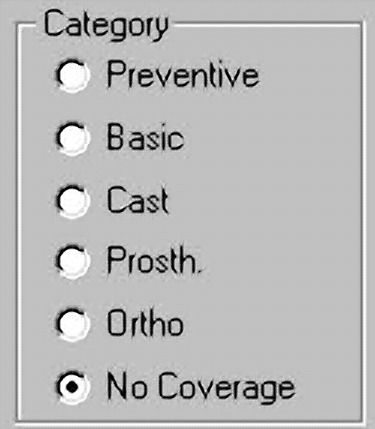
The category for this procedure should be
selected next. This category will affect the percentage of insurance vs.
patient portion based on the insurance record for each patient.
Up to 28 different fees can be applicable
for each procedure. A fee number can be assigned to each patient on the
patient information screen. At that patient's checkout, the appropriate
fee will be applied to that patient.
A new procedure can be added to the
procedure database by pressing the new button. After all data is entered
for the procedure, the save button should be pressed.
We can look at each procedure in the
procedure database by clicking on the next or previous buttons.
Most dental practices want to increase their
fees at least once per year. This can be accomplished with the fee
change button on a procedure list window. When we press the change
button, a window will open allowing us to enter a percentage increase.
This increase is applied to all fees in the database. All fees are around
up to the next largest dollar amount. It is a good idea to make a backup
of the procedure database before performing this fee increase.
Payment Plans
ACE Dental provides the ability to create
extremely flexible payment plans for any patient in the practice.
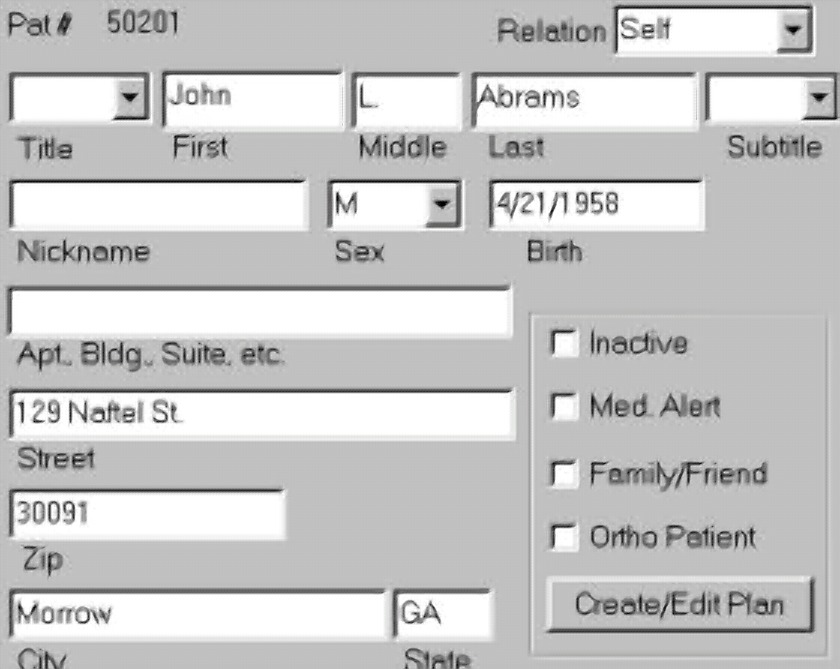
To create a payment plan, we select the
patient name on the find patient window and go to the patient information
screen.
Here, we click on the create/edit plan
button
. 
If no plan currently exist for this patient, the create plan
window will open. If a plan currently exists, the edit plan window
open.
Let's begin with the create plan window.
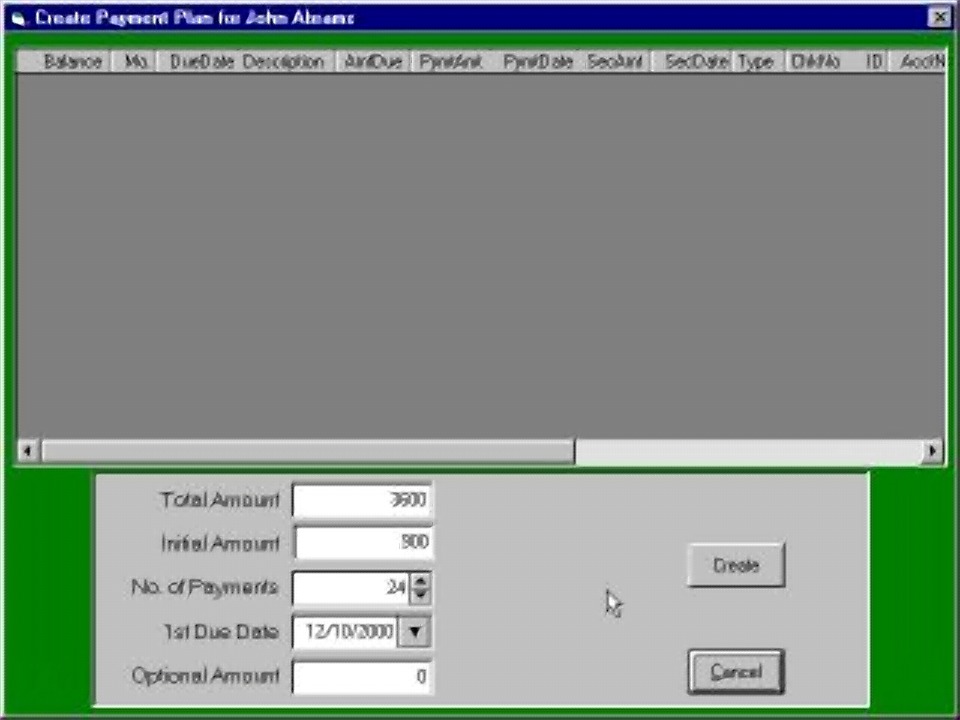
When we open this window we get an alert message that reminds us
to create an adjustment for this patient. In other words, we're going to
adjust off the amount this account owes by the amount of the payment plan
created so the account does not get double billed.
We put the total amount to be paid in the
total amount field. In some cases we may want the patient to make an
initial payment. We place that amount in the initial payment field.
We indicate the number of payments in the number of payments field. We
type in the date for the first due date in the first due date field. This
date can be any day of the month. All subsequent due dates will occur on
the same day of the month. For example, if the first due date is on the
tenth of the month, each due date will be on the tenth of each month. The
optional amount field allows us to force on amount for each payment. Some
people are more likely to make a correct payment each month if they have around
dollar amount to day. With the optional amount field is filled, an
adjustment is made on the last payment for the difference. Otherwise, if
the optional amount is not filled, all payments will be the same
amount.
When we
have completed all of the information, we click the create button.
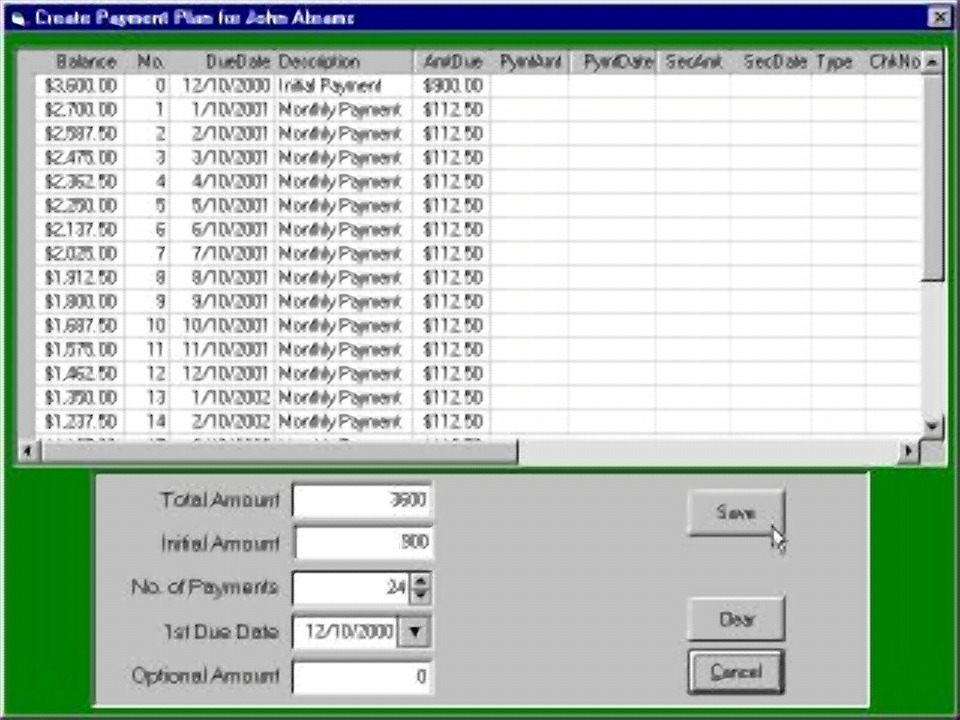
This will create the plan in the
list above. If we've made any mistake, we can press the clear button, make
any changes necessary and press the create button again. When we are
satisfied with the plan created, we can press the save button.
To enter payments for a payment plan, we select the patients
name on the find patient screen. For patients that have an
active payment plan, the plan tab at the top of the
screen is enabled. If we press that tab, we will see the
payment plan for this patient.
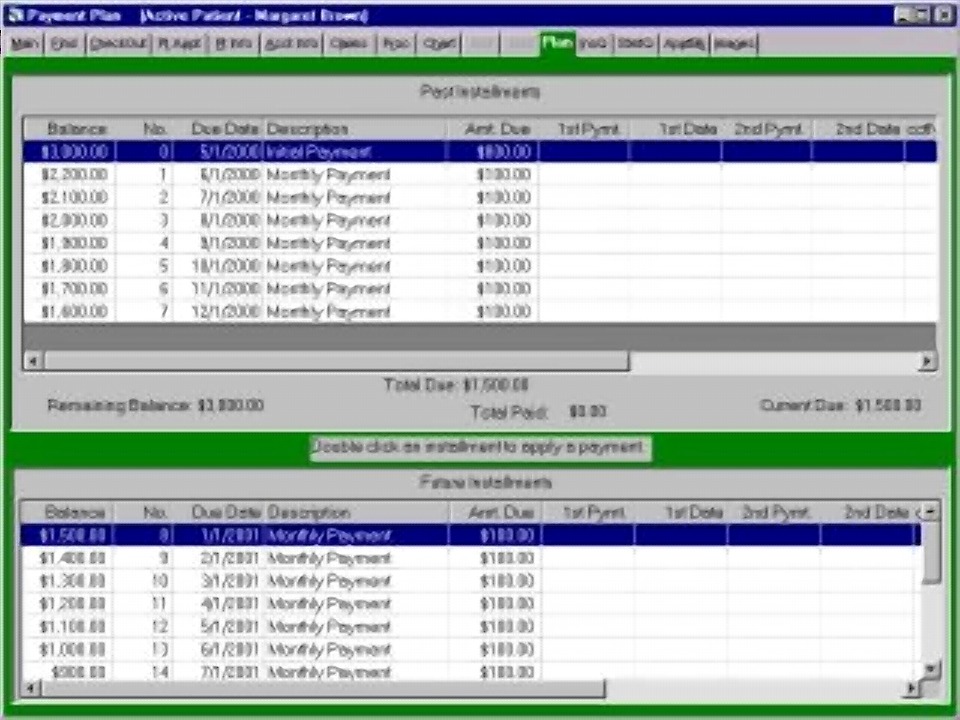
Payments due on or before
today are shown on the top half of the screen. Future
payments are shown on the bottom half of the screen. To
apply a payment, we simply double-click the line for that payment. The
plan payment window will open.
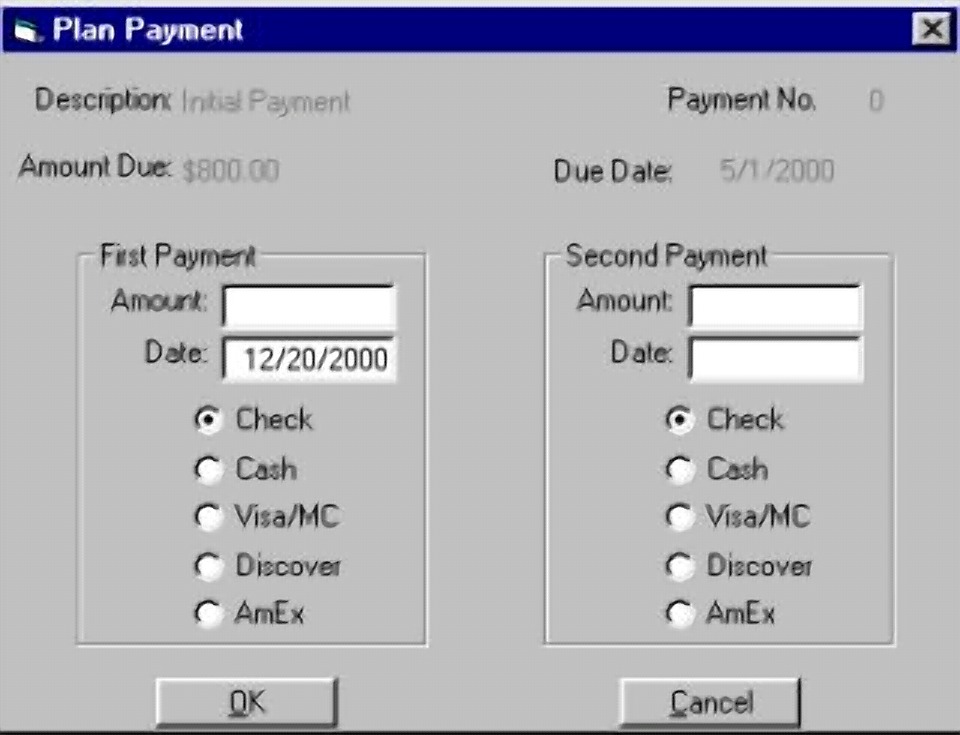
We can enter the amount, the
payment date, and payment type. Notice that payments can be made for each
payment due. For some plans, the patient may pay part of each payment and
insurance company may pay the balance. This is especially true for
orthodontic treatment. In other cases, a divorced husband and wife may
share payments for a child's treatment. Payments can be made for future
transactions as well as past.
Day Sheet
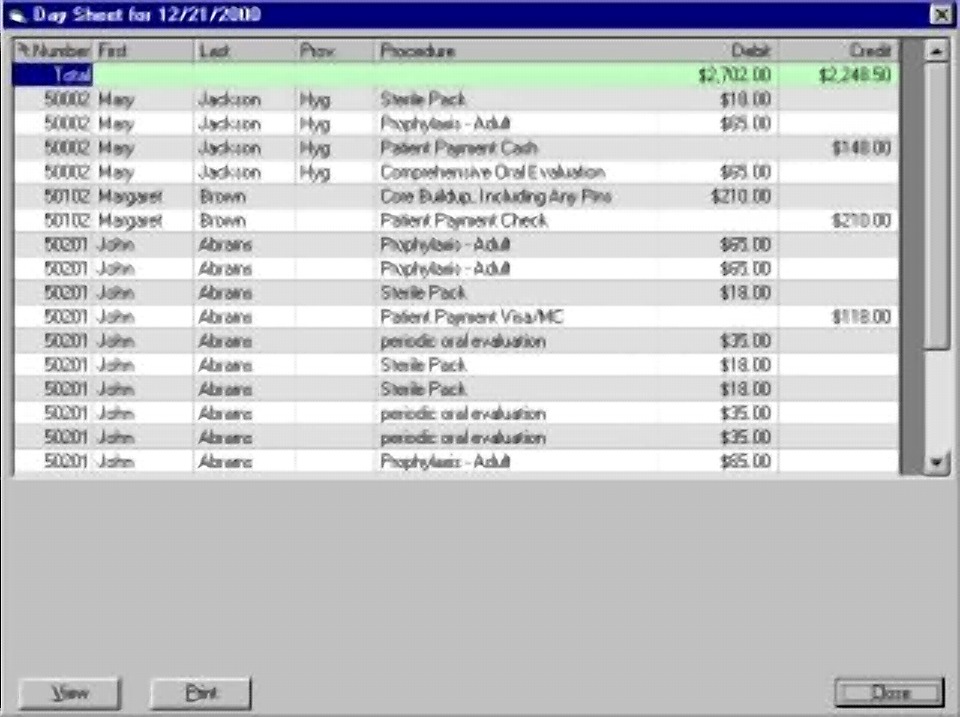
The Day Sheet is a listing of all procedure
standard on a given day. From the menu, you can select today's date or any
other day. Most these are listed in the debit calm and collections are
listed in the credit column.
The day sheet is a hold over a from the old
manual systems. Most computer systems include it because many practices
and their accountants are familiar with this type of report. Similar, but
more detailed, information can be obtained from the production and collection
reports. We recommend their use. If you use the production and
collection reports, running the day sheet is
unnecessary.
Production Report
The production report can be run for a
single day or any period of time. Under the reports menu, select the
production report item and today or other as a sub item.
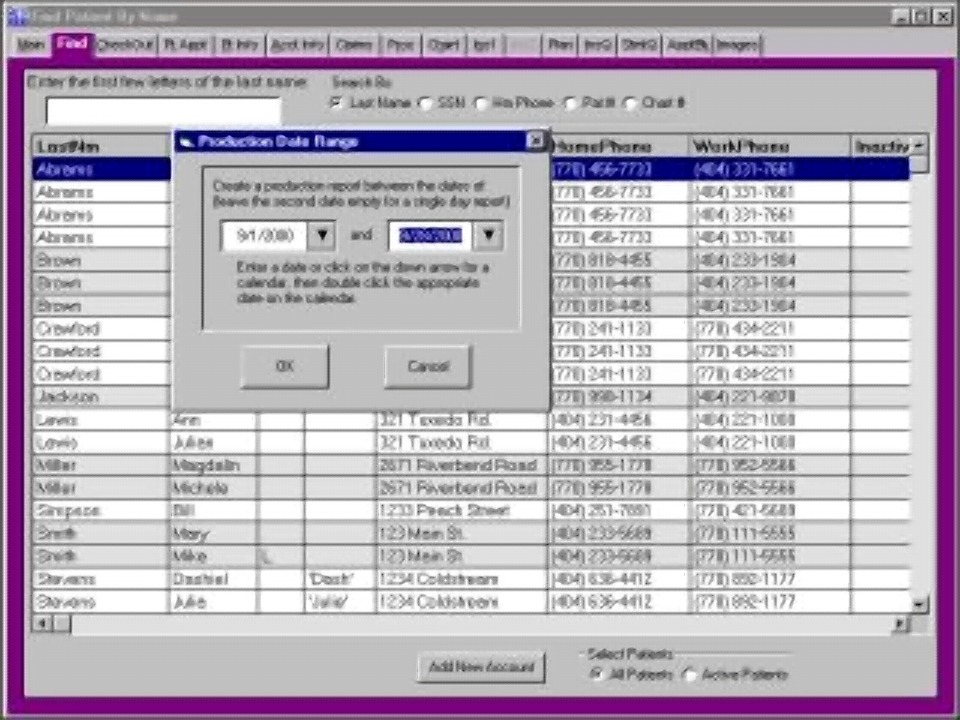
If you select other, a date range can be
entered.
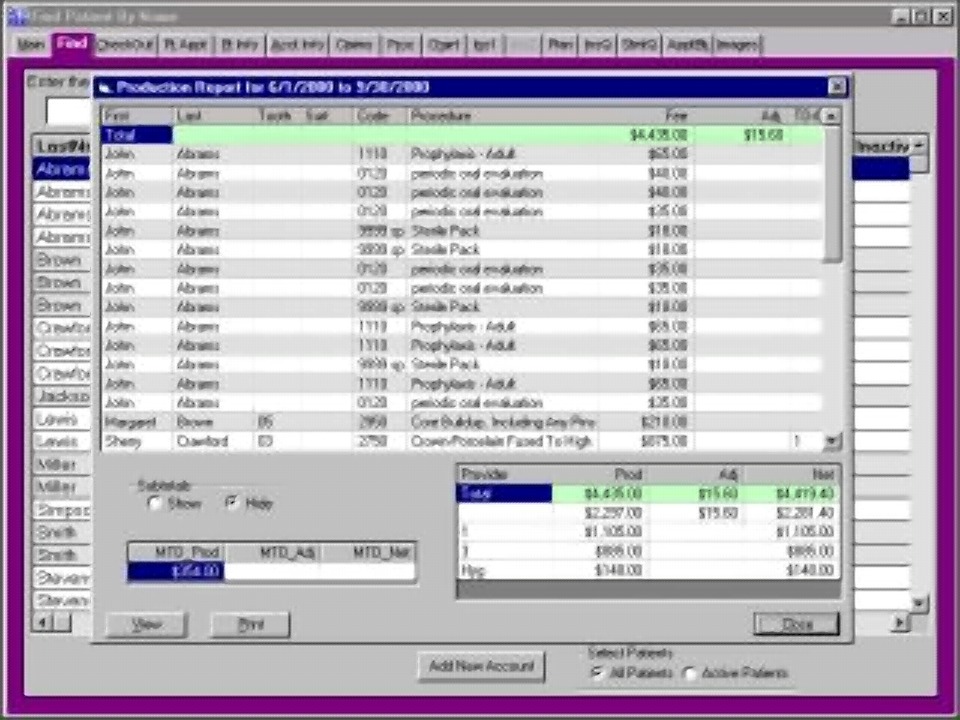
The production report has a list of all
procedures entered with fees and adjustments. These can be subtotaled by
patient. In addition, subtotals are shown by
provider.
Collection Report
Like the production
report, the collection report
can be run for a single day or any period of time. Under the reports menu,
select the collection report item and today or other as a sub item.
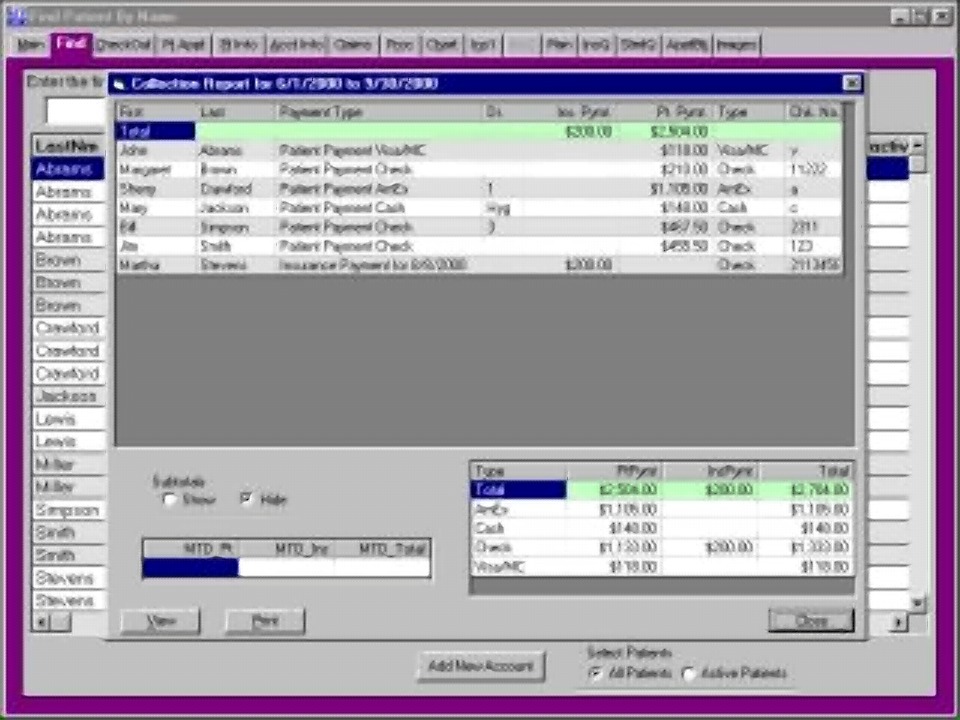
Sub totals can be shown by provider by
clicking the sub totals button.
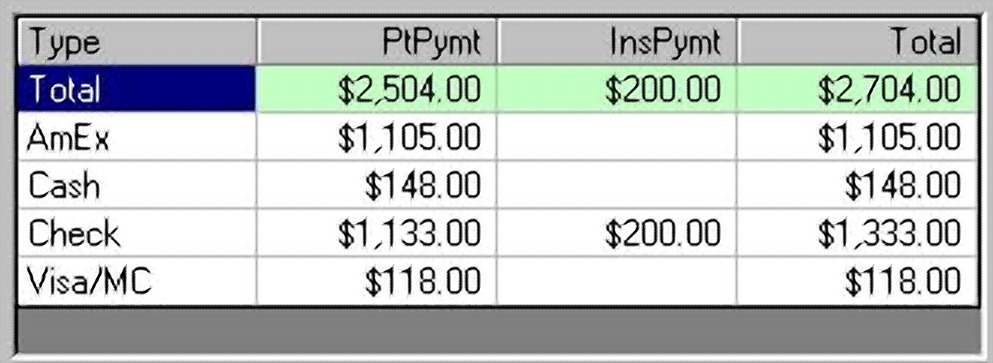
Sub totals are also broken down by payment
type.
Routing Slip
Some practices refer to this as an
encounter form. Selecting this menu item will create a routing slip for the
active patient.
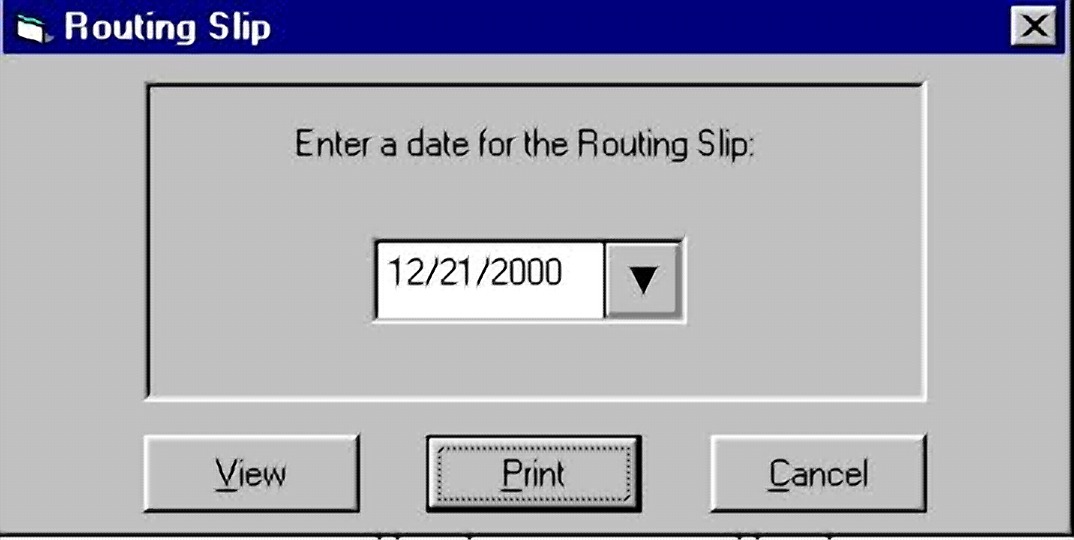
We must first into the day we want to
appear on that routing slip.
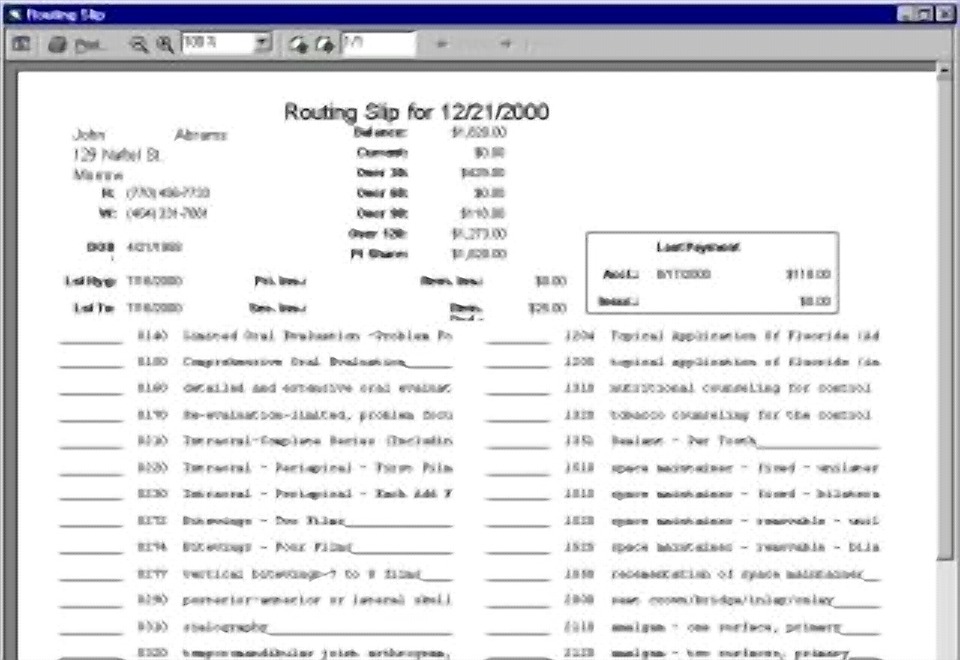
By clicking the view button, we can see the
routing slip on the screen.
Single Statement
This will create a statement for the active
patient or account.
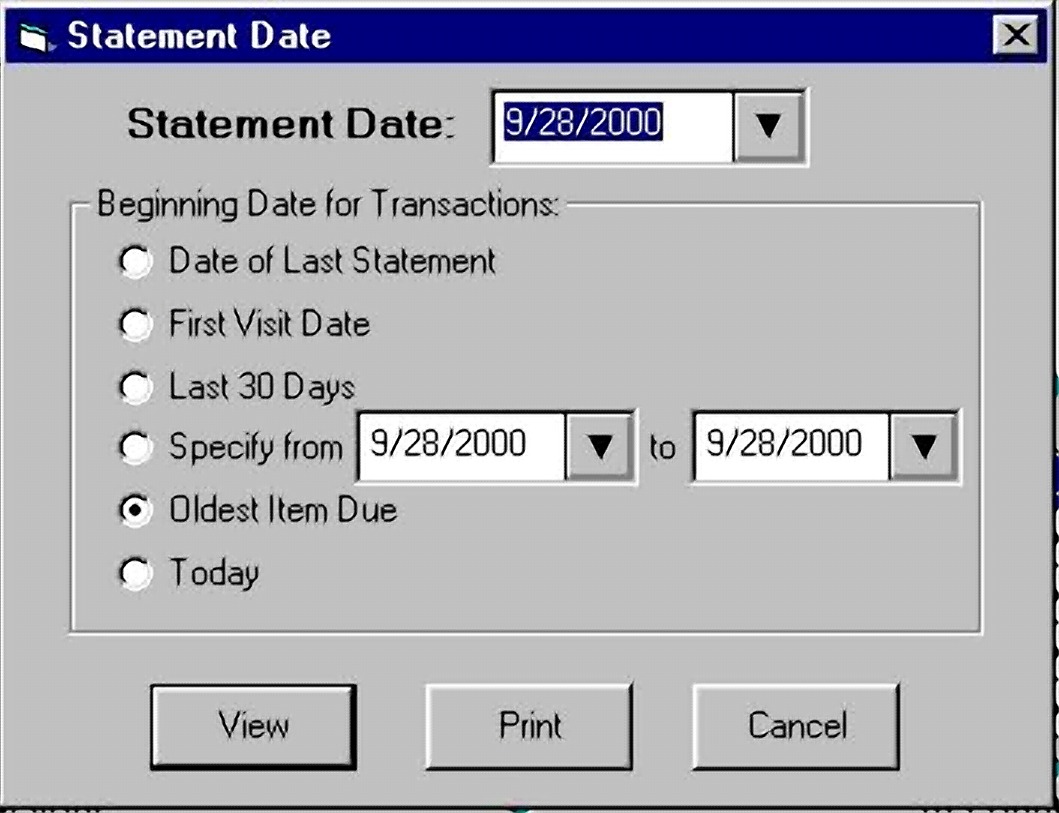
We can select the dates for the
transactions we want to appear on the statement. The oldest item due is
the date the account last had a zero balance.
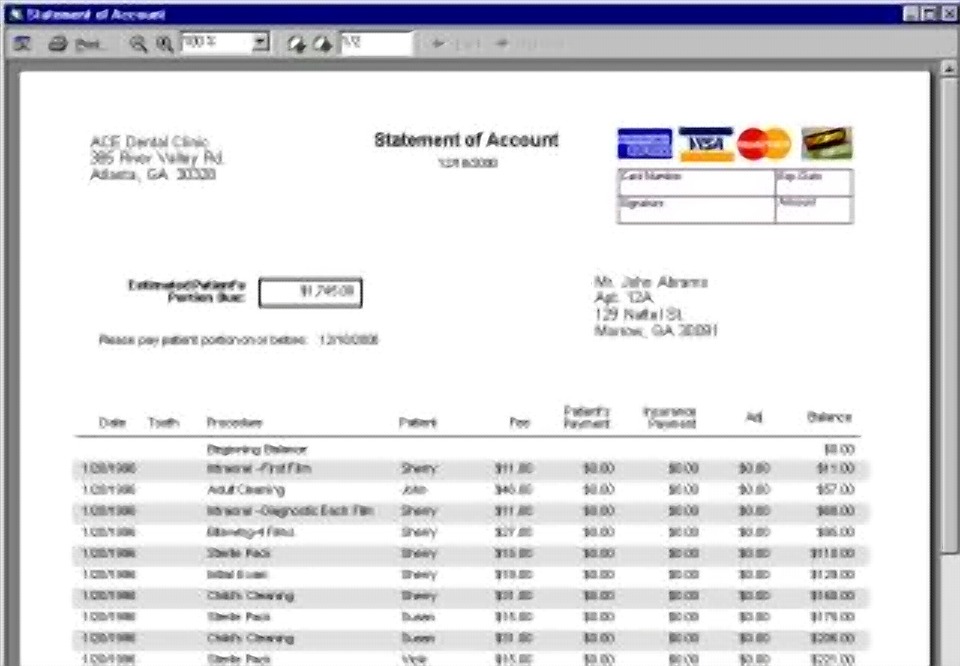
The credit card logos can be removed
entirely, or selected individually on the monthly statement setup
window.
Create Claim
We normally create a
claim following CheckOut. (See CheckOut - Creating A Claim At CheckOut).
If we want to create a
claim for procedures previously entered, this is easy to do. We select the
patient on the find patient screen, and go to their main screen. We then
pull down the reports menu from the top of the screen. We move our cursor
down to create a claim.
Here, we can select a
claim for today's date or any other date. If we select other date we can
create a primary or secondary claim. We then fill in the beginning and
ending date for the claim requested and the insurance summittal screen will
appear.
We then save the
claim.
We will review sending
claims in another section. If we want to see a claim previously created
for a given patient, we can select that patient's named on the find patient
screen and press the claims tab at the top of the screen. We will see a
list of all claims created for that account. We can highlight any claim
and press the edit button to view the claim. If we choose, we can change
or delete this claim at this time. If we want to create a secondary claim
for the same date of service, we can highlight the claim on the claims screen
and press the secondary claim button. The identical claim will be created
with the secondary insurance company.
Monthly Statements
Option for monthly statements can be set of
the screen.
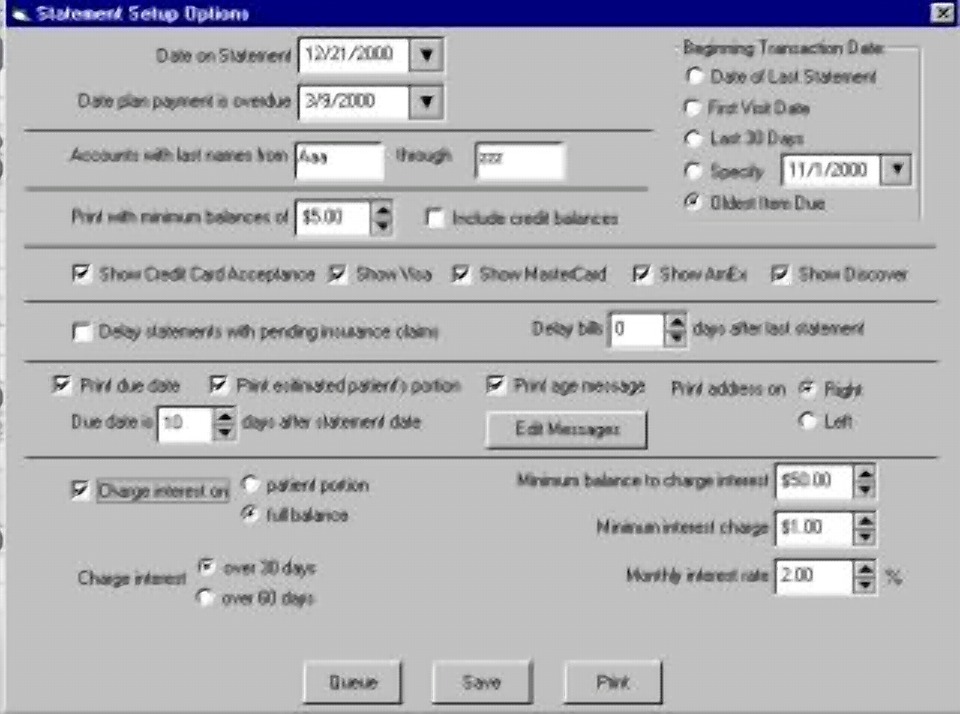
We can select the day we would like to appear on all
statements. Also, we can select the date range for the transactions we
would like to appear on the statements. We can specify all, or any segment, of
accounts based on last name. We can set a minimum balance. We
normally do not include credit balances, but we can check that to do
so.
We can show credit card logos and specify
which logo to include.
We can skip statements that have pending insurance
claims.
We can delay bills a minimum number of days
after the last statement was printed. For example, if the patient calls
several days ago and asked to be said the statement and we manually created one,
we may not want to send him another one with our monthly batch.
We can choose to print a due date on the
statement. We can print messages based on the age of the
balance.
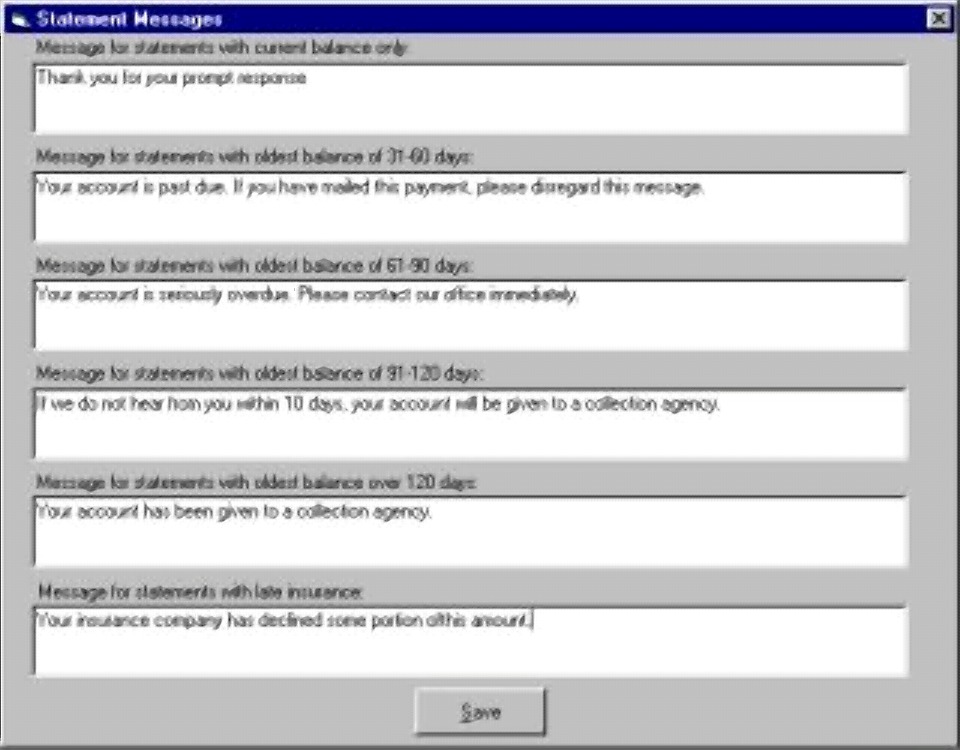
These messages can be entered by pressing
the edit message button. We can print the address of the account on the right or
the left side, depending upon the type of windowed envelope we want to
use.
We can add interest charges to all accounts
with a balance. If we use this option, we must be very careful not to run
the statements more than once per month. The interest charges will be
handed when the queue or print button is pressed on the screen.
When one of those buttons is pressed, we
are asked if we want to age all accounts. We should almost always say yes
to this question. If we pressed the queue button, after the aging, we are
taken to the statement queue window. If we pressed the Print button, we
are taken to the statement queue window and printing proceeds immediately.
This is handy if we want to start the printing after we of left the
practice.
Any options we set on the screen, will be
saved and applied to any statements printed. This includes statements from
the statement queue, or single statements.
Pay Plan Review
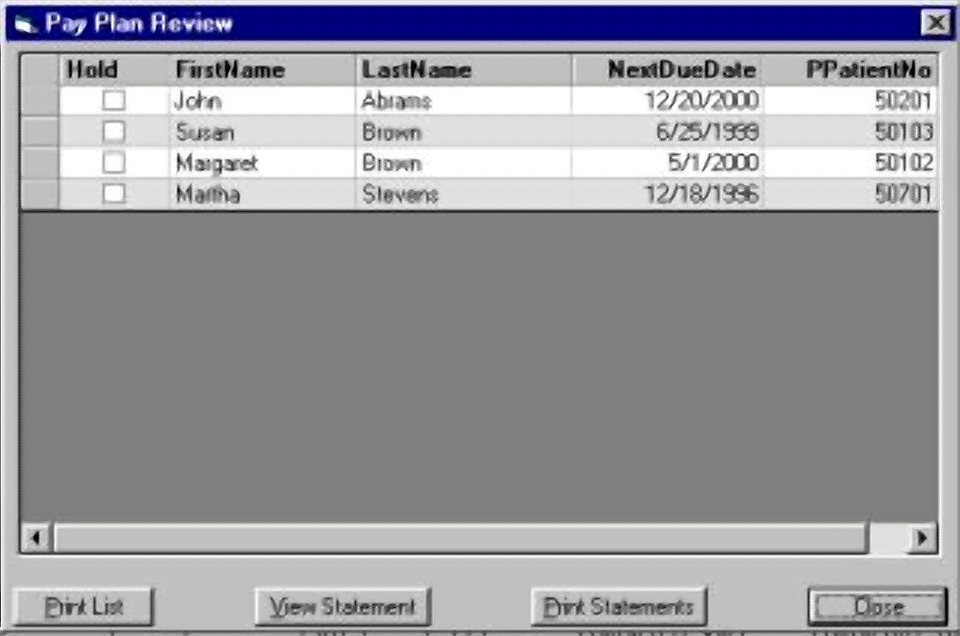
The pay plan review shows a list of all
plans and the system, and allows us to view or print statements for those
plans.
Search Treatment Plans
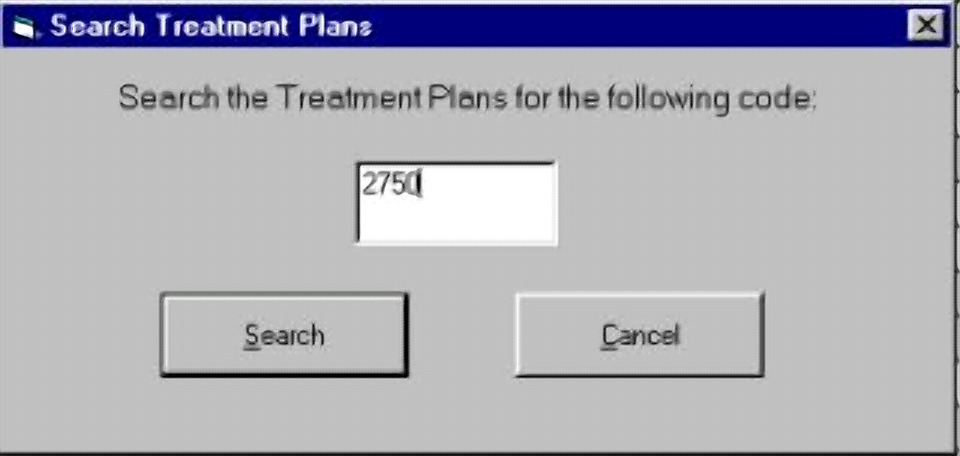
This option allows us to search the treatment plan database.
For example, if we have an appointment cancellation for a
crown prep, we can search the treatment database for other patients with
this recommended treatment. We can call them to see if they can
fill the appointment.
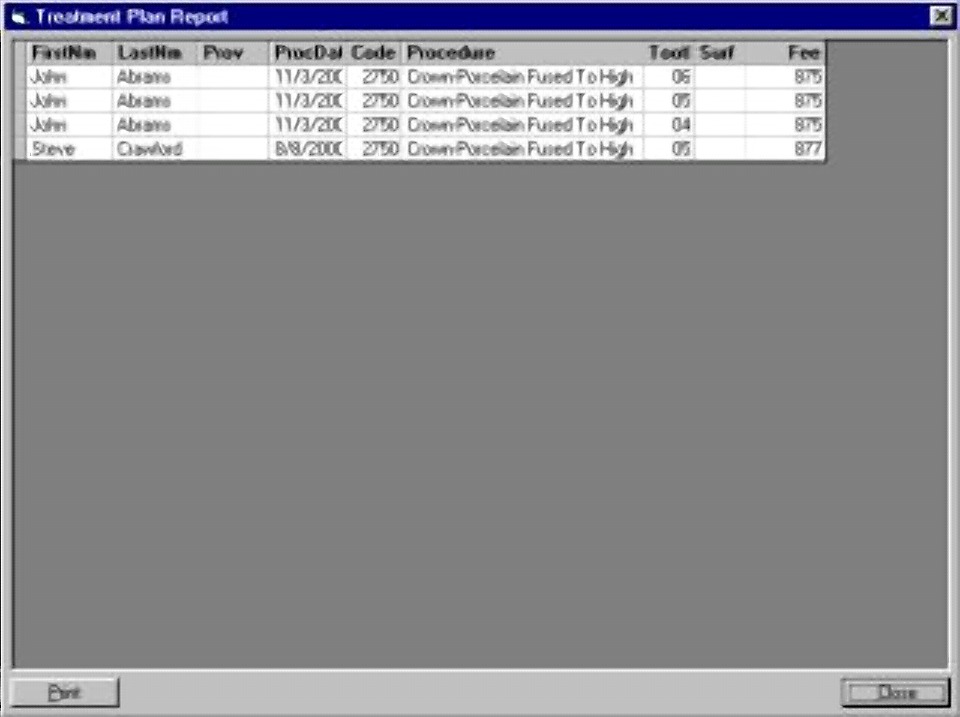
Aged Receivables
The aged receivables report will give us a
list of all families who owe the practice money. They are listed with the
largest balances first.
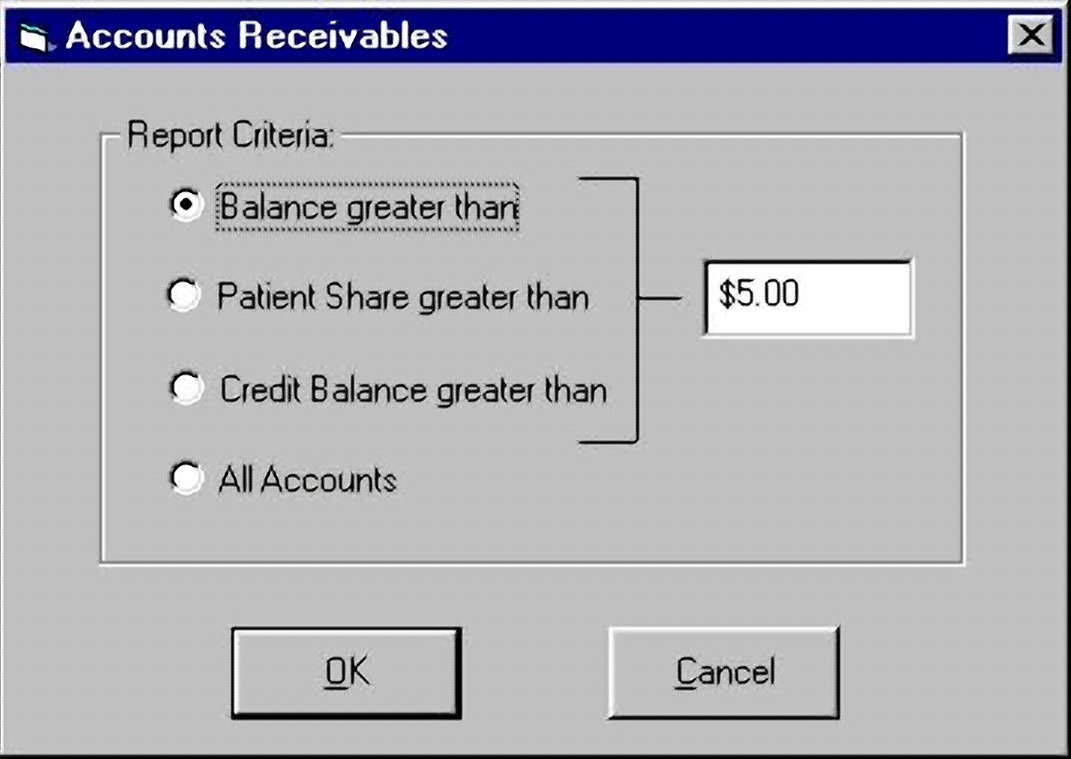
We can select the minimum balance shown in
the report.
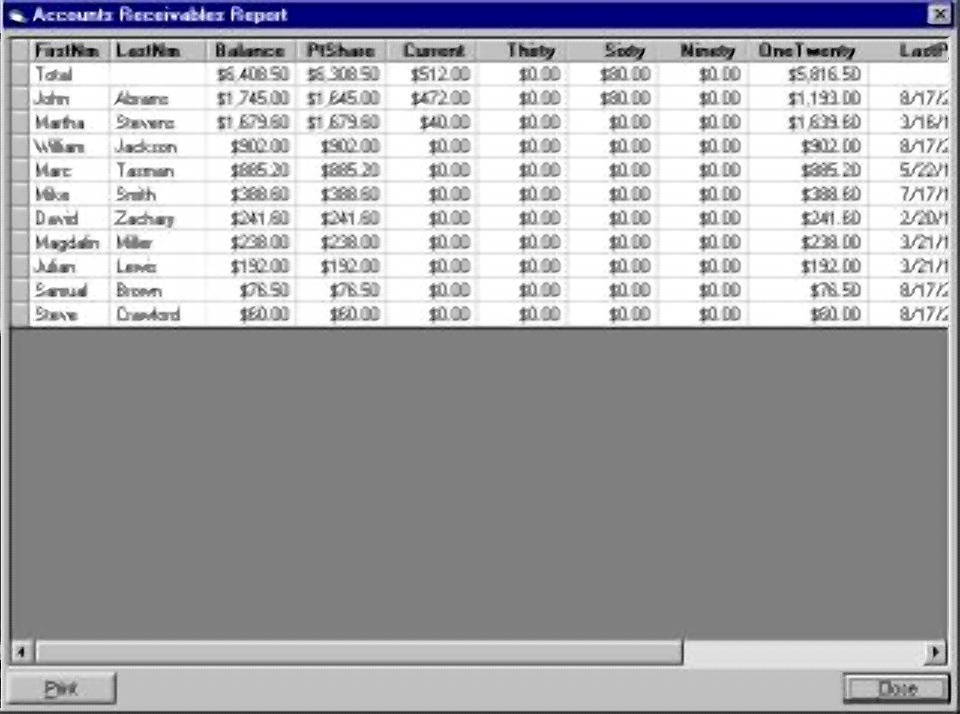
The order of the columns can be changed by
double-clicking on the column heading. For example, if we click on the
last name column, the names will be sorted in last name order. On the
other hand, if we double-click on the One Twenty column, we would see those
with the largest over 120 day balance first.
Procedure Report
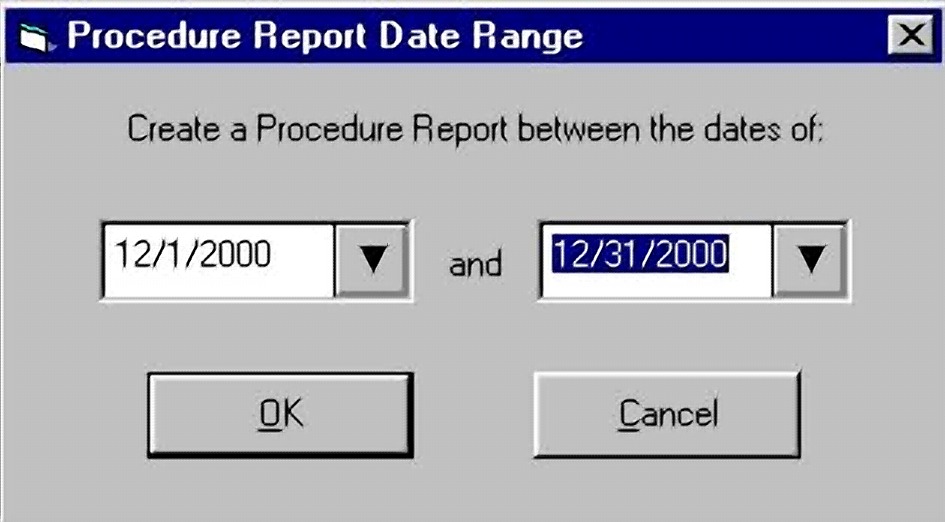
We can select a procedure report
for any date range.
The report will show a list of all
procedures performed during that time.
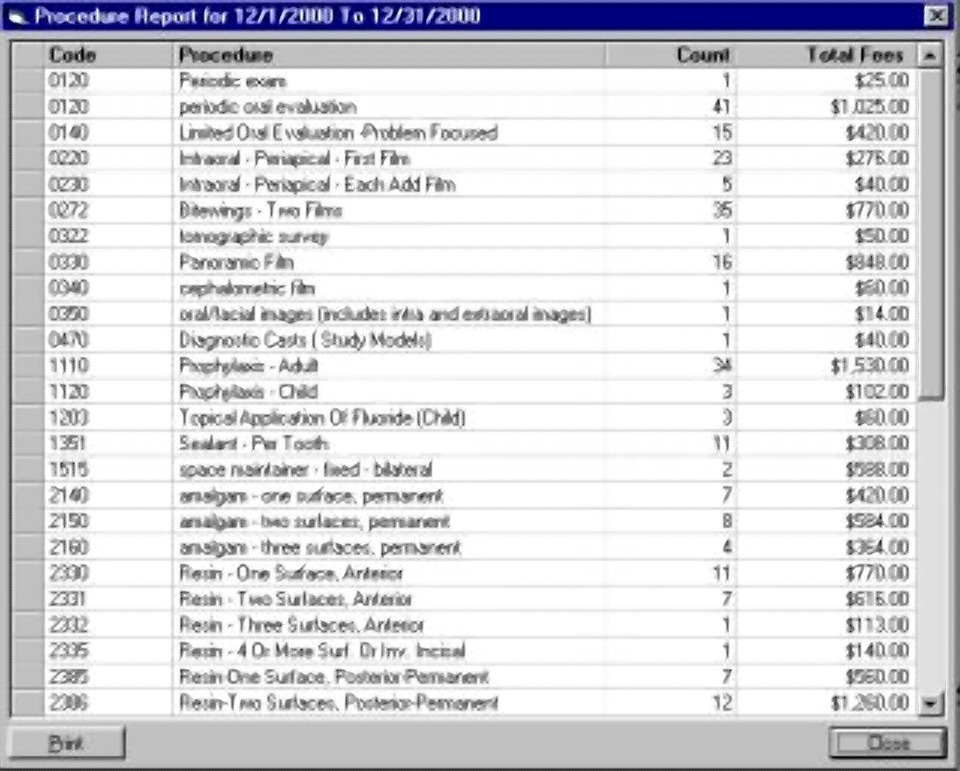
It will show how many of each procedure was
performed and the total fees for the procedure.
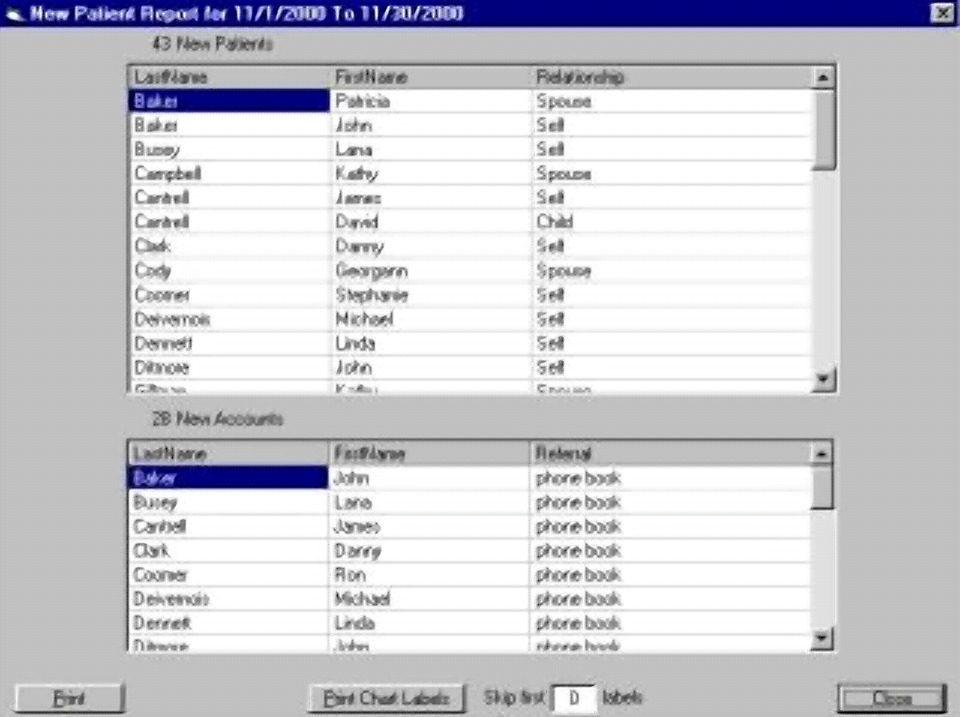
New Patients Report
Recall Reports
The recall report can be accessed from the
report menu. When we click on the recall report menu item, we're given
three options.
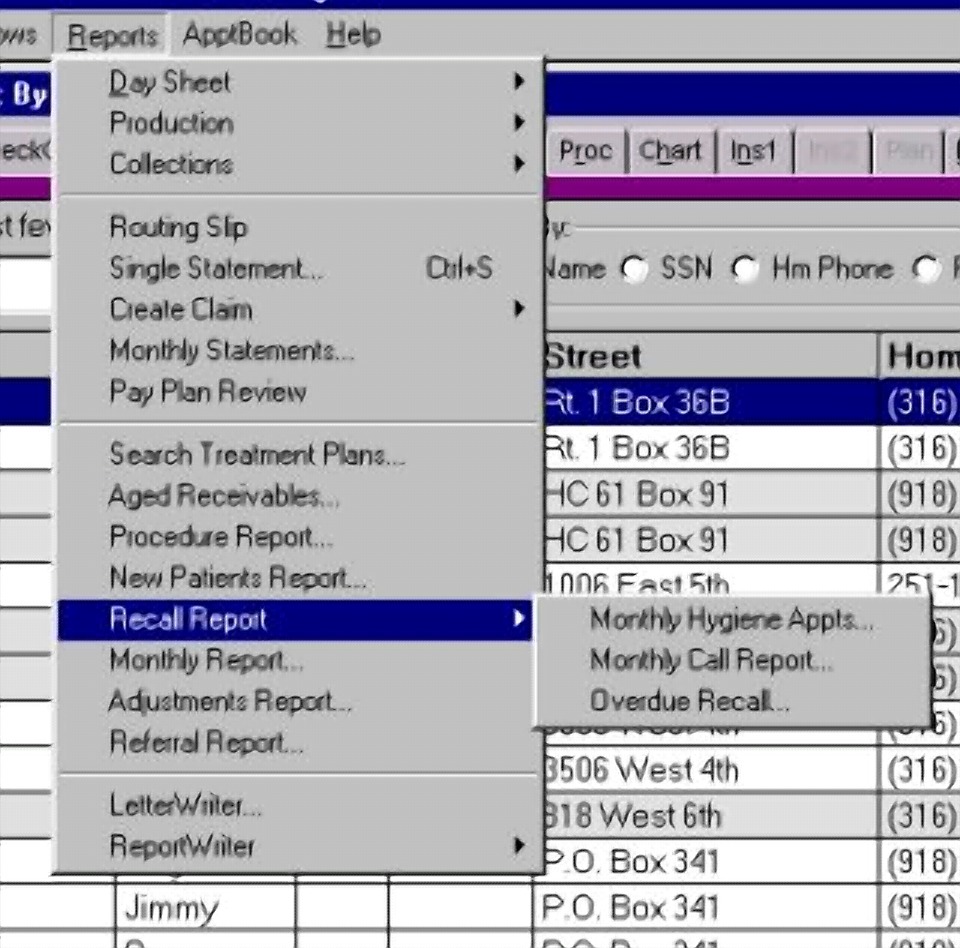
Monthly Hygiene Appts.
The first options is the monthly hygiene
appointments report.
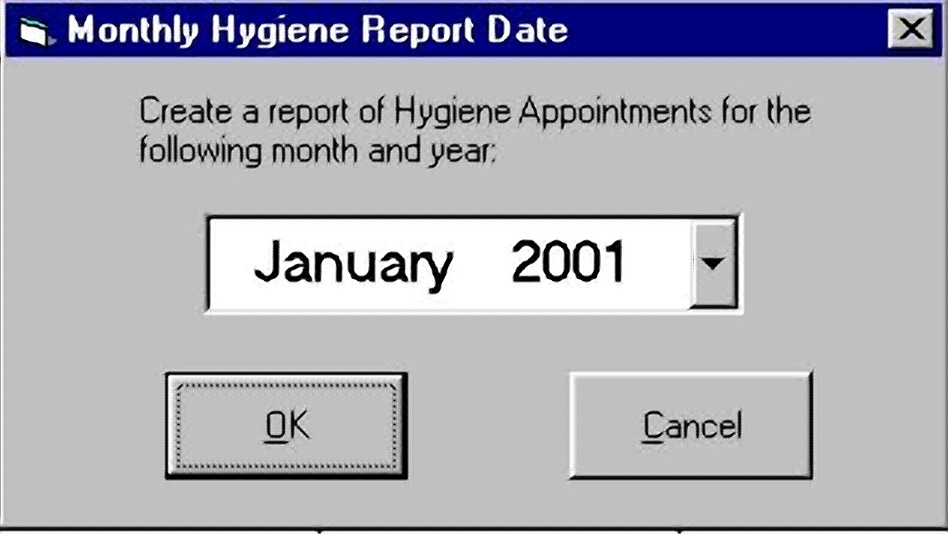
When we
select this, we can choose to generate a report of all hygiene
appointments for any month of the year.
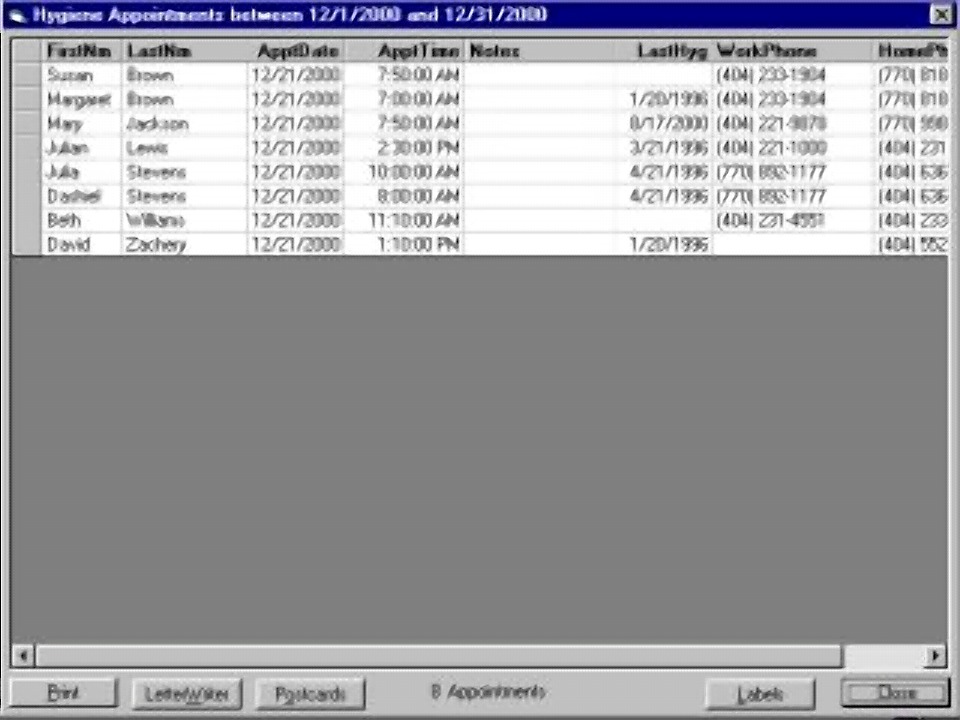
We can use this report as a call report to confirm future hygiene
appointments. We can also use this list of patients to generate mailing
labels or letters in the letterwriter system.
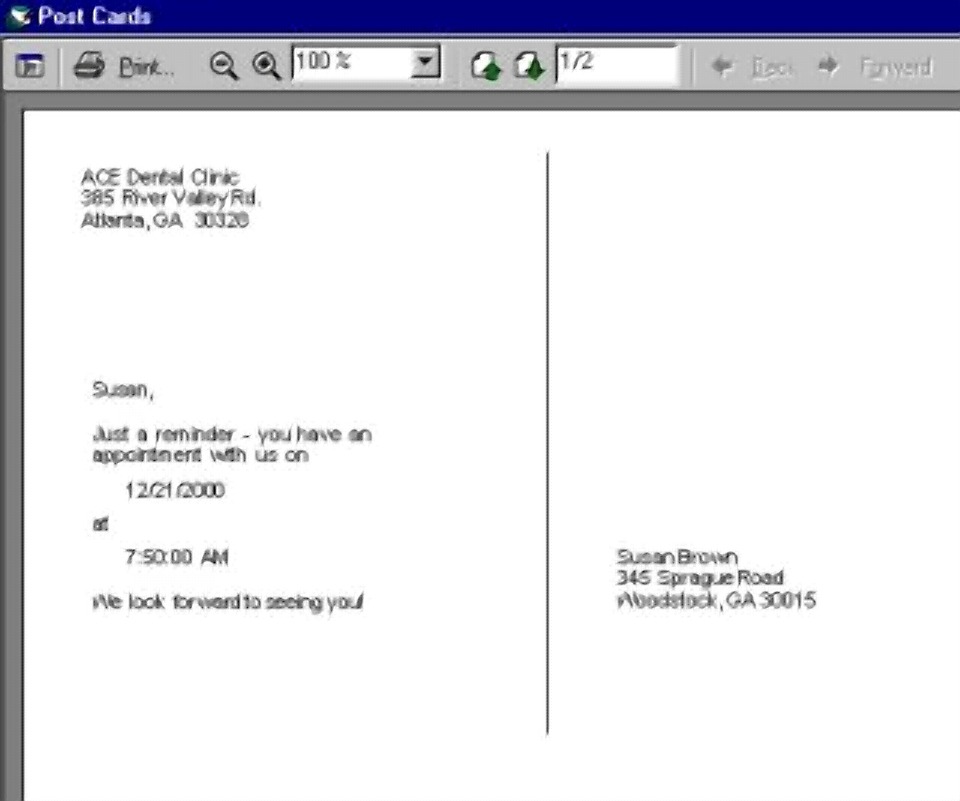
We can also generate post
cards.
Monthly Call Report
The next item under recall report is the monthly call report. This allows
us to generate a list of patients who are due to be called
during any given month.
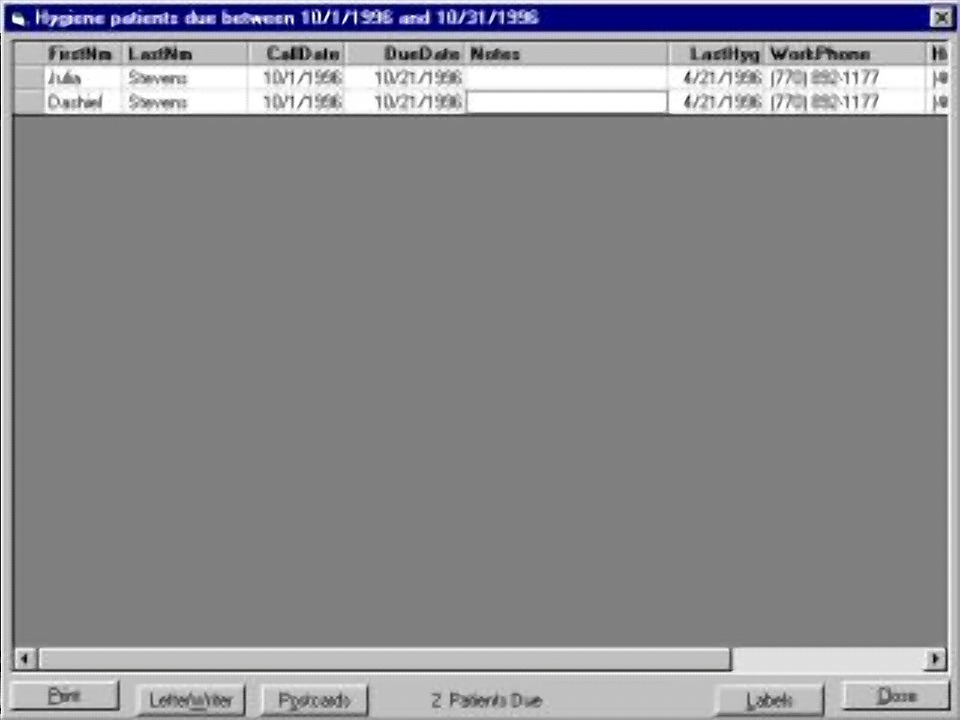
These patients are due
in the selected
month but do not currently
have a hygiene appointment.
Overdue Recall
The next item in the recall report is the
overdue hygiene report.
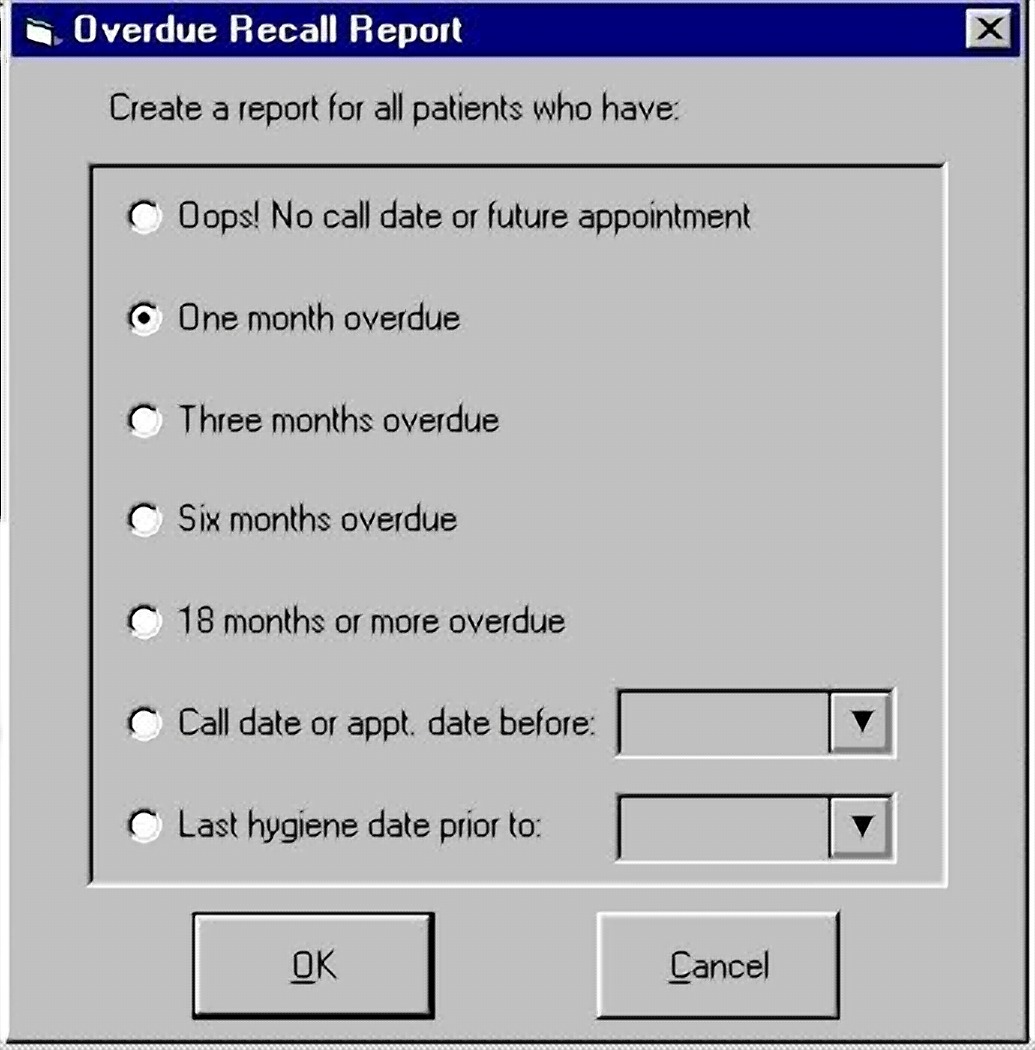
This allows us to generate a list of
patients who are overdue for hygiene appointment. When we select this, we
are presented with several options. The first option is the overlooked
report. This generates a list patients who have no call date or future
hygiene appointment. No patient should appear on this report hence the
name "oops".
After that, we can generate a report of
those patients who are one month overdue, three months overdue, six-month
overdue, or 18 or more months overdue. After we generate each list we may
choose to call these patients on the telephone, generate mailing labels to mail
cards, merge these patients into a letter using the LetterWriter, or print to
postcards.
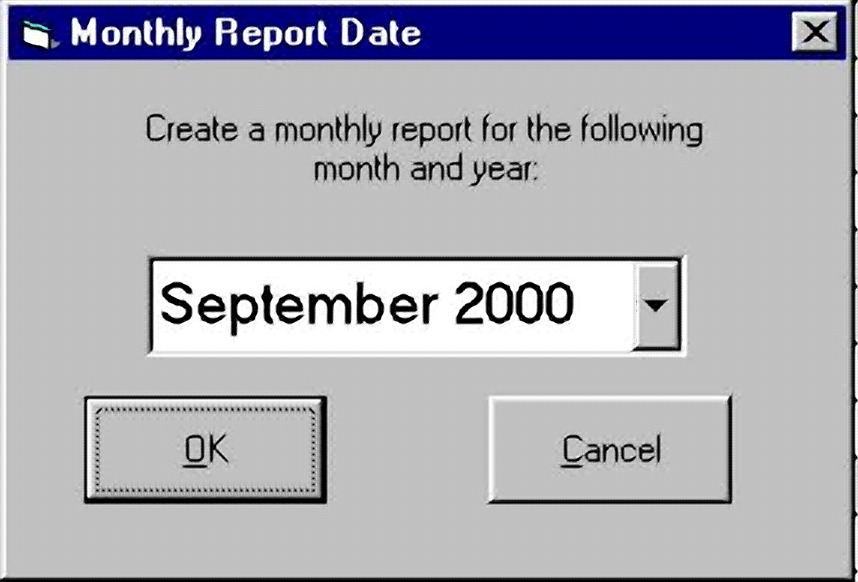
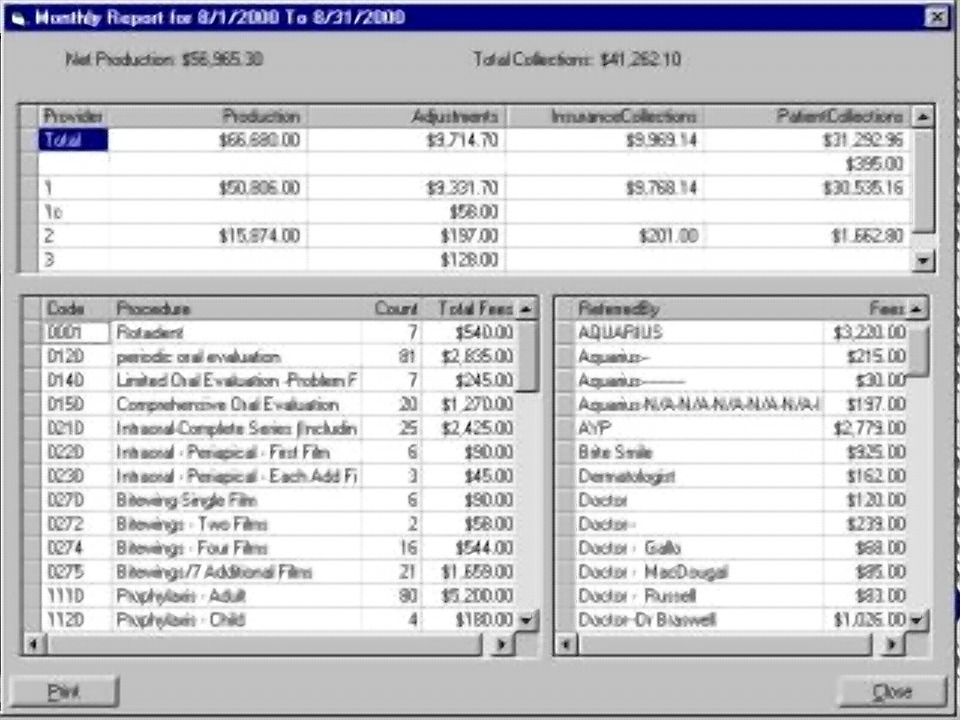
Monthly Report
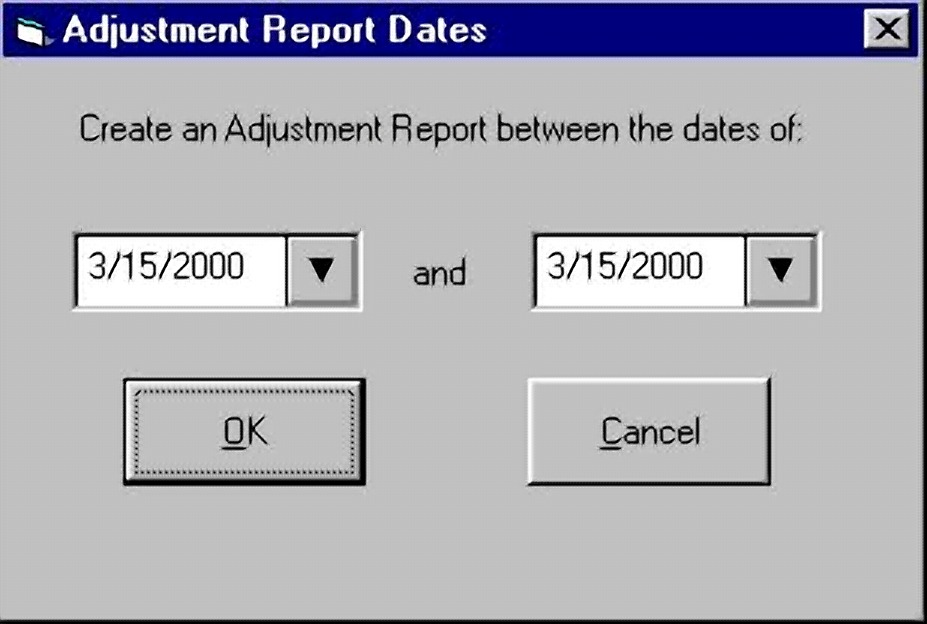
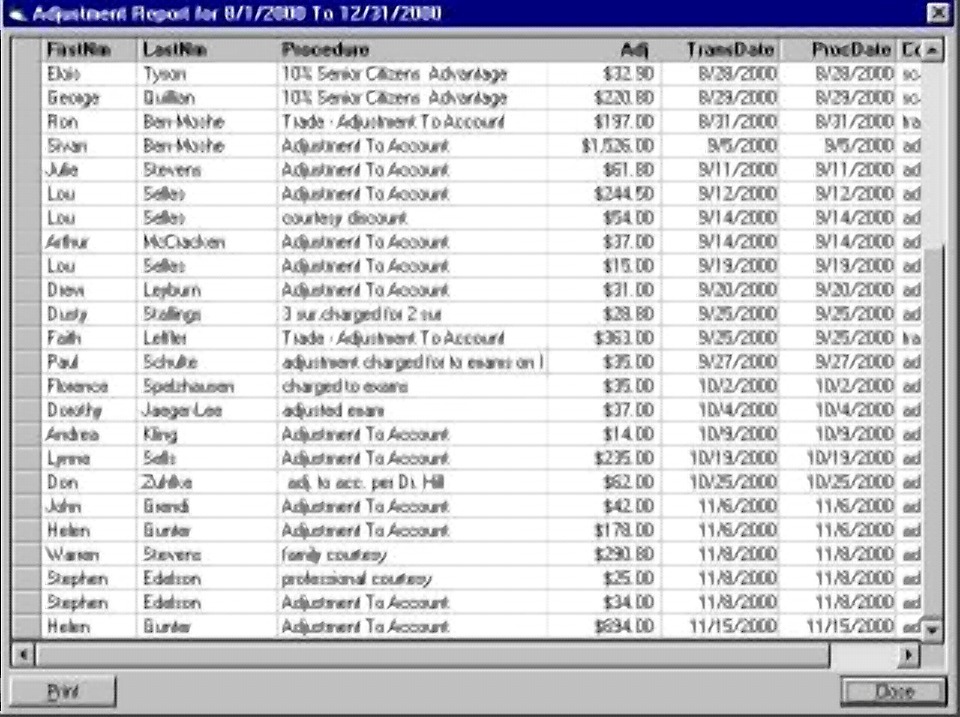
Adjustments Report
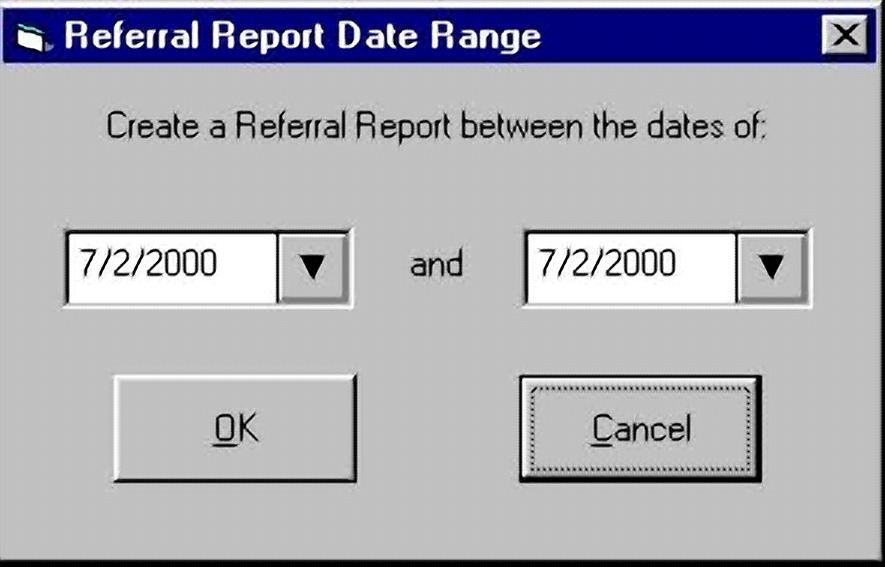
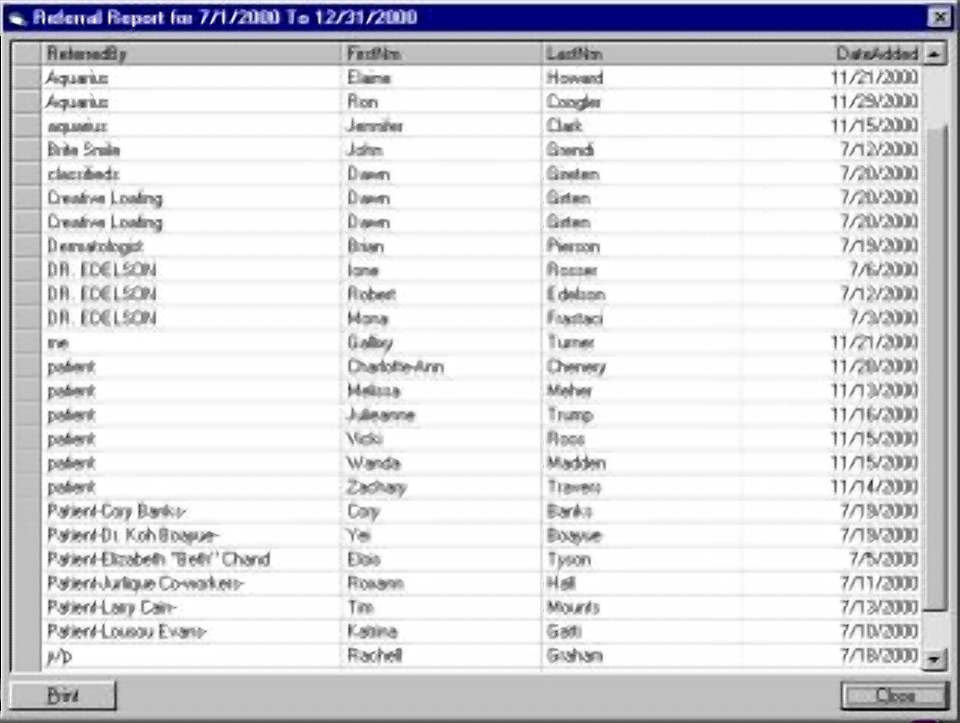
Referral Report
LetterWriter
This system allows us to merge the
fields from our database into a letter to send the patients.
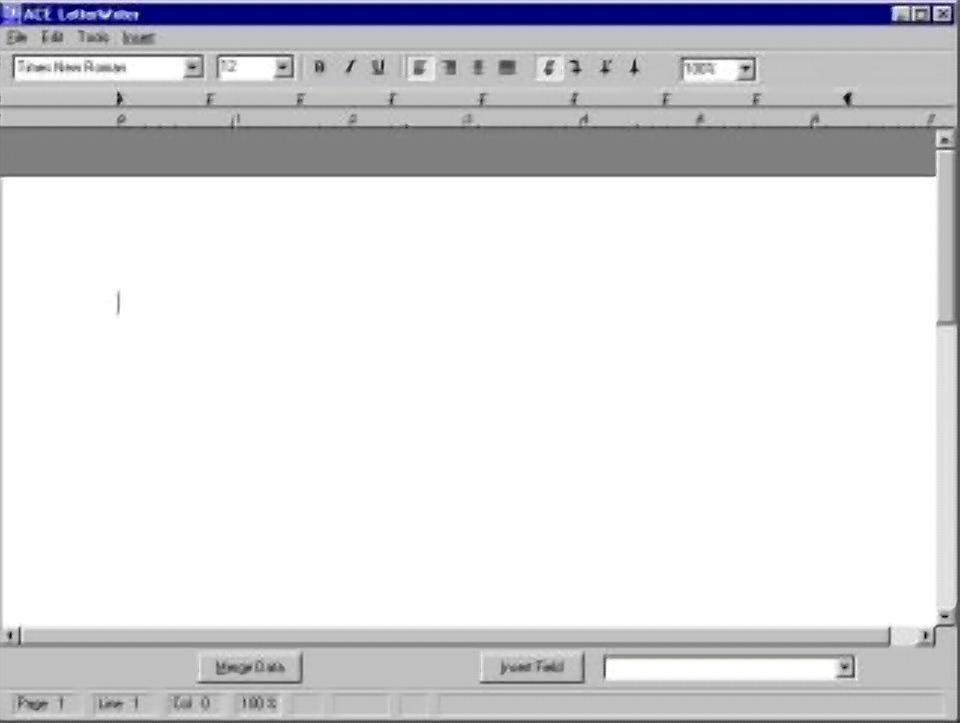
To get an existing
letter, pull down the file menu and select open. We can select the letter
for merging, create a new letter, or edit an existing letter.
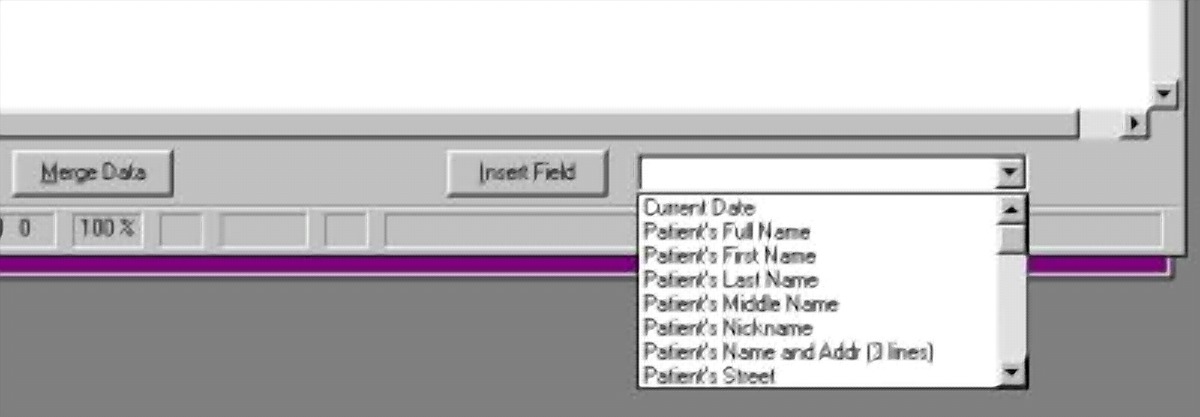
Within the letter we can create merge
fields. We simply select the fields we want from the insert fields list,
and press the Insert Fields button. When we press the Merge button, the
current patient's information will be shown in the letter.
When we've completed the letter, we pull
down the file menu and save the letter. In several instances throughout
the program we can generate a list of patients and press the LetterWriter
button. This will merge everyone in the list to a separate letter.
Otherwise, we can select an individual patient on the find patient window and
select letter writer to generate one letter for this patient.
Our spell checking will check the spelling
as we type. If we choose, we can spell check the entire letter using the spell
check item under the Tools menu. We can also select the word and choose
the Thesaurus item under the Tools menu. We can insert images in our letter
using the Insert option under the Insert menu. We can use this to include
a logo for the dental practice, or images of x-rays or
photos.
Form
The ReportWriter form menu option allows us
to create our own reports from the databases. When we select this menu
item, a window will open allowing us to select which database to choose.
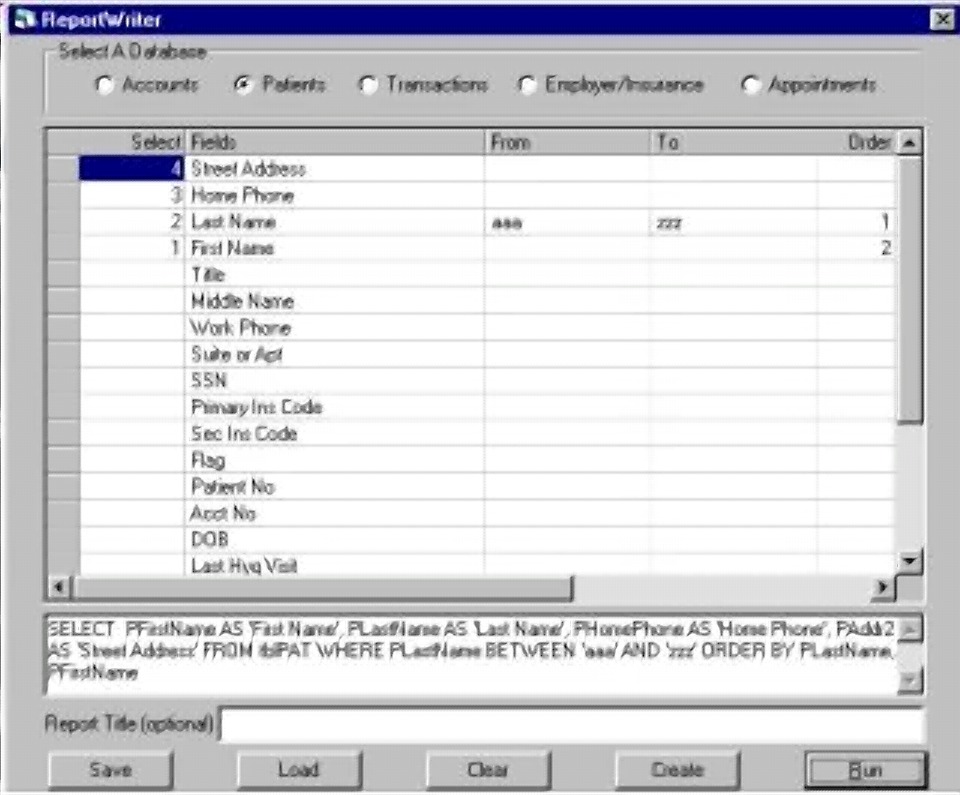
All of the fields from the database we've chosen are presented. We place a number
next to the field that we want a column in the report to appear. The columns
will be in the order numbered. After we have selected the columns for the report, we
place the criteria in the From and To columns. For example, if we put an "aaa" in
the From column and "zzz" in the To column of the LastName, we will get report
of all names. We can force the report to sort by placing a number in
the order column. We can sort by more than one column. For
example, if we want to sort by last name then sort by first name within
last name, we would place a 1 in the last name column and
a 2 in the first name column. We then press the run button
to generate a report.
We can see a good example of how this works by pressing
the help button. The create button allows us to generate the statement
that will run the report. This can be helpful if we want to modify that
statement. If you want to create a highly specialized report, you can contact
ACE Dental. We can help you create the appropriate statement which you can
save for later reuse.
We can save this report with the same
button. Later, we can load the report with the load button to
rerun.
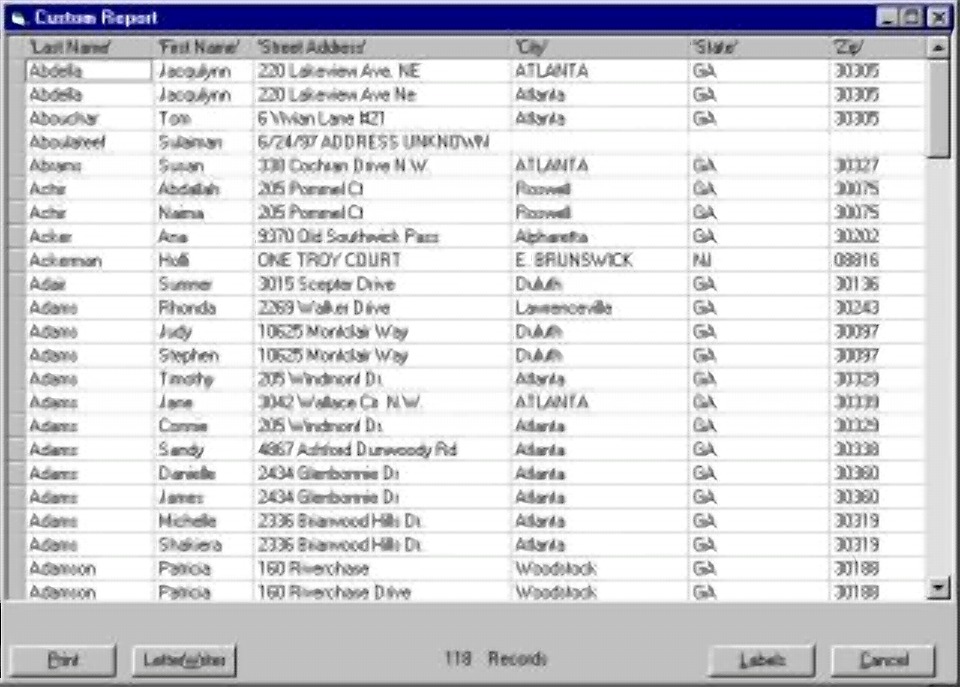
After we run the report, the results can be
printed, merged into the LetterWriter, or printed as mailing labels. To
generate mailing labels, we must be sure to include the patient number from the
patient database or the account number from the account database in our
selection criteria. When we do this, all of the necessary data for mailing
labels will be retrieved from the database. In other words, we do not have
to select Address, City, State, and Zip.
English
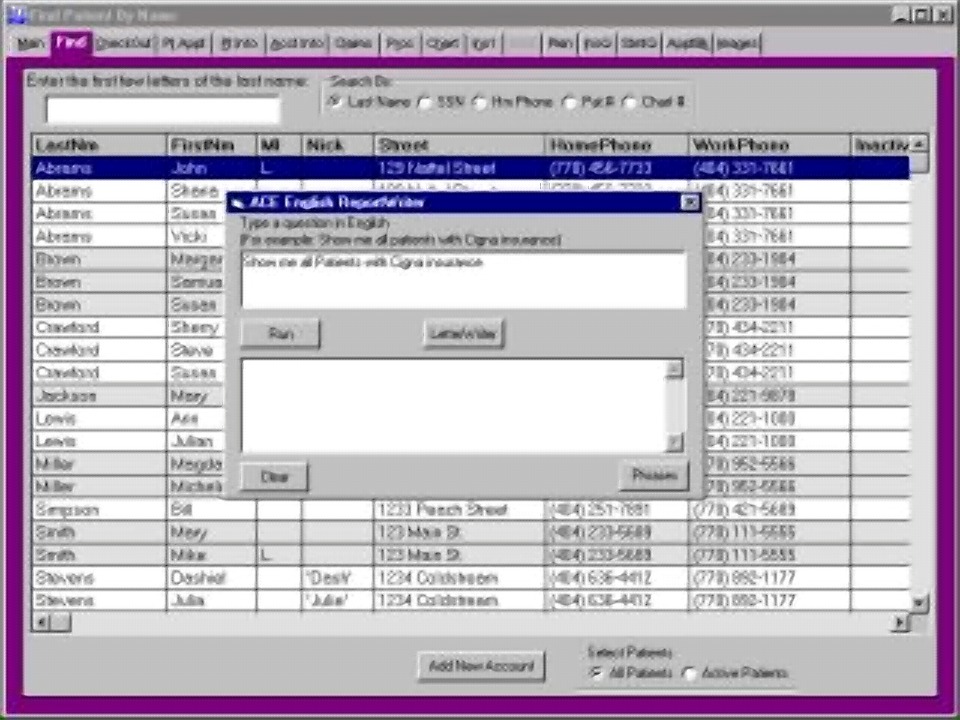
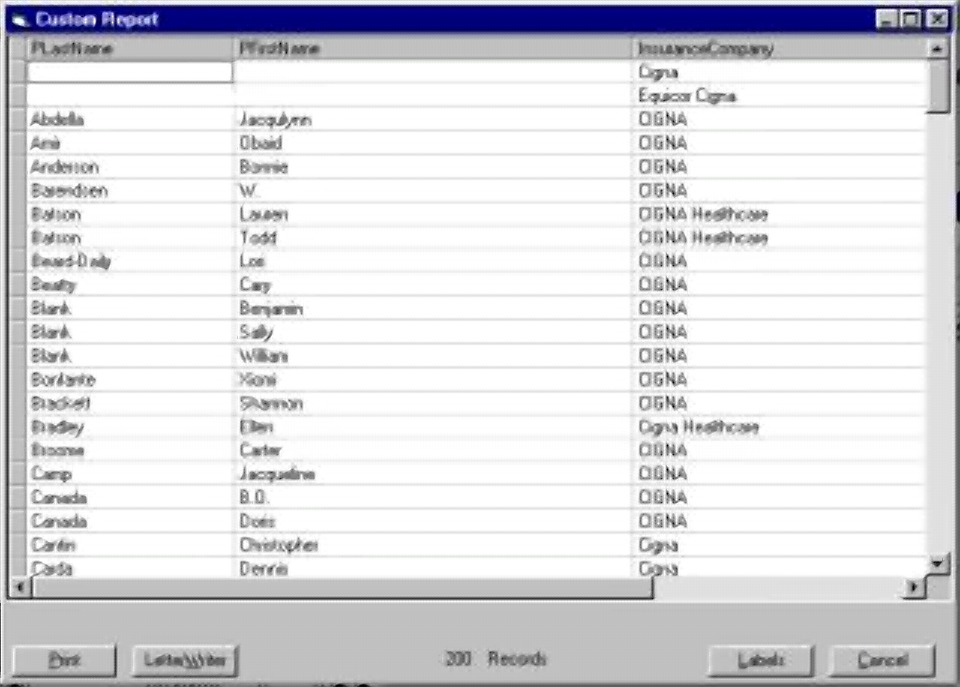
The English report writer allows us to
create a report by typing the question in English.
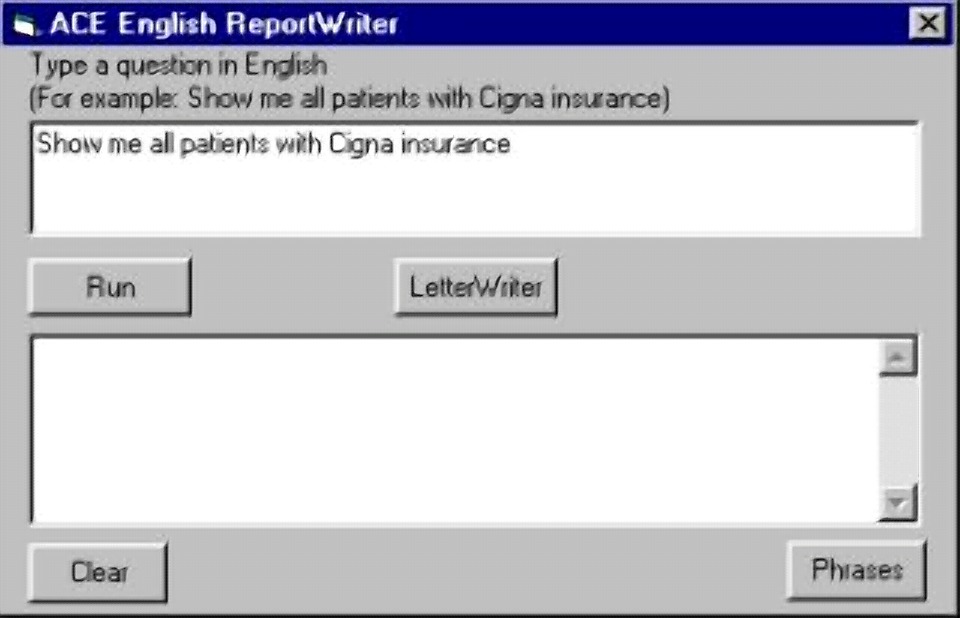
The key to using this
report writer is in the phrases that we defined.
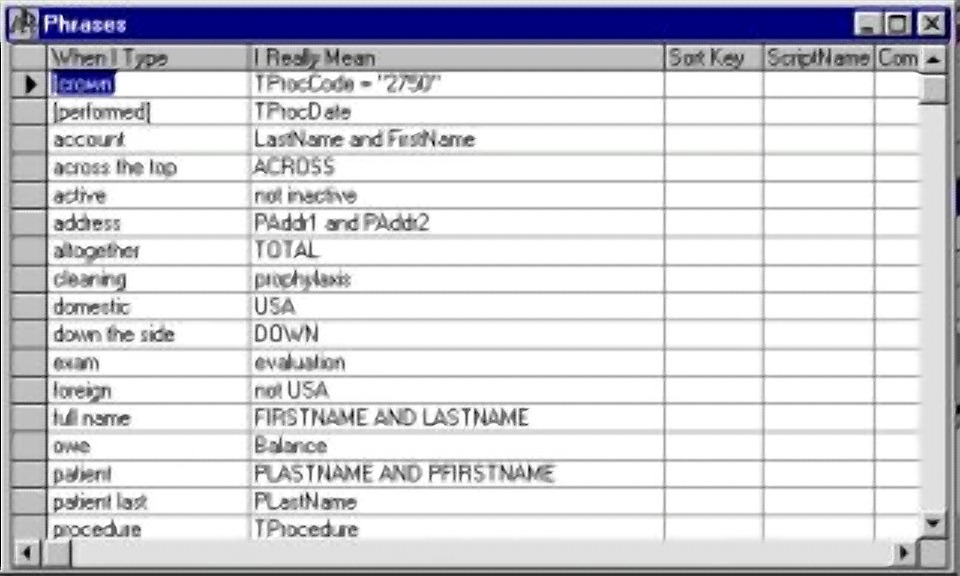
By pressing the phrases button, you can see
some of the phrases we have already defined. If you need assistance with
this please call ACE Dental support.
Appointment Book
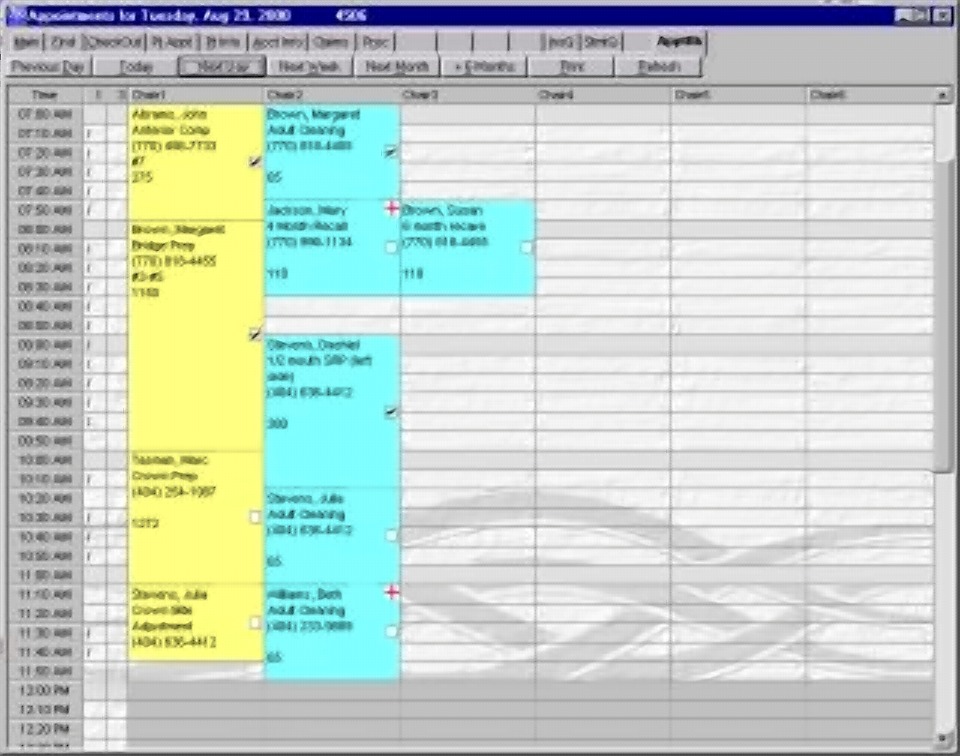
To use the electronic scheduling system, we
simply click on the appointment book tab at the top of the screen. This
will take us to the appointment book. The schedule will either be for
today or the last date we accessed.
Before we began using the appointment book,
we should make sure that all of the settings on the setup screen are
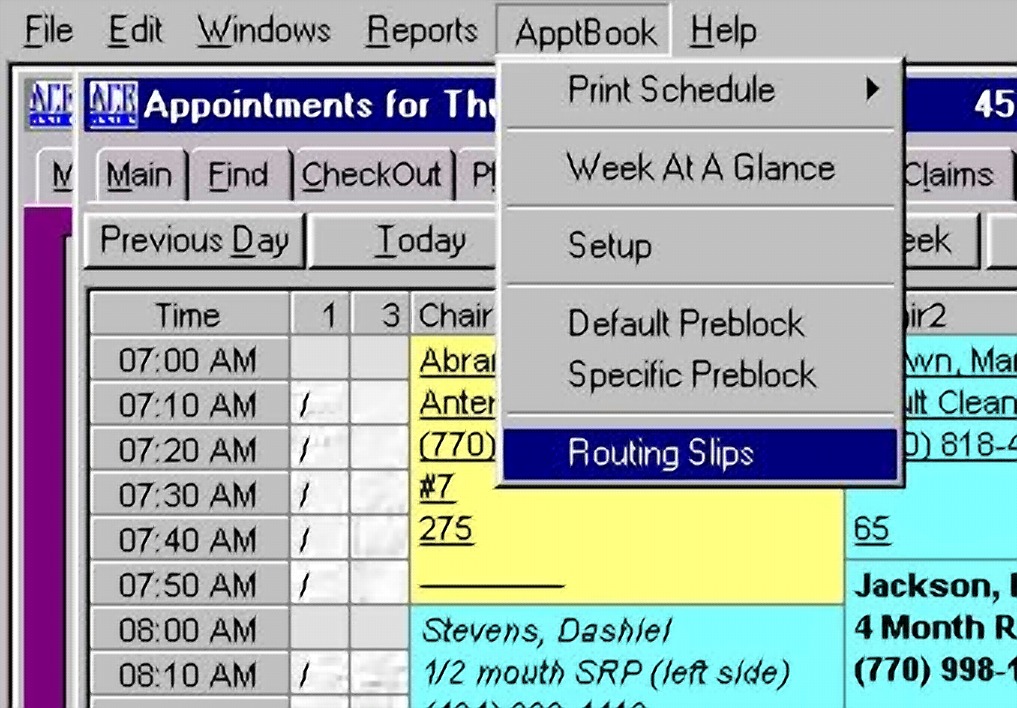
appropriate. Click on the appointment book menu in the top menu bar and go
down to the setup menu item. This will open the setup
window.
Setup
Before we began using the appointment book,
we should make sure that all of the settings on the setup screen are
appropriate. Click on the appointment book menu in the top menu bar and go
down to the setup menu item. This will open the setup
window.
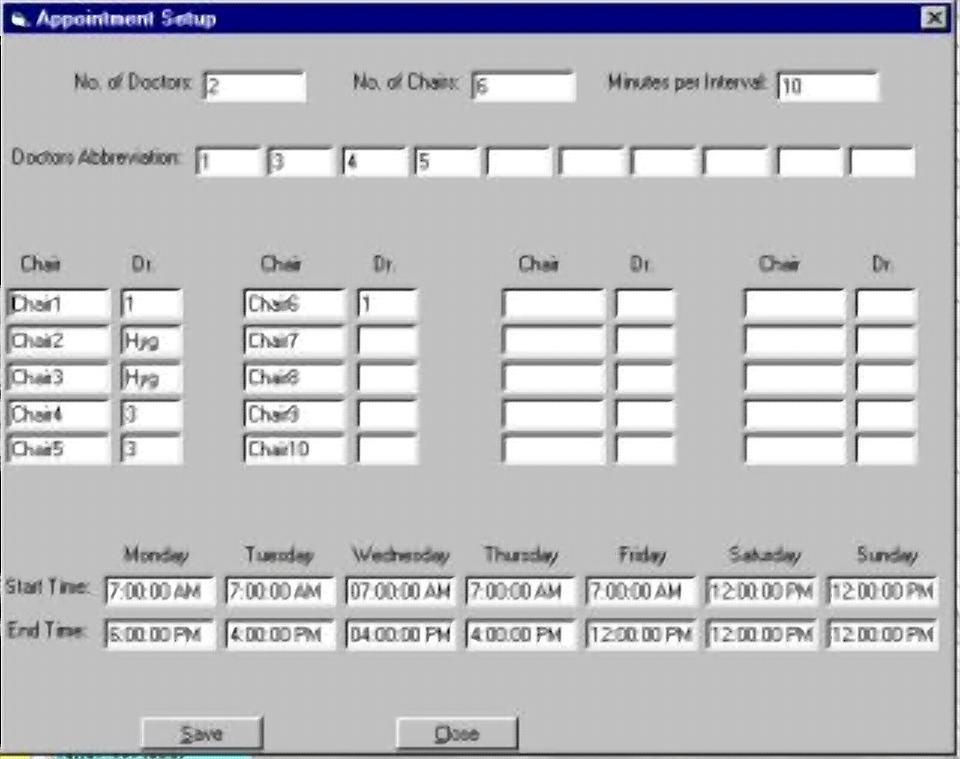
We first enter the
number of doctors in this practice. One column for each doctor will be
created on the appointment book screen for tracking the doctors time.
We then enter the
number of chairs. This will create one column on the schedule for each
chair or treatment room. Keep in mind when you enter this number that you
should not change this number in the future without doing a conversion on the
appointment database. (Please call ACE Dental support for assistance with
this.) Therefore get is a good idea to enter as many chairs or treatment rooms
as you think the practice will have in the future as well as today. After
all, it usually a good idea to have at least one extra column for
overflow. If you have two, three, or four treatment rooms, we would
suggest that you use six for your scheduling layout.
We can indicate the
number of minutes per interval for the practice scheduling. If you're
practice is currently scheduling on 15 minute increments, we and most practice
management consultants recommend that you change to ten minute increments.
This number should not be changed after appointments have been entered into the
system. If you wish to change this number, please call ACE Dental for
assistance.
If we had indicated
more than one doctor in the practice, we should use an abbreviation for each
doctor shown. This can be initials or simply 1, 2, etc.
We can now enter a
name for each chair or treatment room and the abbreviation of the doctor who
will use that room. Each time we make an appointment for that chair, that
doctor will be the default doctor. we can change that doctors abbreviation
at the time the appointment is made.
We should indicate the
starting time and closing time for each day of the week. If a practice is
only open occasionally on a certain day, we should still indicate the starting
and closing time for that day.
Press the save button
when the information is correct.
Scheduling
To schedule an appointment, we must first
select the appropriate day and for this appointment. There are two ways to
find a particular date. We can press the buttons at the top of the screen
under the tabs. This will allow us to go to the next day, week, or
month.
To go to a particular date,
we can use the calendar. To make the calendar appear, move the cursor to the
far left edge of the screen.
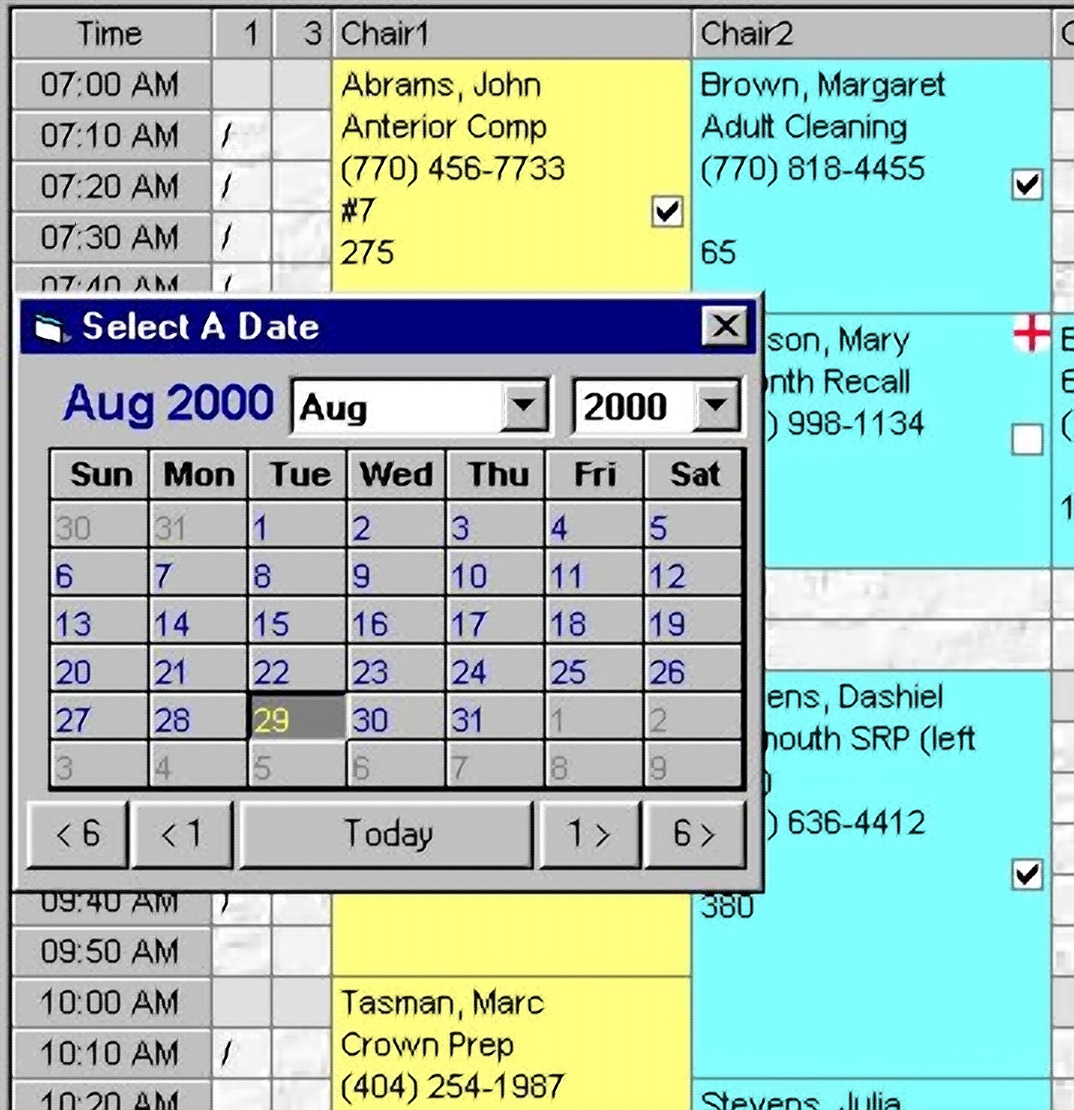
When the calendar appears, if you are on the correct a
month, click on the day you want. You can move the calendar months forward
or backward by clicking on the +1, -1, +6, or -6 buttons. To return to
today's date, press the today button.
You'll see the date for the
appointment schedule at the top of the screen. When we have the correct
date shown, select the appropriate time and appropriate chair. Click once on the
chair column.
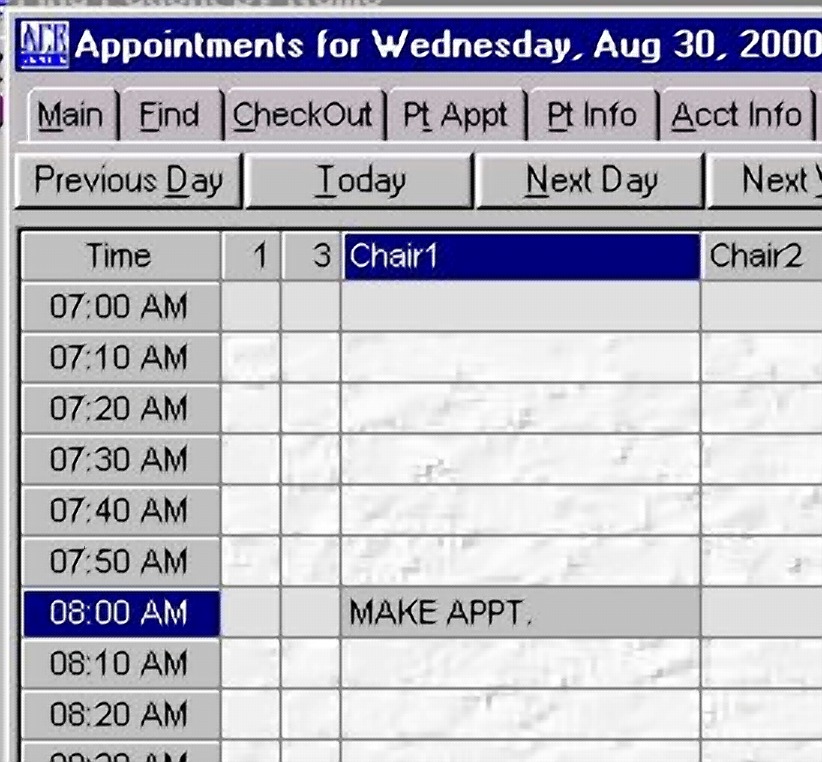
A make appointment button will appear and the start time will be
highlighted. If this is at the correct time and chair, click the make
appointment button.
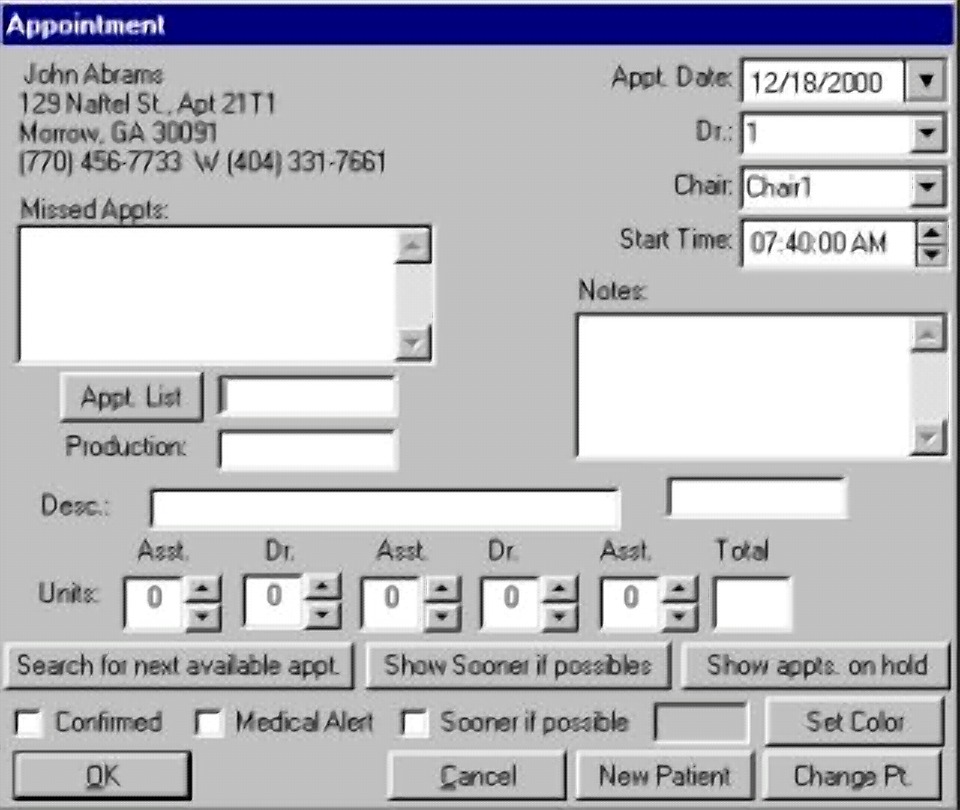
The
Appointment Detail Window will appear.
We
are now ready to create an appointment for that patient. If this is the
wrong patient, we can click the change patient button at the bottom of this
window, and select another patient.
Change Patient
If we click on the Change Patient button, a
small find patient window will open.
This window works exactly like the large find patient
window we've seen before. Type a few letters of last name and select
the appropriate patient name. Click the okay button. We are now ready to create
appointment for that patient.
Appointment Detail
We can now enter abbreviation for the type
of appointment to the right of the appointment button. If we do not know
the appropriate abbreviation, we can click the appointment button.
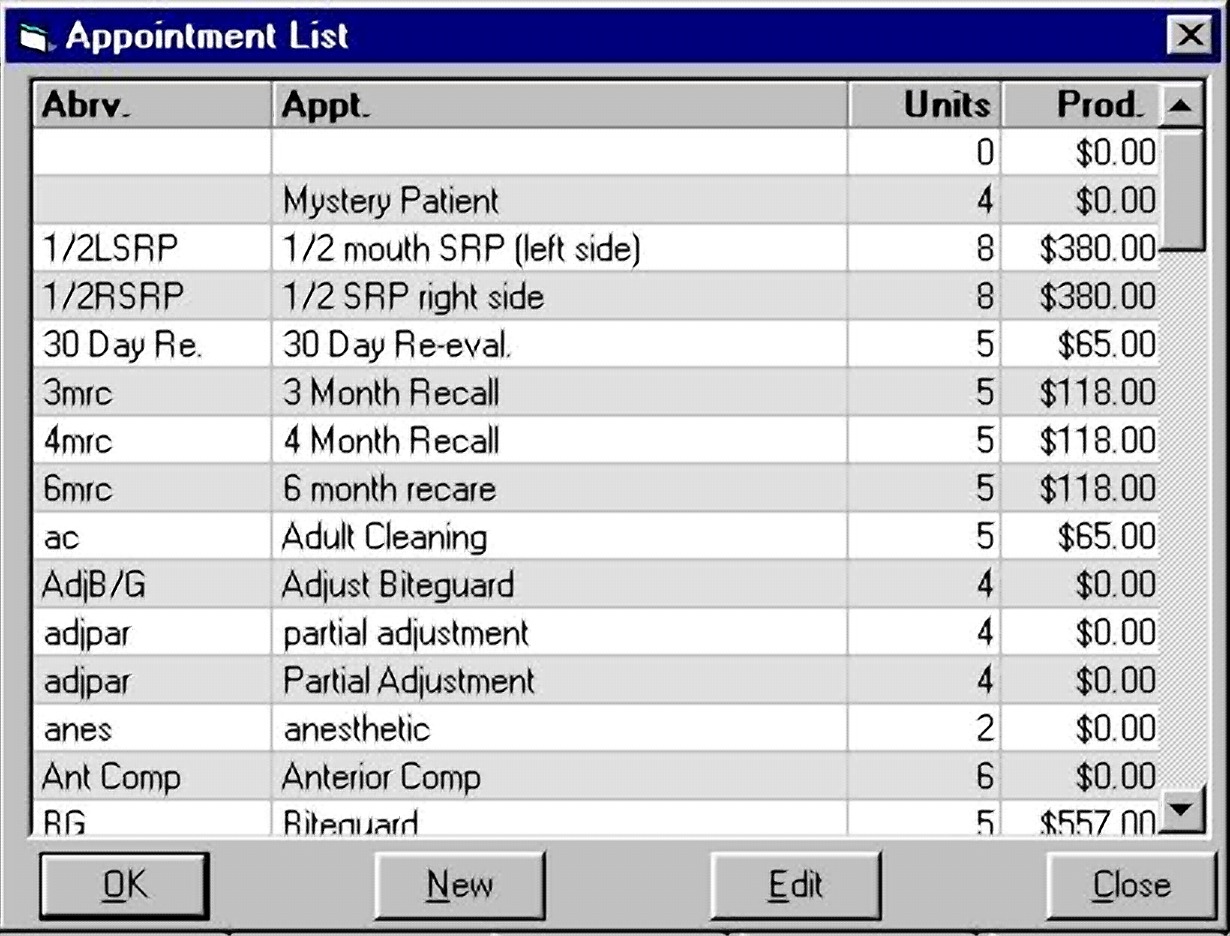
This will open a small window where we
can choose the appropriate appointment. Simply select the appointment you
want and press the okay button. If you do not see the type
of appointment you want, press the new button.
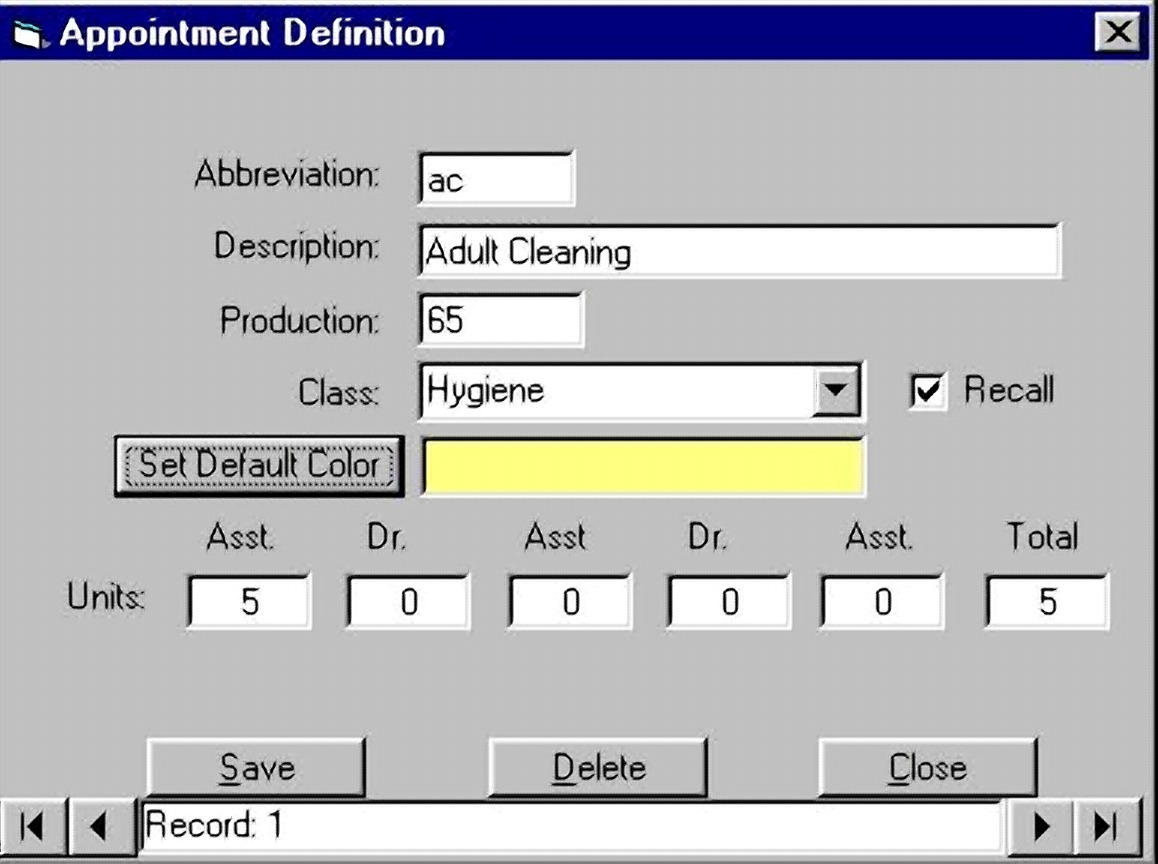
This will open another window that allows us
to create the appointment definition in the appointment definition
database. We simply enter the description and a short abbreviation.
Click on the double arrow button to select a class for this appointment.
This class is important in terms of pre-blocking.
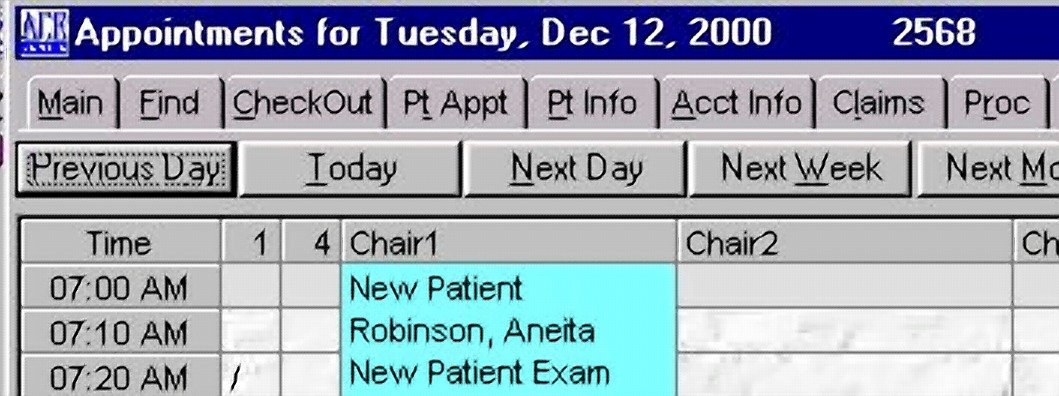
We can enter
the estimated production for this type of appointment. If we enter the estimated
production, the total for the day will be shown that the top of the appointment
window.
We do not place a $ on this figure so others will not know its
meaning.
We then enter
the number of units for assistant and doctor time for this appointment.
For example, if we are using ten minute increments, and this appointment is a
crown preparation, we might enter one unit for 10 minutes of assistant time,
then one unit of doctor time for injection, then one unit of assistant time
while the injection takes effect, then three units of doctor time for actual
crown prep, then one unit of assistant time to prepare the temporary. This
breakdown of the assistant vs. doctor time allows us to schedule the doctor's
time more efficiently. We can also set a default color for a particular type of
appointment.
When the
appropriate appointment type has been selected, all of the information from the appointment
definition database will be entered on the appointment window. We can change any
of this information if we choose.
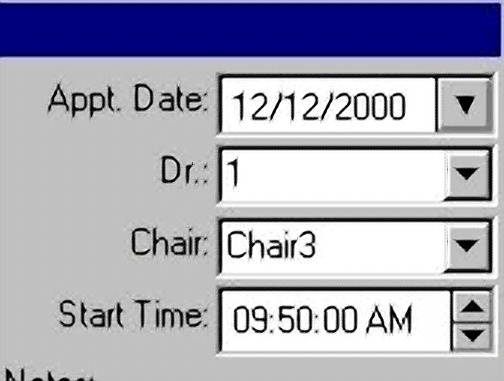
The date, doctor, chair, and start time are all
shown in the upper right corner.
When we have the appropriate chair, date,
and time, we can press the okay button. If we want to search for the next
available appointment based on some criteria, we can press the search
button.
Appointment Search
If we want to search for the next available
appointment based on some criteria, we can press the search
button.
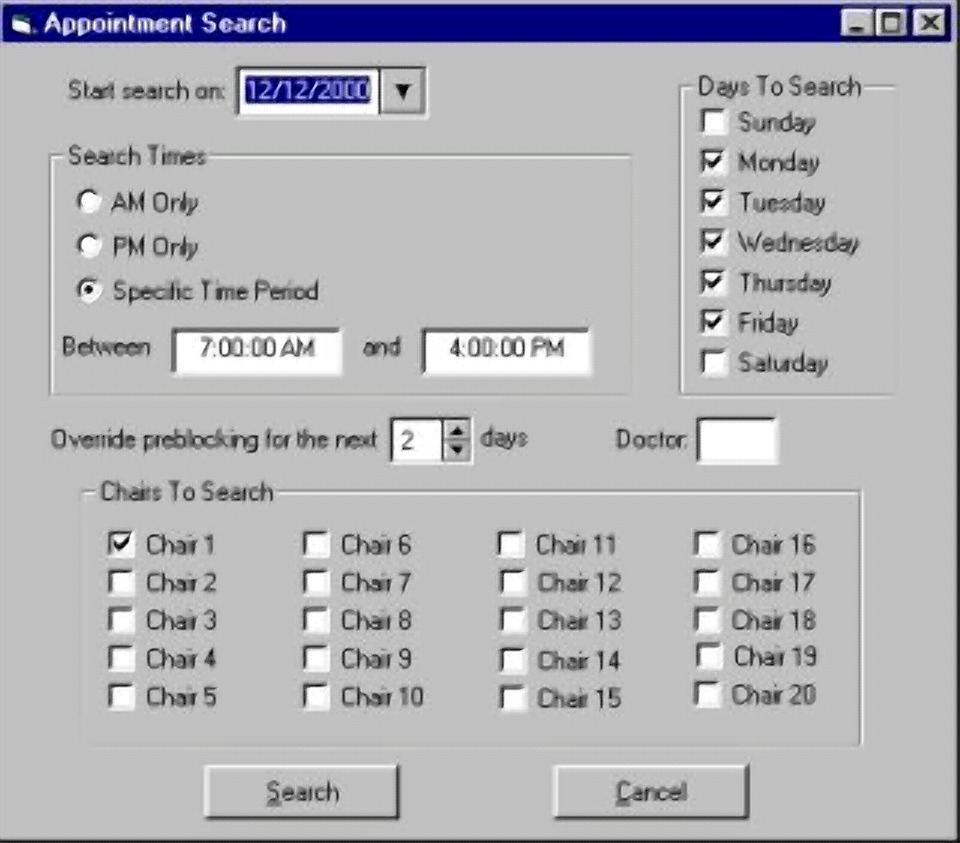
The appointment search window allows us to
search for the next available appointment time that meets our criteria.
For example we can specify that time period, starting date, day of the week, and
chairs to search. When we click the search button, the first appointment
that meets this criteria will appear. We can except this appointment or
keep searching for the next available appointment.
Sooner If Possible, On Hold
An appointment can be checked to be seen
sooner if possible.
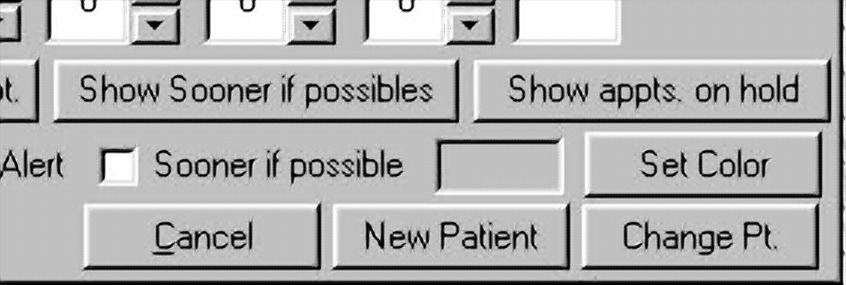
These appointments
will be shown in a bold font.
If we have a
cancellation, we can click on the "Show Sooner if Possibles" button to see a
list of these appointments.
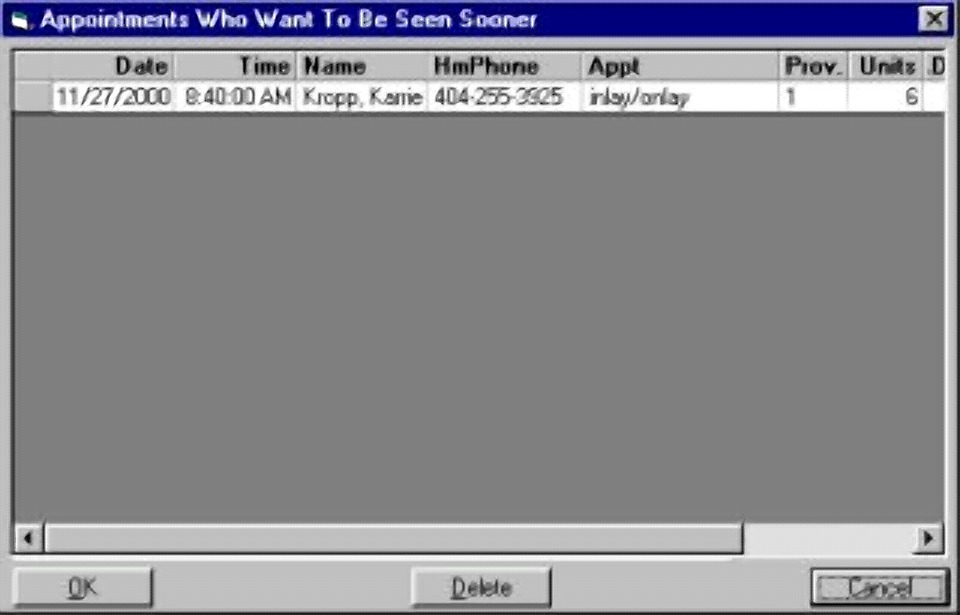
They can then be easily moved
to the cancellation time.
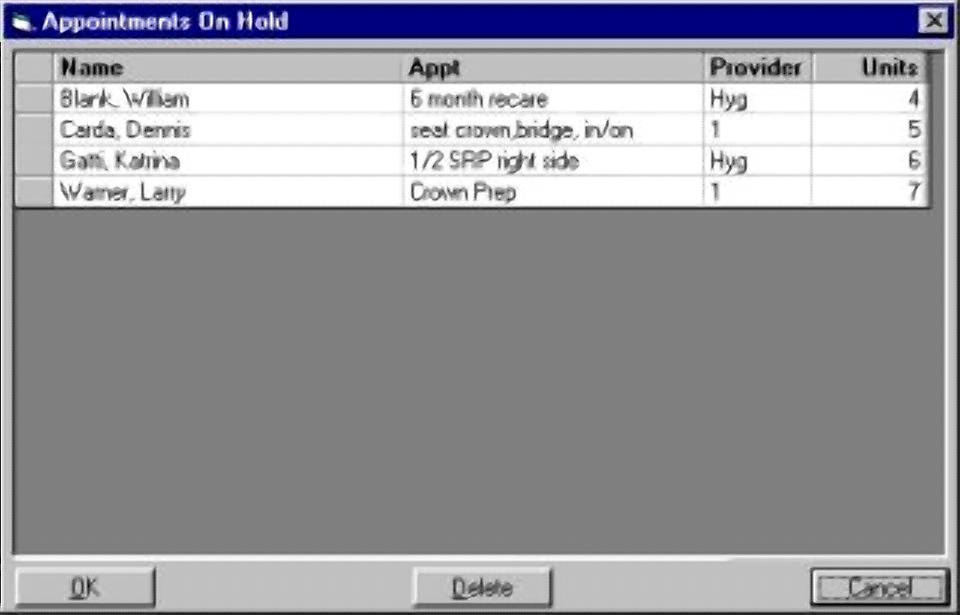
Appointments can also be placed on
hold. We can then select the appointments on hold button to see a list of
these appointments. They can then be placed without reentering all of the
information.
New Patients
If the patient is a new patient and not in
our database, we can click on the new patient button.
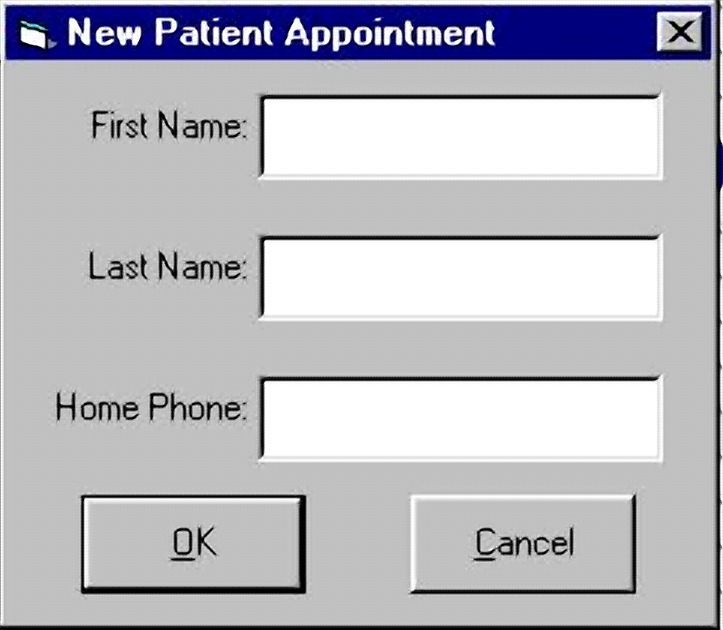
This will allow us to enter the name and
phone number for the new patient. This will appear on the appointment
screen. If this patient does not come into the appointment, we do not have
to delete a patient on the database. However, if the patient does come in,
we simply click on his appointment and click on the account information
tab. His name and phone number will automatically be entered and we can
continue the entry process.
Preblocking
Pre-blocking is available in the scheduling
system. From the appointment book menu at the top, click on default
pre-blocking.
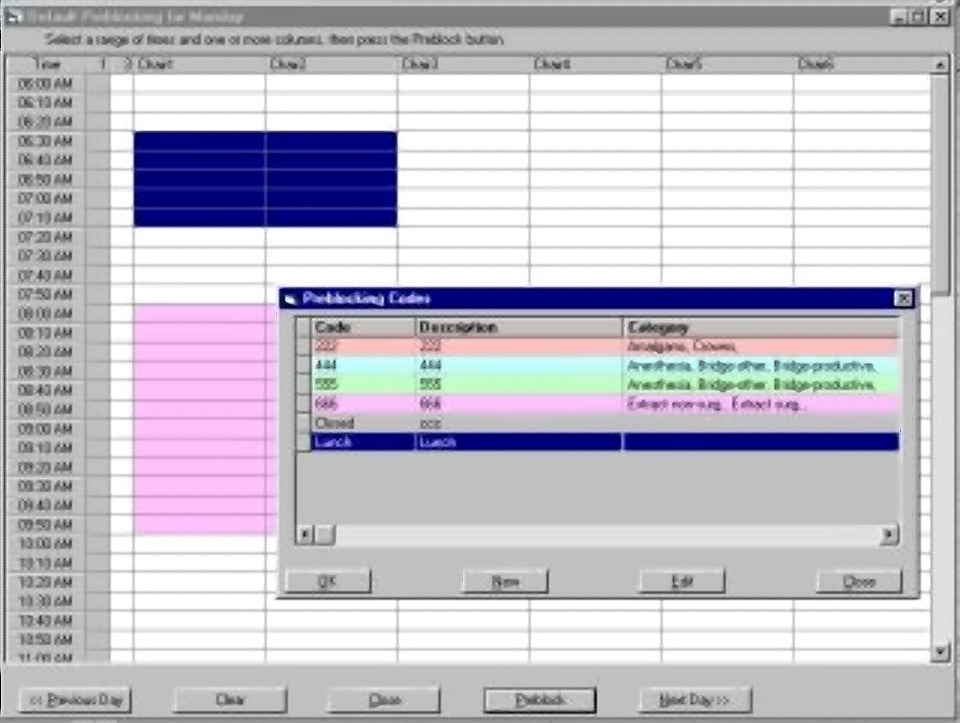
A template will appear for each day of the week. To pre-block
time on a given day, select block of time, then press the
pre-block button. You can then select an existing type of pre-blocking, or create
a new one.
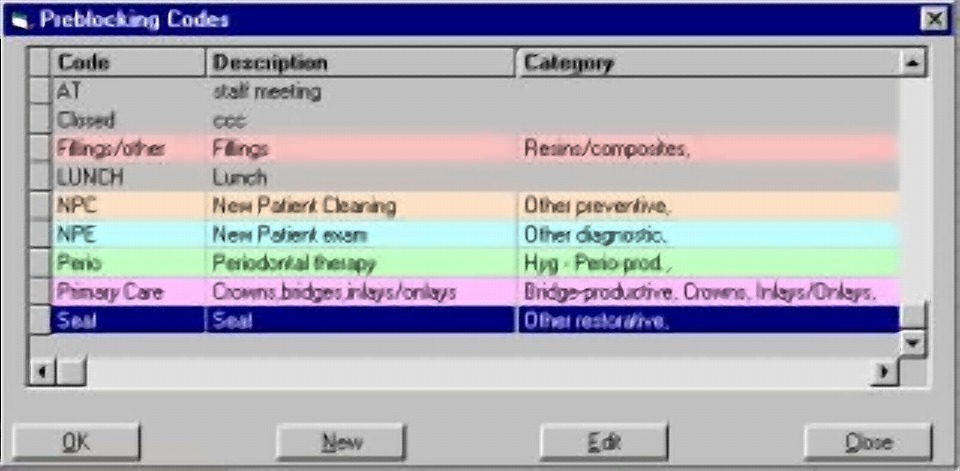
The key to creating a new pre-blocking type, is
the categories selected.
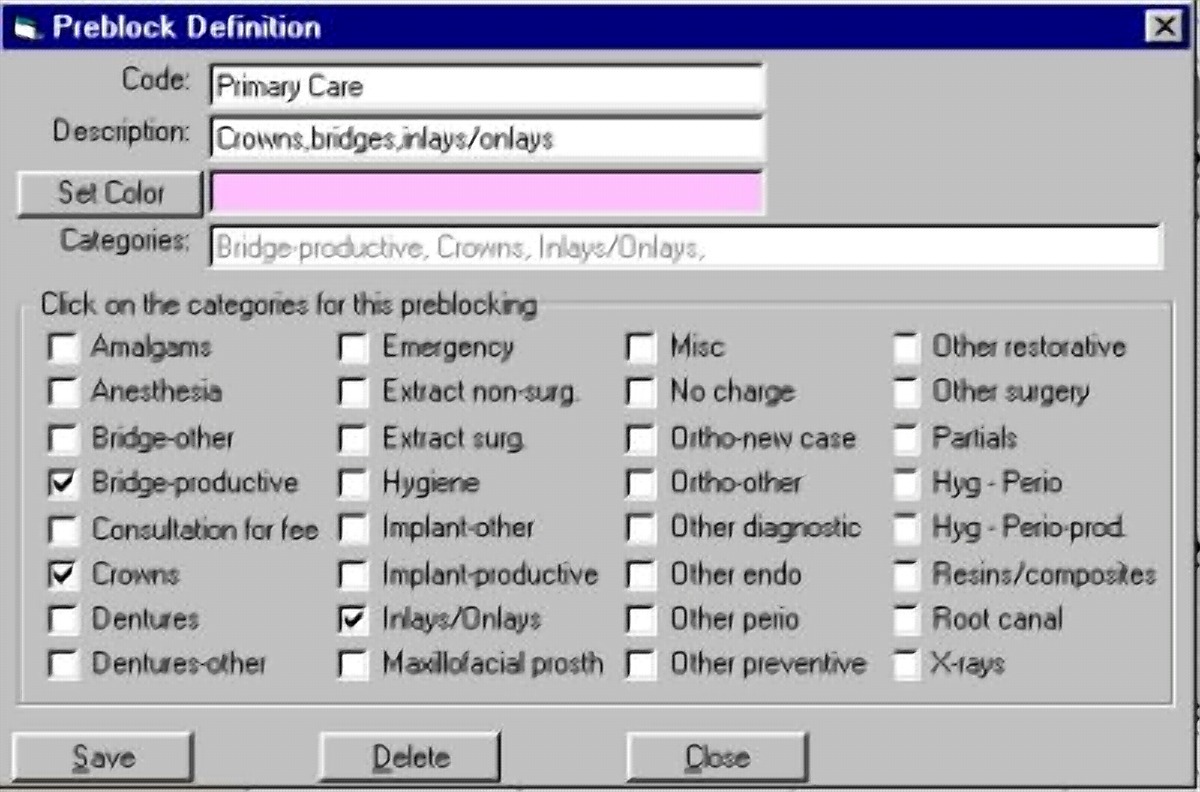
This is what will be matched when we
search for the next available appointment time. If you want to pre-block
for lunch, meetings, or any other time when they'll be no appointments, leave
the categories blank.
We can also do specific pre-blocking on a
specific date. For example, if we want to pre-block one morning for a
staff meeting, we select that date in the appointment book, and click on the
specific pre-blocking item under the appointment book menu. We can then
pre-block for that one day.
Normally, time is pre-blocked for new
patient exams and primary care treatment. When using the search mechanism
to locate appointments, the pre-blocking rules are honored except for the next
few days. You can specify on the search window the number of
days.
Changing Appointments
You can make any patient on the appointment
screen the active patient by clicking on their appointment one time. For
example, if you want to checkout a patient, rather than finding their name on
the find screen you can click on their appointment one time and then click on
the checkout tab.
To edit or delete an appointment, simply
double-click on the appointment. The appointment window will open with all
of the appropriate data. You can change the data to change the
appointment. Or, you can press the delete button to delete the
appointment.
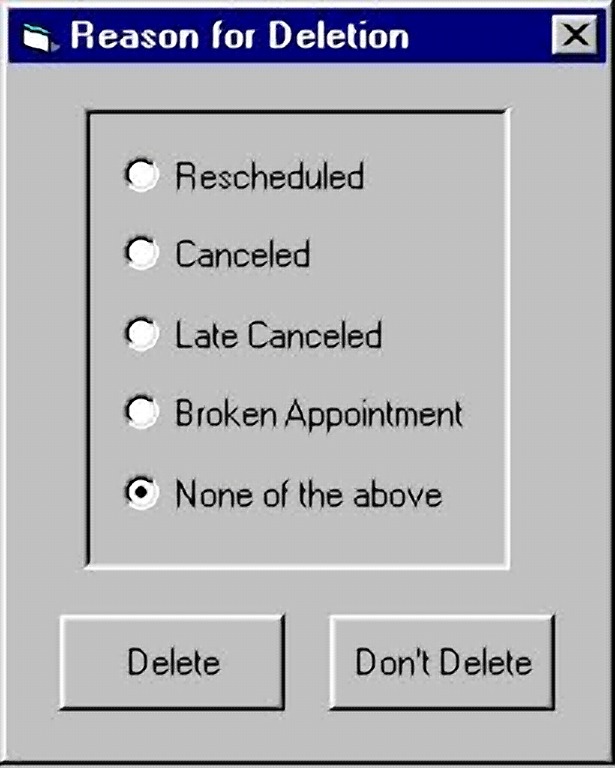
If you delete an appointment,
you'll be asked to indicate if it was rescheduled, canceled, or broken. This
information is tracked in the patient record.
You will see an indication of this the
next time you make appointment for this patient. This will give you an
idea of the reliability of this patient.
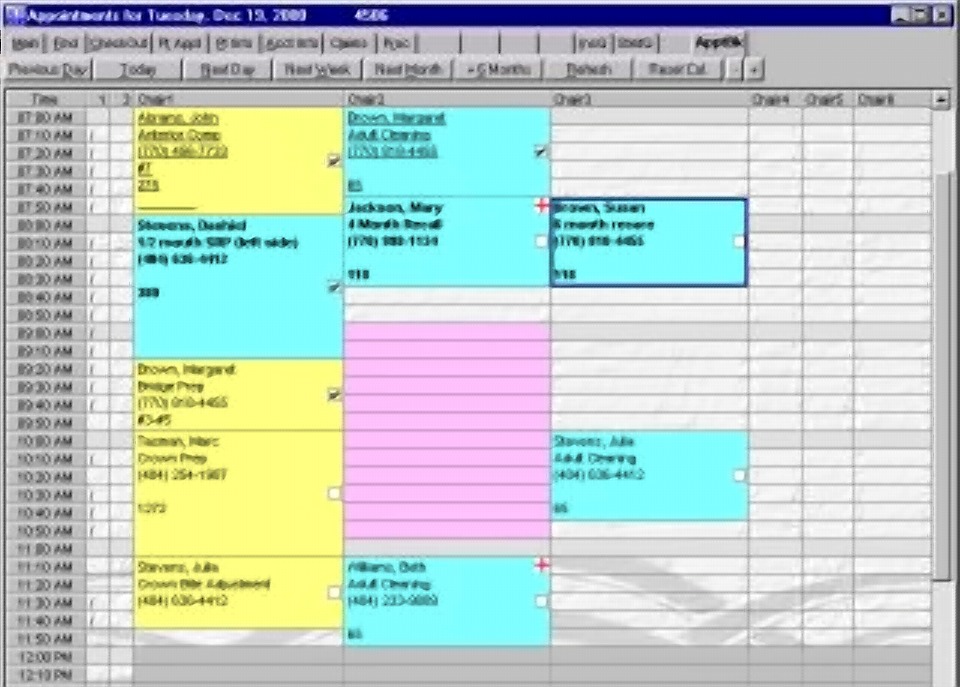
To move an appointment to another chair or
time on the same day, first click on the appointment. This
will place a dark border around the appointment. Then click on the appointment again
and hold the mouse button down. Now drag the mouse to the
new appointment location. Then release the mouse button.
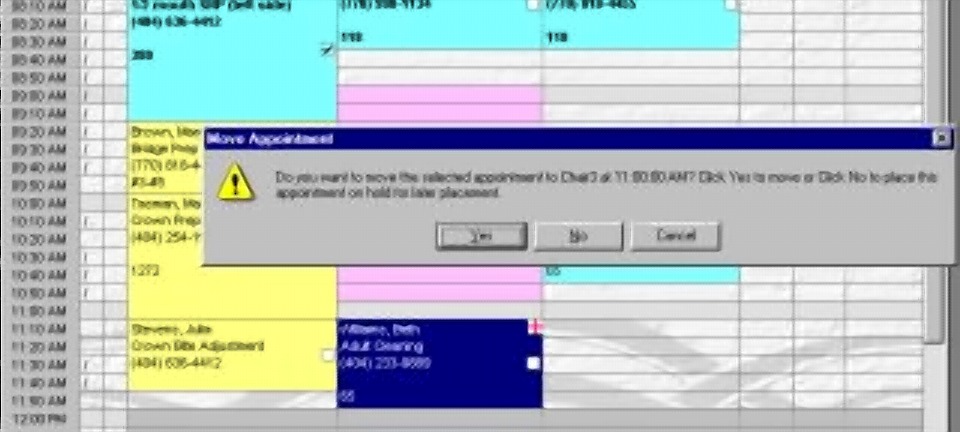
You'll be asked if you want
to move the appointment to the new location.
To move an appointment to another day, do the
same thing only this time drag the appointment to the top line with the chair
description. You'll be asked if you want to place this appointment on
immediate hold. Answer yes to this question. Move to the date of the
new appointment. Click on the chair and time to create a make appointment
button. Then click on the make appointment button. You'll be asked
if you want to place the appointment on immediate hold in the new
location. Answer yes to this question.
Today's Appointment Indicators
When the appointment book is opened on the
current date,
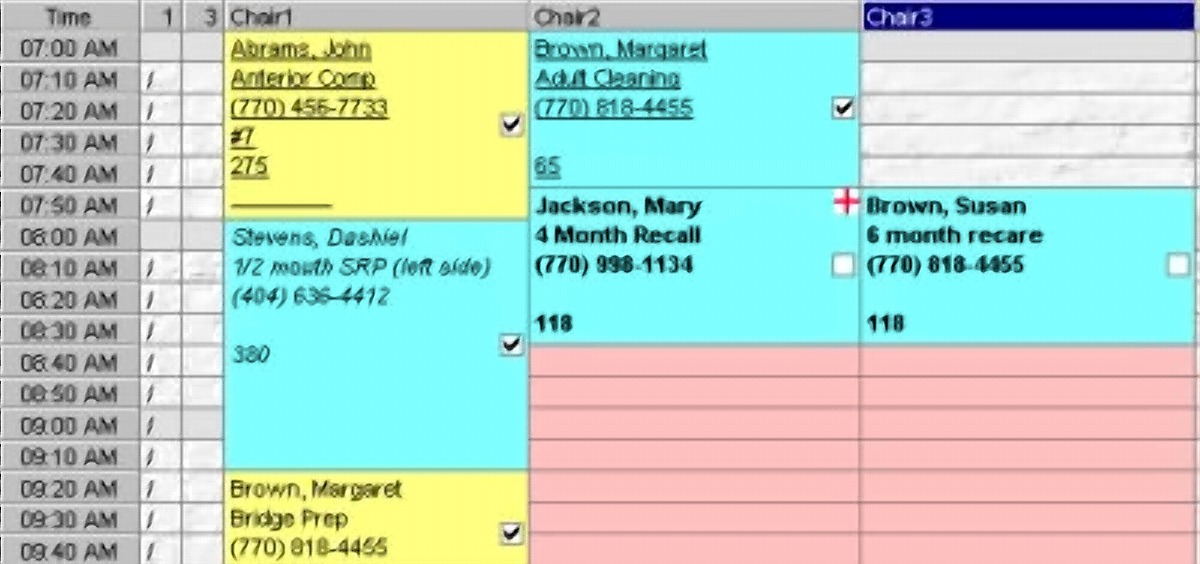
you may see that the
appointments at the top of the window are shown in italics. That is
because the current time is later than the appointment time for these
appointments. The computer thinks these patients are overdue.
If you click on the
patient's name with the right mouse button, the appointment will be shown in a
bold font. You have just told the computer that the patient has arrived
and is in the practice.
Now anyone can view
the appointment book from any computer in the practice and see which patient has
arrived. If we click on appointment shown in a bold font with the right
mouse button again, the bold font will be removed and replaced with an
underlined font. This indicates this patient has checked out and left the
practice.
This feature allows the appointment
book to be an excellent communication tool.
Week At A Glance
We can also show a week at a glance by
selecting that option under the appointment book menu.
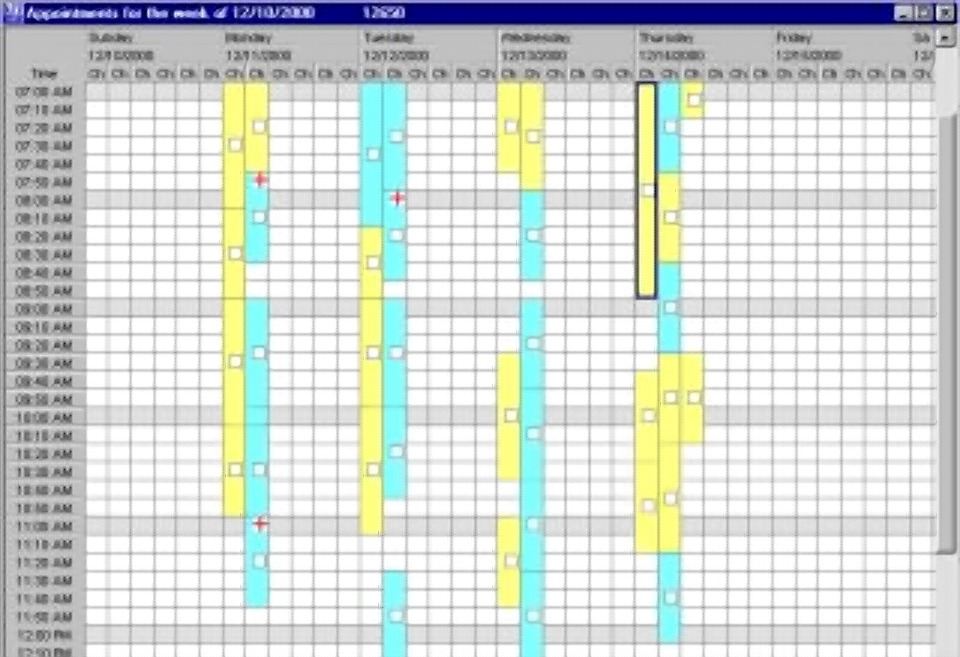
Routing Slips
We can print routing slips for all patients
on a given day by selecting the routing slip option under the appointment of
menu.